
Huge purple frame surrounds the flat screen TV

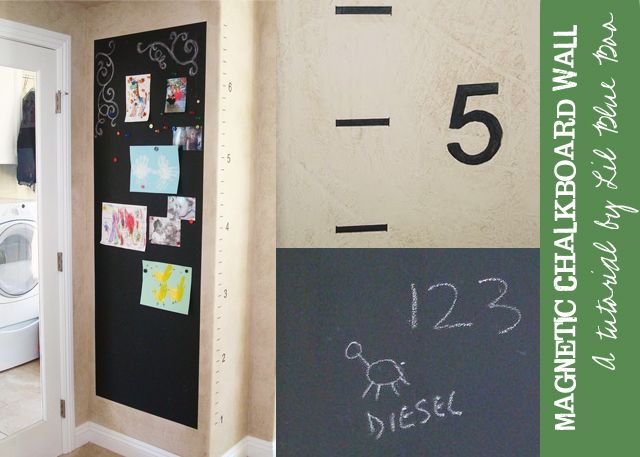
Chalkboard shaped like a butterfly
(see my tutorials on how to make your own template and chalkboard)

"Pixie dust" all over the room is glow-in-the-dark!

Huge flowers and vines to make the girls feel like they are tiny like Tinkerbell

Vines and butterflies peek through to the bottom bunk
Update:
I've had several emails asking what the paint colors were for my fairy forest mural, so here they are:

Images from Disney
For the pixie dust, I also used Rustoleum Glow-in-the-dark paint.
The Disney website has some cute templates you can download here.
The Disney website has some cute templates you can download here.
You can download the TV frame here.
For the chalkboard, you can find the materials used here:
See my tutorial here on making a large custom template here:
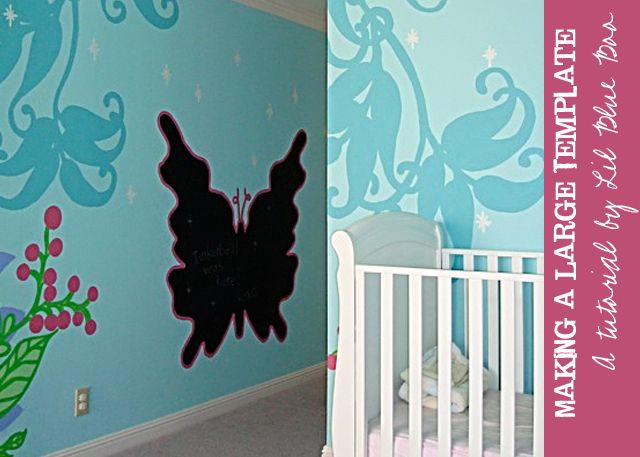
See my tutorial here on making a large custom template here:
Wow! I love it!
ReplyDeleteOh my gosh!!!! Ashley this is amazing. You did a FABULOUS job! Those are 3 lucky little girls.
ReplyDeleteLOVE IT!
ReplyDeleteLove it. I adore my kids but darn it..I have boys. I'm having fairy envy!!!
ReplyDeleteIt looks so darn cute! Those are 3 lucky girls! Wish i had something like this when i was a child!You have so much talent!
ReplyDeleteHave a Happy Friday!
(coming here from SITS)
That is so beautiful. I wish I had that kind of talent. Hi from the SITStahood.
ReplyDeleteThat came out awesome.
ReplyDeleteFollowing your blog!
ReplyDeleteLate but never forgotten! Have a great weekend my fellow sitstahs!
Camp Sock Monkey
What a fun, beautifully done room! You are a talented one!
ReplyDeleteThank you for stopping by my blog recently and commenting. :)
Hi Ashley,
ReplyDeleteWow! You are amazing. I love the room. Thanks so much for stopping by my blog today. It's so cool meeting other people with similar interests and gifts. I hope you come back. Have a great day:)
Love your blog! You are very talented!
ReplyDeleteoh my gosh, i love this room. how wonderful it would be to wake up to that everyday. so great!
ReplyDeleteVery pretty! I would love to be able to paint like this!
ReplyDeleteDo you have any tips for painting children's murals?
Hi, I have been looking for something like this forever..My daughters LOVE Pixie fairies and I'm doing their room in fairy theme..thanks for the GREAT idea!!
ReplyDeleteCristina..so glad I'm following..YOU HAVE AWESOME IDEAS!!
Wow that's an amazing room.
ReplyDeleteHappy SITS Saturday Sharefest.
Hi Ashley,
ReplyDeleteI just wanted to THANK you so much for inspiring me to make my daughters room into a fairy room..I used your ideas and mixed them with some of mines, I also did my son's room using some of your ideas about uploading a pic into the website that makes huge poster size pics from letter size paper...VERY awesome!! I posted some pics on my blog....Thanks again for sharing.....
xoxoxoxoxoxo
Holy crap. That is thee most amazing, gorgeous room I've ever seen!! Gorgeous!! LOVE IT!! By the way, I'm addicted to your blog. I've had it open for the past 48 hours and I've studies almost every tutorial here. I have big plans. Thank you so much for all the awesome ideas and tutorials so I can be cool just like you!!
ReplyDeleteSo how do you make really big stencils? Did I miss something? I got to this page from a link on your tutorials page! lol...love this rooM!
ReplyDeleteOkay, this is just amazing! Come out to Indy and paint for me!! :)
ReplyDeleteOh goodness, this is incredible! I'll have to try something similar in my little girl's Tinkerbell room.
ReplyDeleteAbsolutely LOVE the room! It will make any little girl feel special :)
ReplyDeleteI also have a trick for large templates.
-You just need to save the image you want, find or borrow a projector, and hook it up to a laptop computer.
-Then you just project the image onto the wall, and adjust the projector for the desired size.
-Then outline the image onto the wall and paint away.