
I did two projects for this week's S.Y.T.Y.C. contest entry and had my friends vote on which I should submit.....this was the winner, but I chose the other project instead.....hope I'm not sorry in a week! I'm completely in "gift" mode right now.....and I think this belt would make a great gift for a little girl or boy depending on which kind of plastic you used. It is a very sturdy, functional belt. It would even make a cute dog collar!
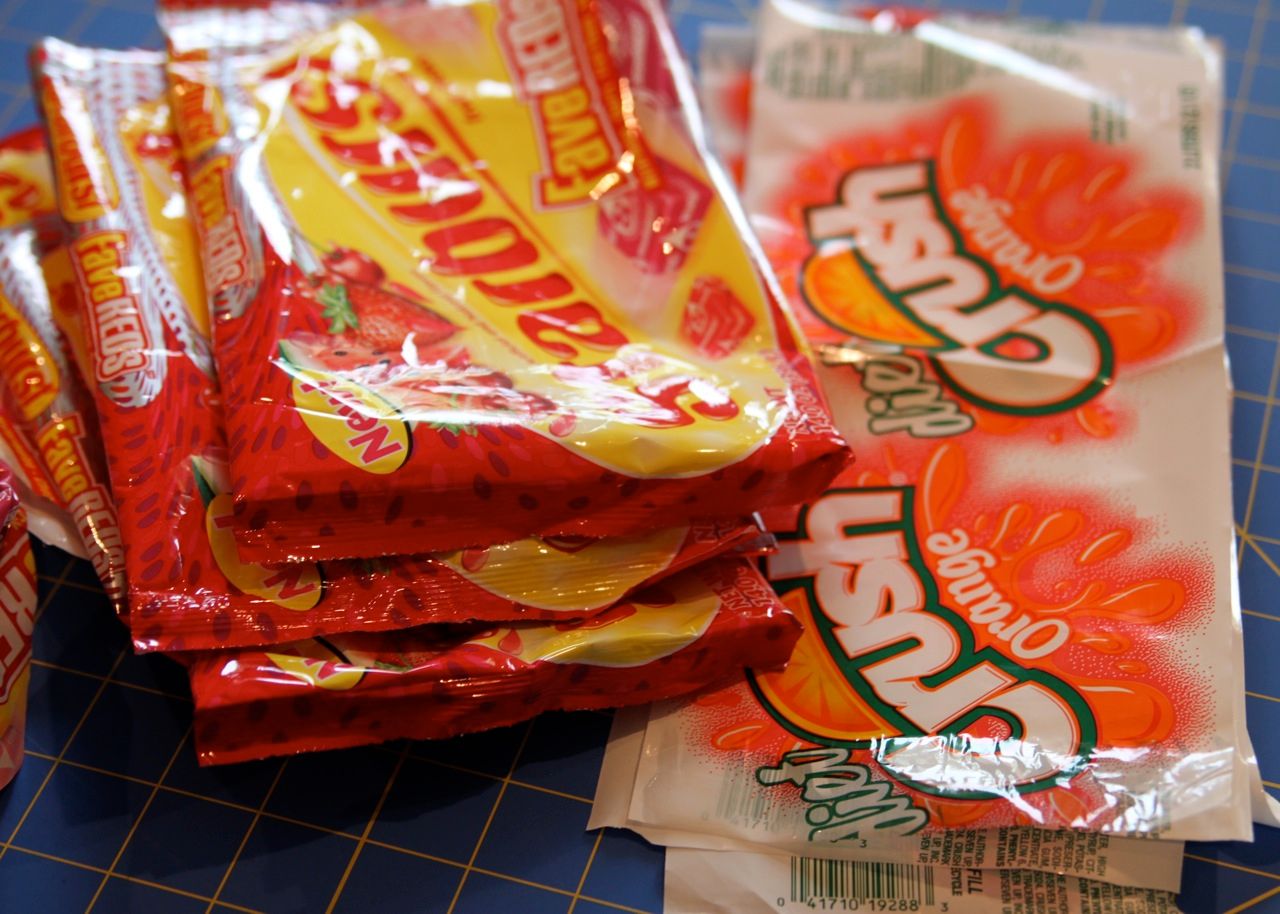
I seriously had to eat 4,000 Starbursts and drink 5 2-liter bottles of Diet Orange Crush for this project...but happy to do it!
Step 1: Collect different types of plastic....candy packages, soda labels, etc. You will also need several plain white plastic grocery bags (or partially white).
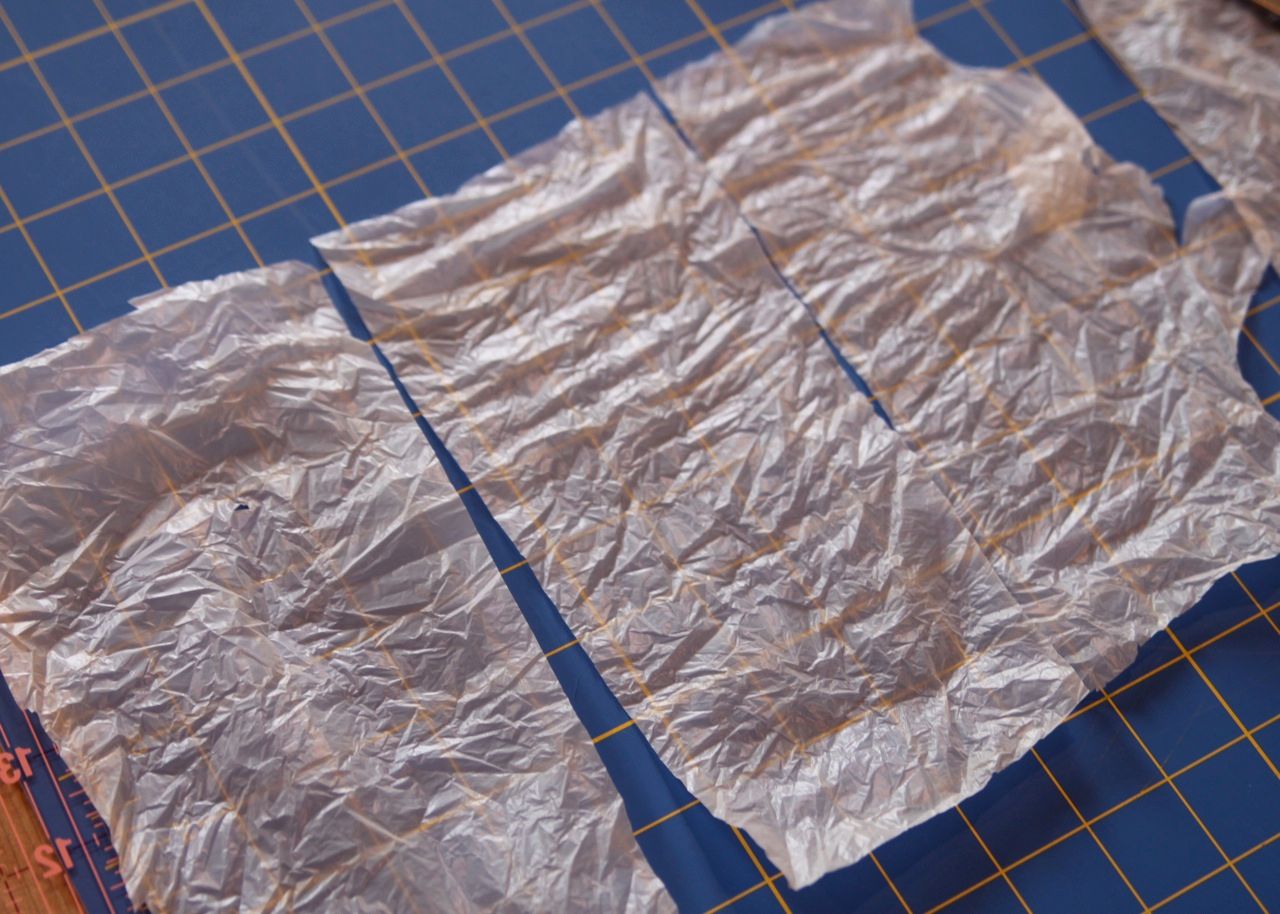
Step 2: Cut the plastic grocery bags into 4" strips. These are going to form a plastic base for your belt.
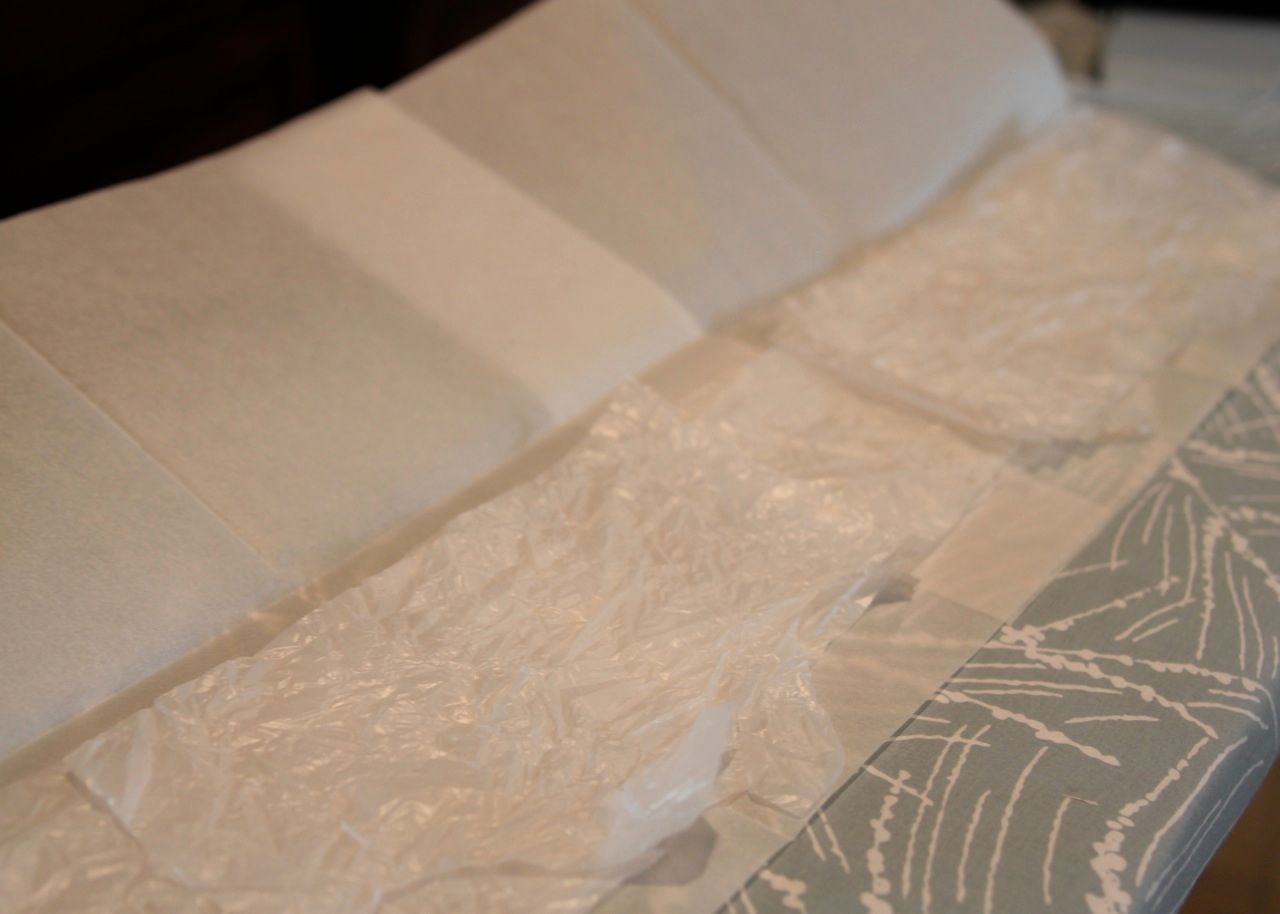
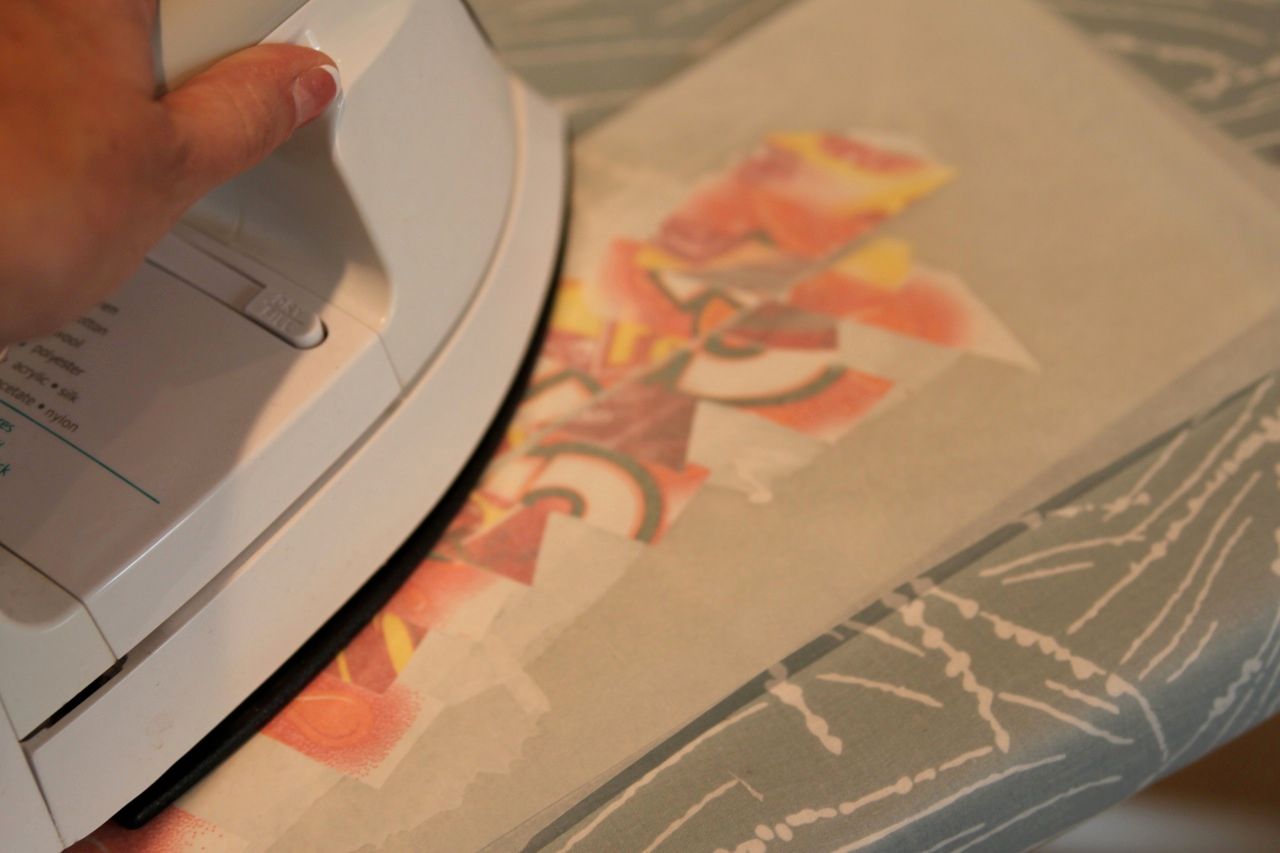
Step 3: Create a "sleeve" using parchment paper. (You can also use freezer paper but see directions here) Lay the grocery bag strips on one side of the parchment paper, several strips thick, overlapping them slightly.
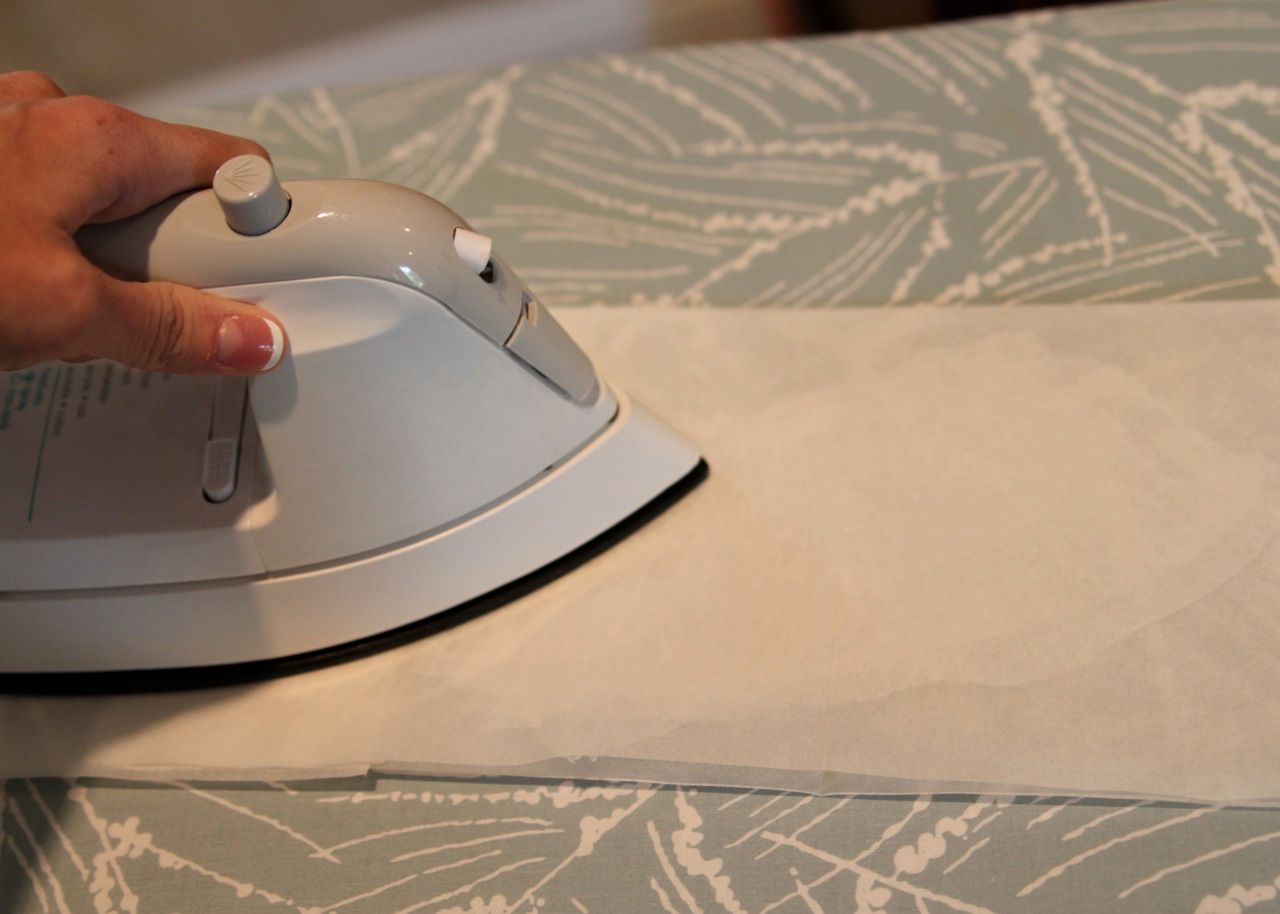
Step 4: Close the sleeve carefully. Iron (no steam, medium setting) along the freezer paper sleeve to melt the bags together. You'll have to do this for about a minute.... keeping the iron moving slowly at all times. Let your sleeve cool. This is important because plastic tends to curl when it cools. The white plastic grocery bags tend to shrink considerably so check for "voids" or holes..this means your heat setting is too high.
Step 5: Cut your decorative plastic (i.e. the candy packages or soda labels etc) into 1" x 4" strips.

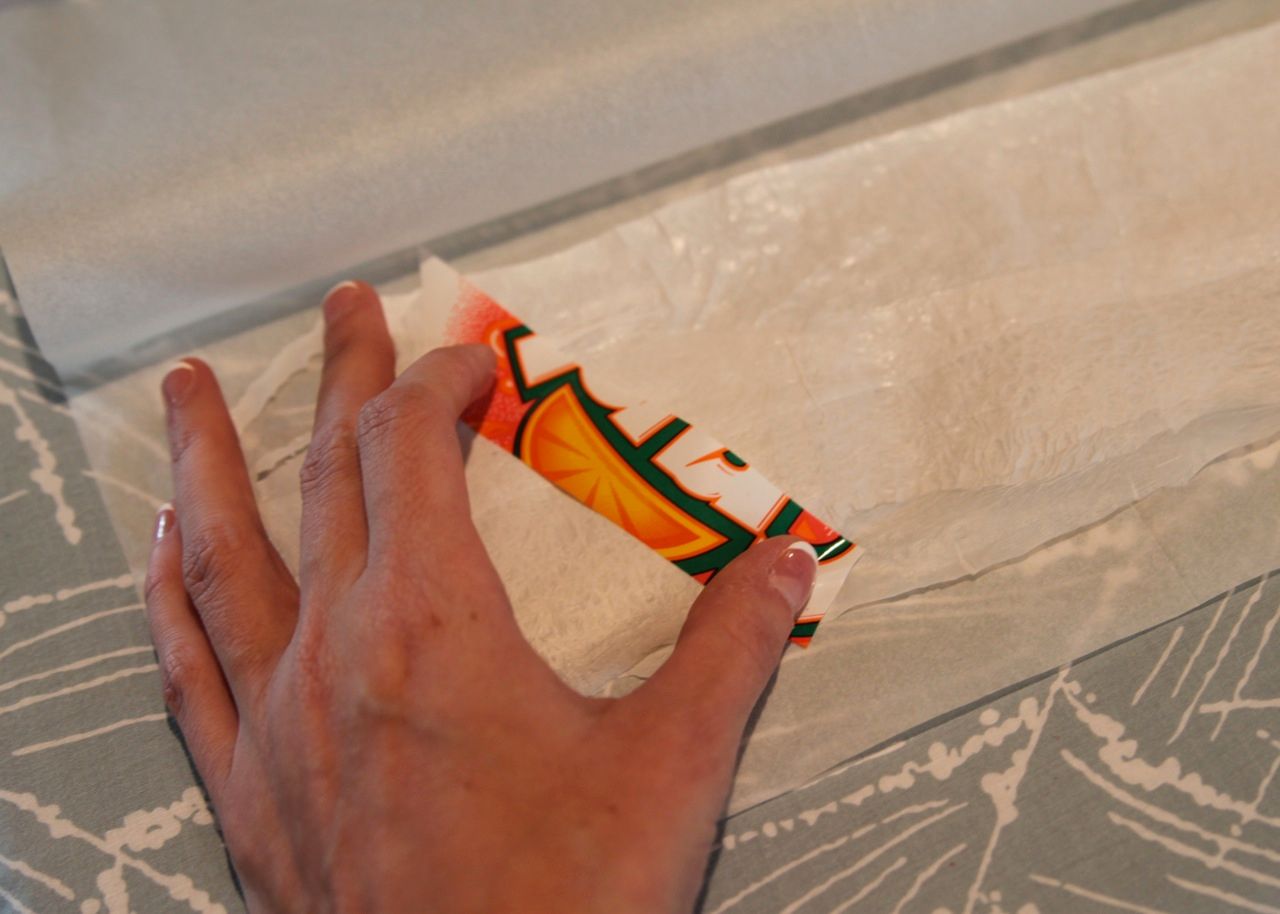
Step 6: Lay your first strip at an angle, close the sleeve and iron to fuse it to your bottom white layer......
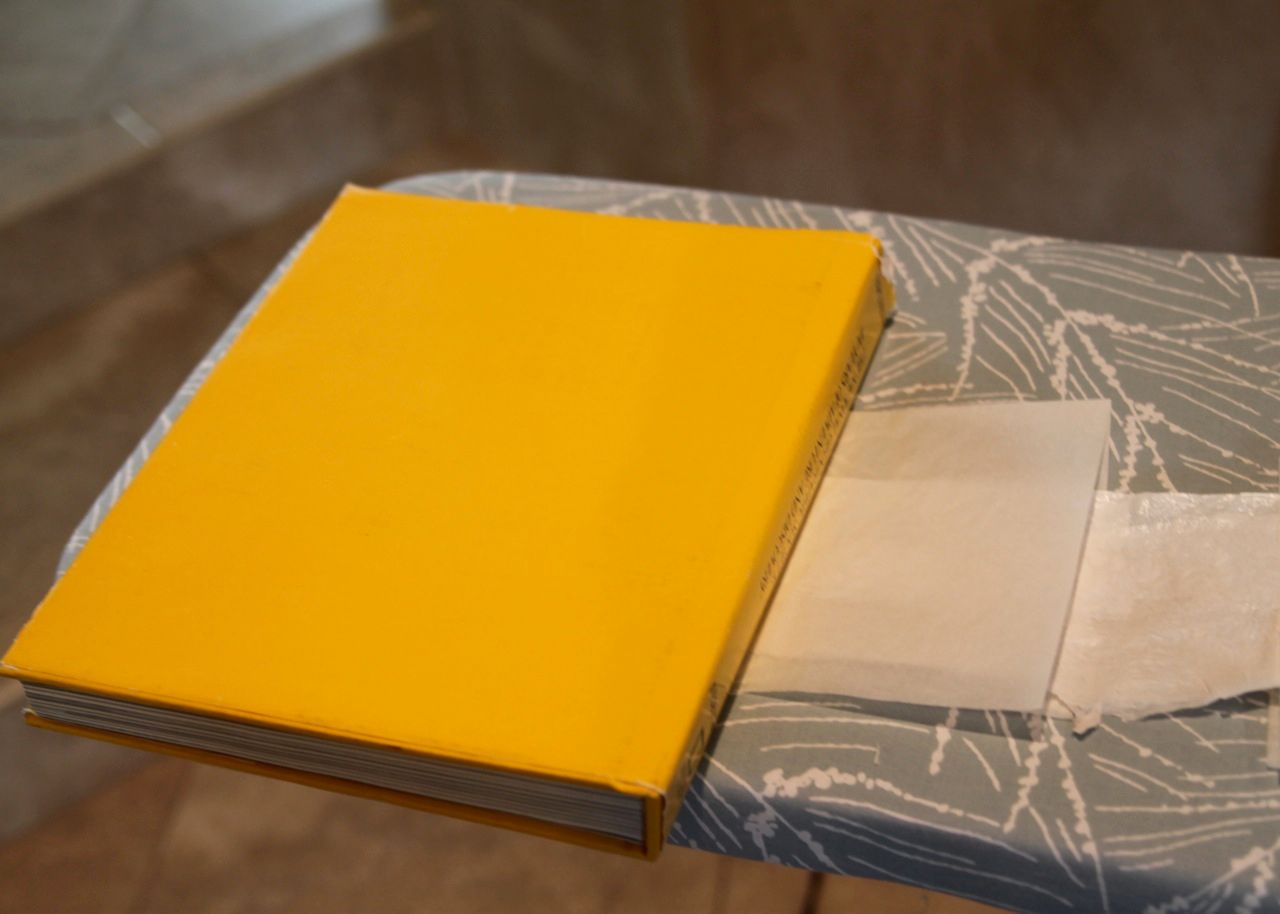
......after removing the iron I placed a heavy coffee table book on top of the sleeve to make sure the plastic cooled flat.
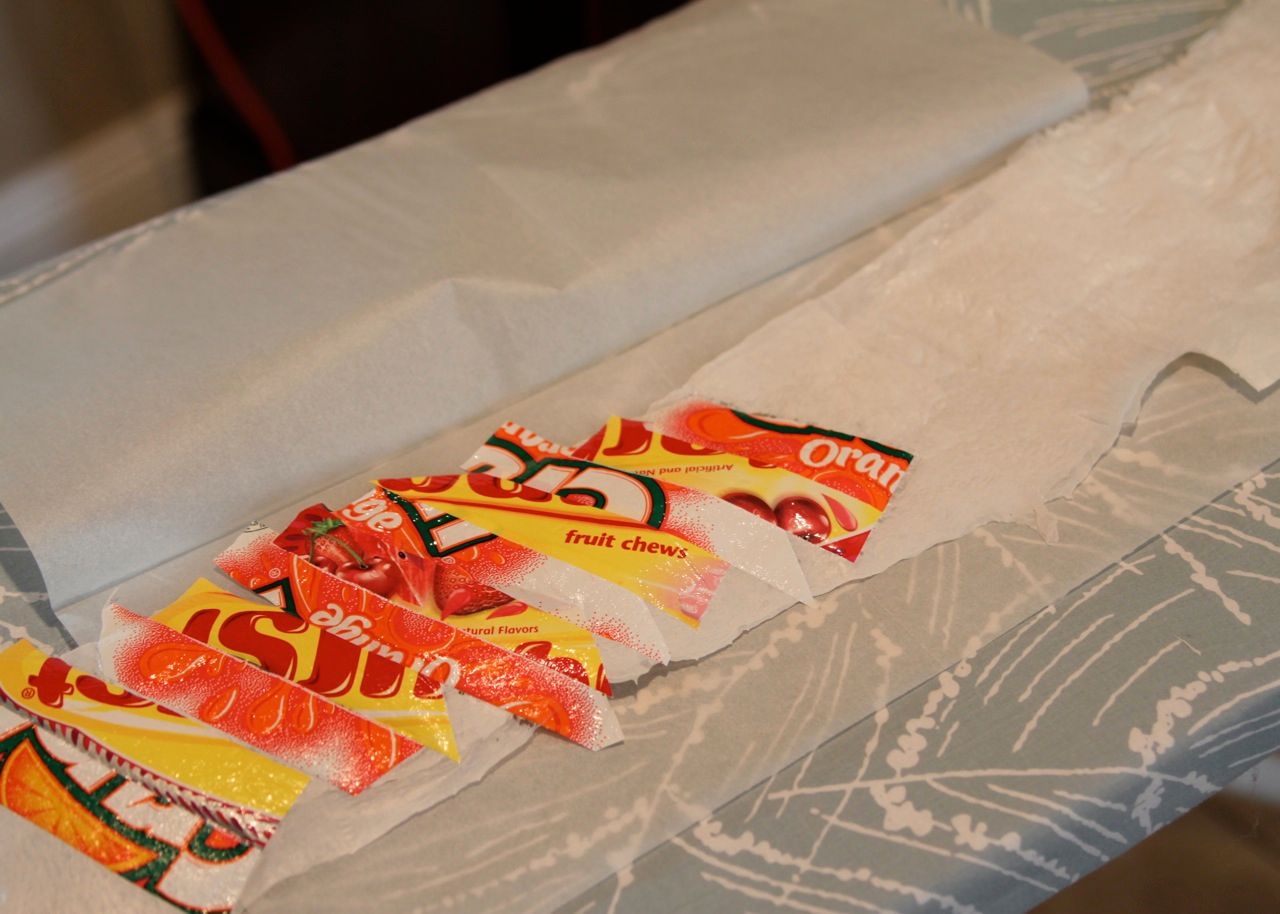
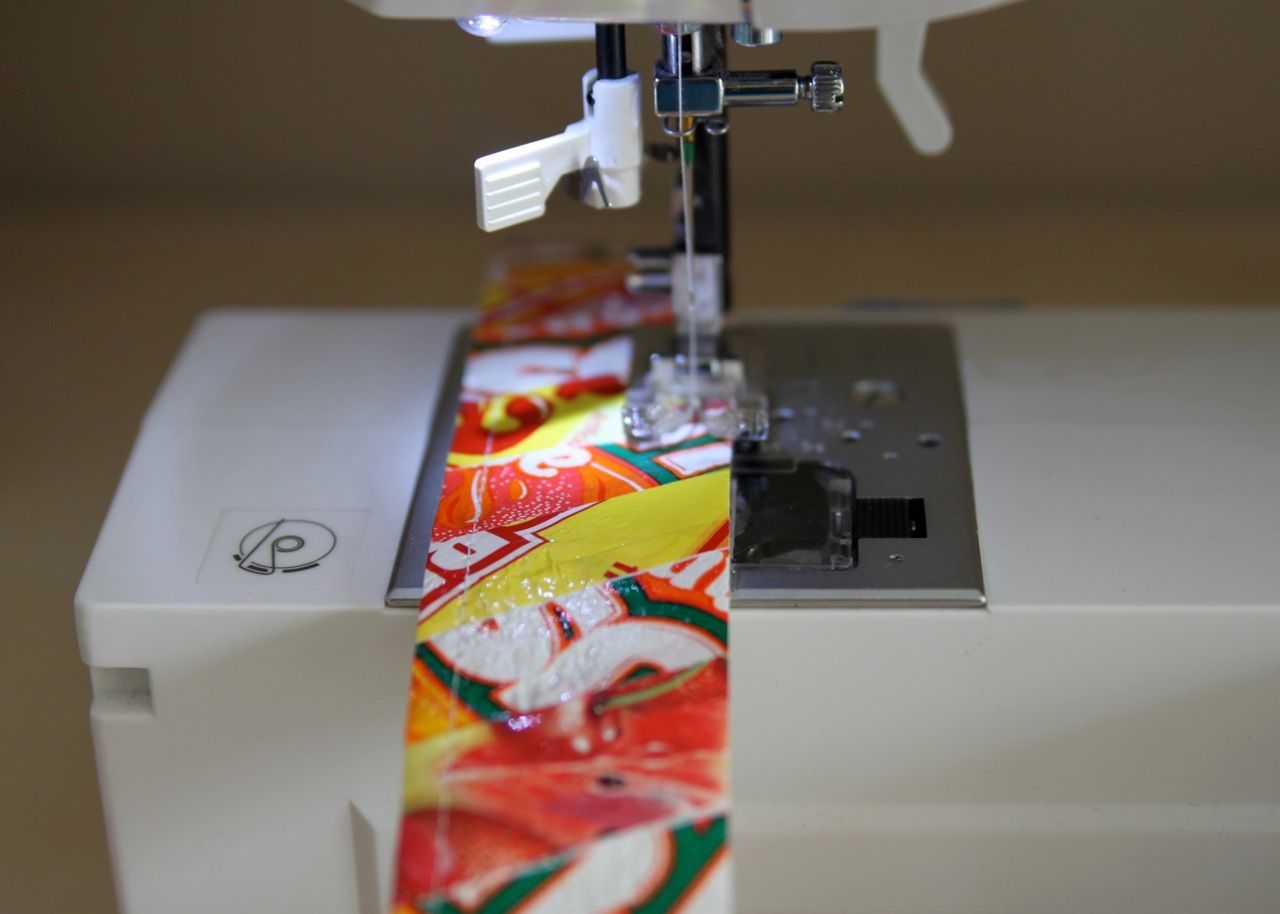
Step 7: Repeat this process for each 1" plastic strip, alternating designs as you go and overlapping each piece over the previous by 1/8" to account for shrinking. REpeat until the entire length of plastic is covered.
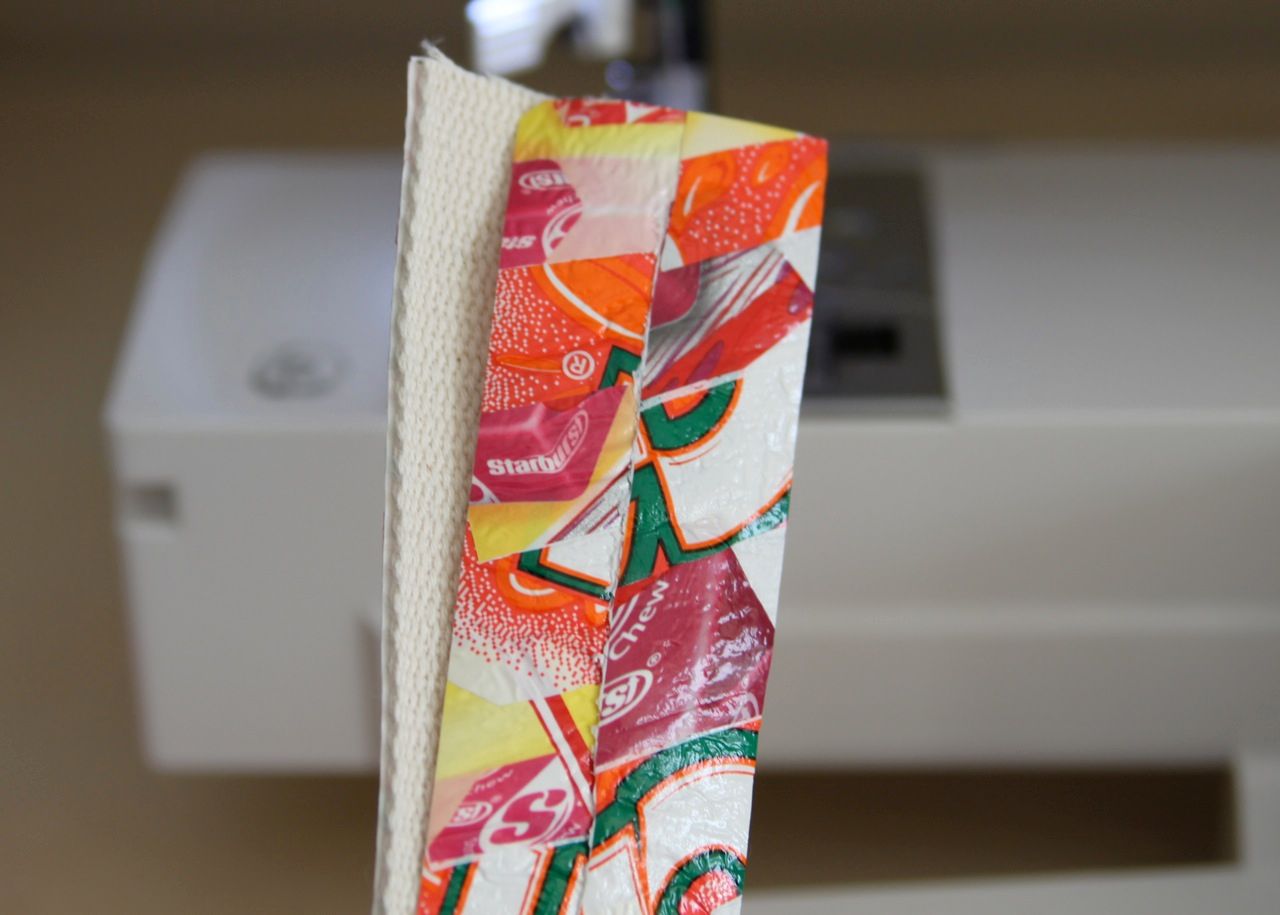
Step 8: Cut a piece of cotton canvas webbing the length of your belt. Trim your fused plastic piece to be the same width as the webbing.
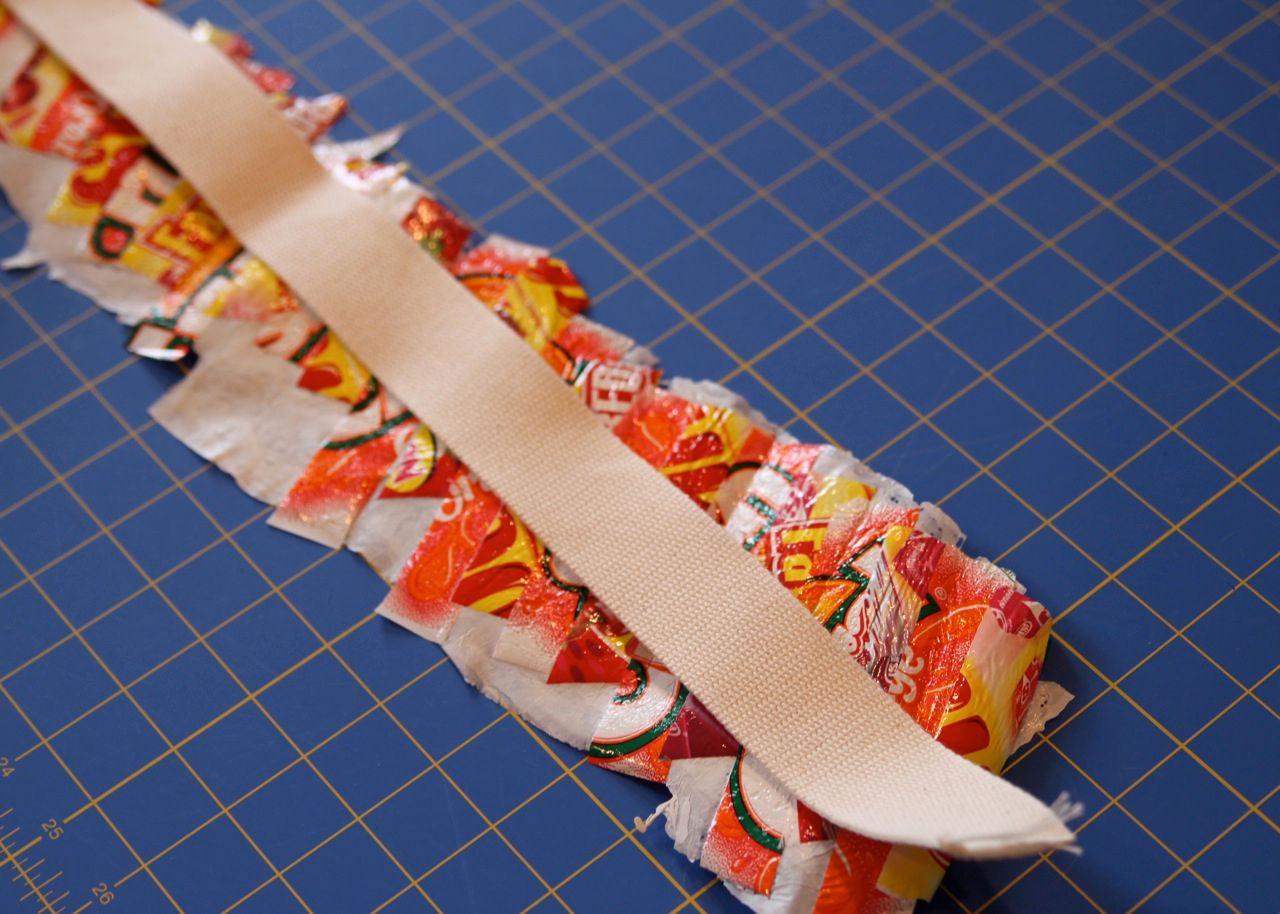
Step 9: Sew the fused plastic piece to the webbing 1/8" from the edge all the way around.
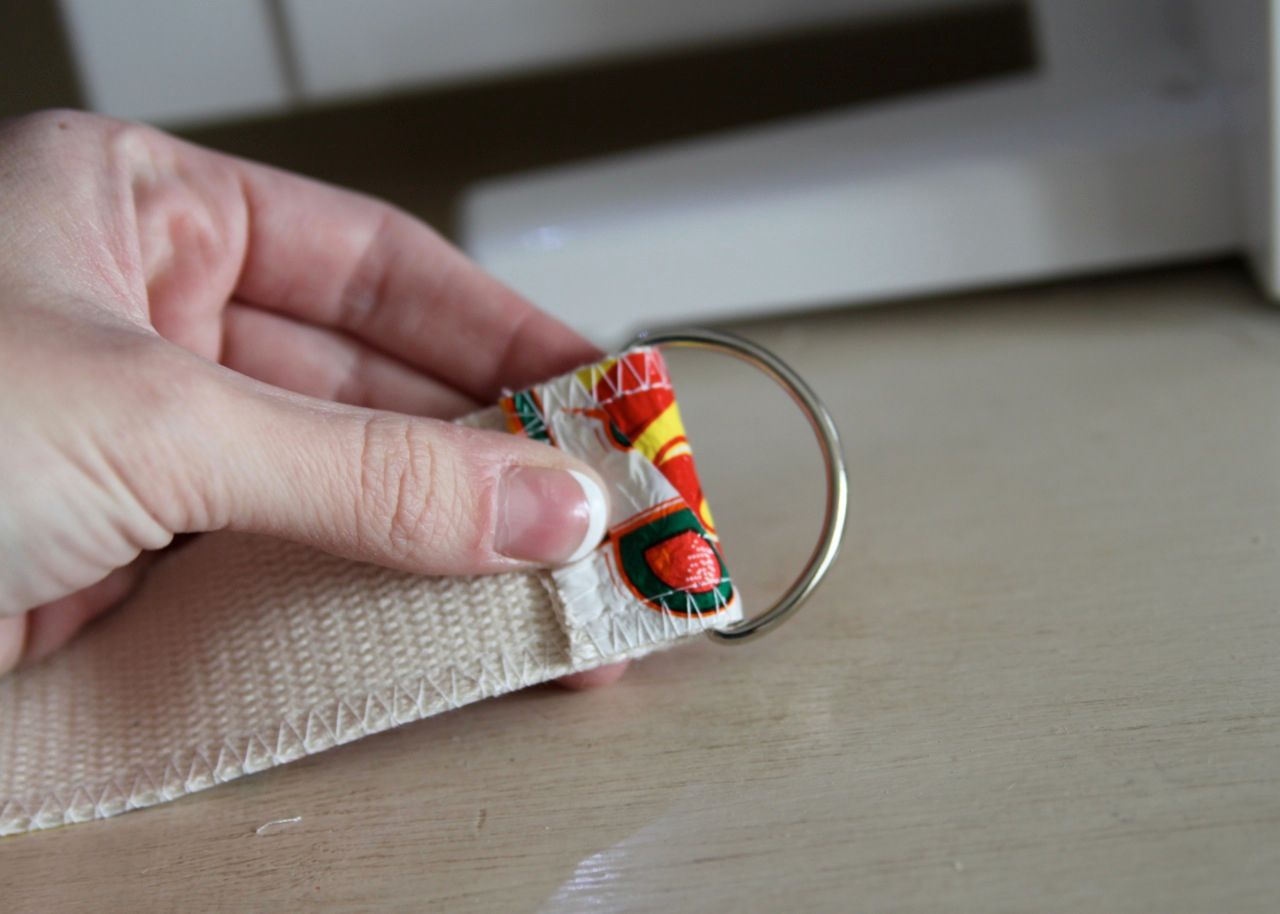
Optional Step: Since my belt used "D" rings, the webbing would show when the belt was fastened. I took two of the trim scraps and fused them together to create a piece large enough.......
......to sew to the back of the belt on the end that threads through the "D" rings.
Step 10: Zigzag all of the belt edges.Place your D rings on one end of the belt and fold your belt end back. Sew the fold closed. You may have to use a zipper foot here if your D rings get in the way (I had enough room and was able to use the regular foot).
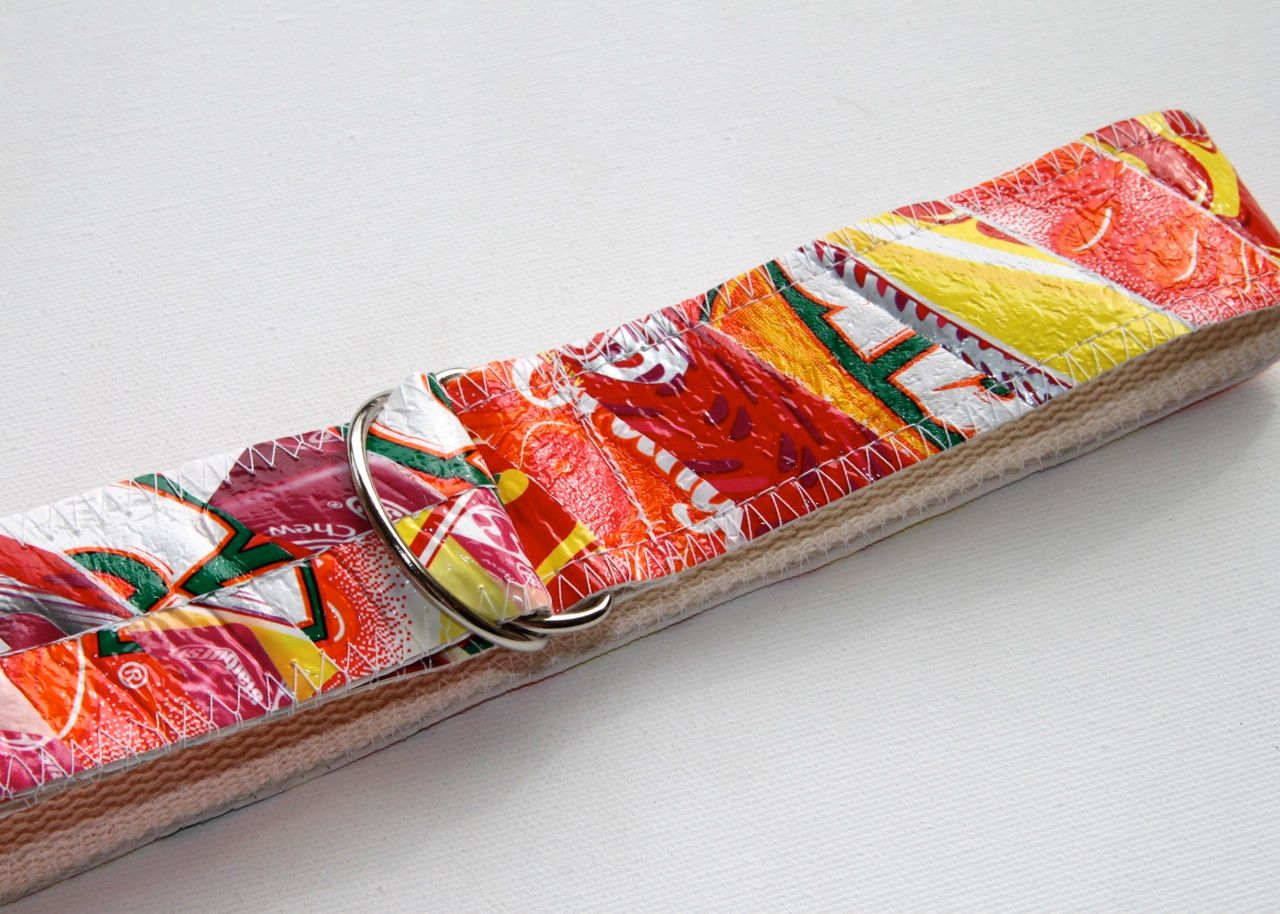
Finished belt! So cute and funky!

fabulous!!!! ;)
ReplyDeleteVery cute!
ReplyDeleteI think I could make the sacrifice and eat 4,000 Starburst...
That is INSANE!!! I don't know what would ever spur that idea in your head, but I'm glad God gave that gene to somebody! How cool :)
ReplyDeleteI bet it is uber cute like everything you make, but for a little while now, I can't see ANY of your photos! I could just WEEP over that.
ReplyDeleteSo FUN...and fruity! :D
ReplyDeleteugh, i tried this a year or so ago and was an utter failure. I think your trick with laying the book over the plastic while it cools is genius and probably would've saved me. I'm inspired to try again! Thanks!
ReplyDeleteWho even thinks of this?? So adorable.
ReplyDeleteSo cool! I've experimented with fused plastic stuff, but need to do something wearable with it. A belt is a perfectly sized project.
ReplyDeleteAnd oh, how we suffer for our art! Starburst, Orange Crush, no problem.
I love this project! But I gotta ask, how bad is the smell with melting plastic? I'm thinking the 'off-gassing' would be awful, and I'm thinking a bottle of Advil would have to be right next to my ironing board! Would love to hear about those details too!! CHEERS!
ReplyDeleteThis is so cute!!! I posted a link to your tutorial on Craft Gossip Sewing:
ReplyDeletehttp://sewing.craftgossip.com/tutorial-d-ring-belt-from-fused-plastic-bags/2009/11/13/
--Anne
Love it! I gotta try it! Got my starburst and I'm chewing!!
ReplyDeleteThat's amazing - great job!!
ReplyDeleteLove IT!!!
ReplyDeleteSo cute! Just found your blog and I'm almost giddy! It's full of wonderful treats for the eye =)
ReplyDeleteJen