I made the wallets using leftover ribbon scraps that are too small to use for anything else (except maybe for a scrap ribbon camera strap or a scrap ribbon belt) and a basic applique technique.
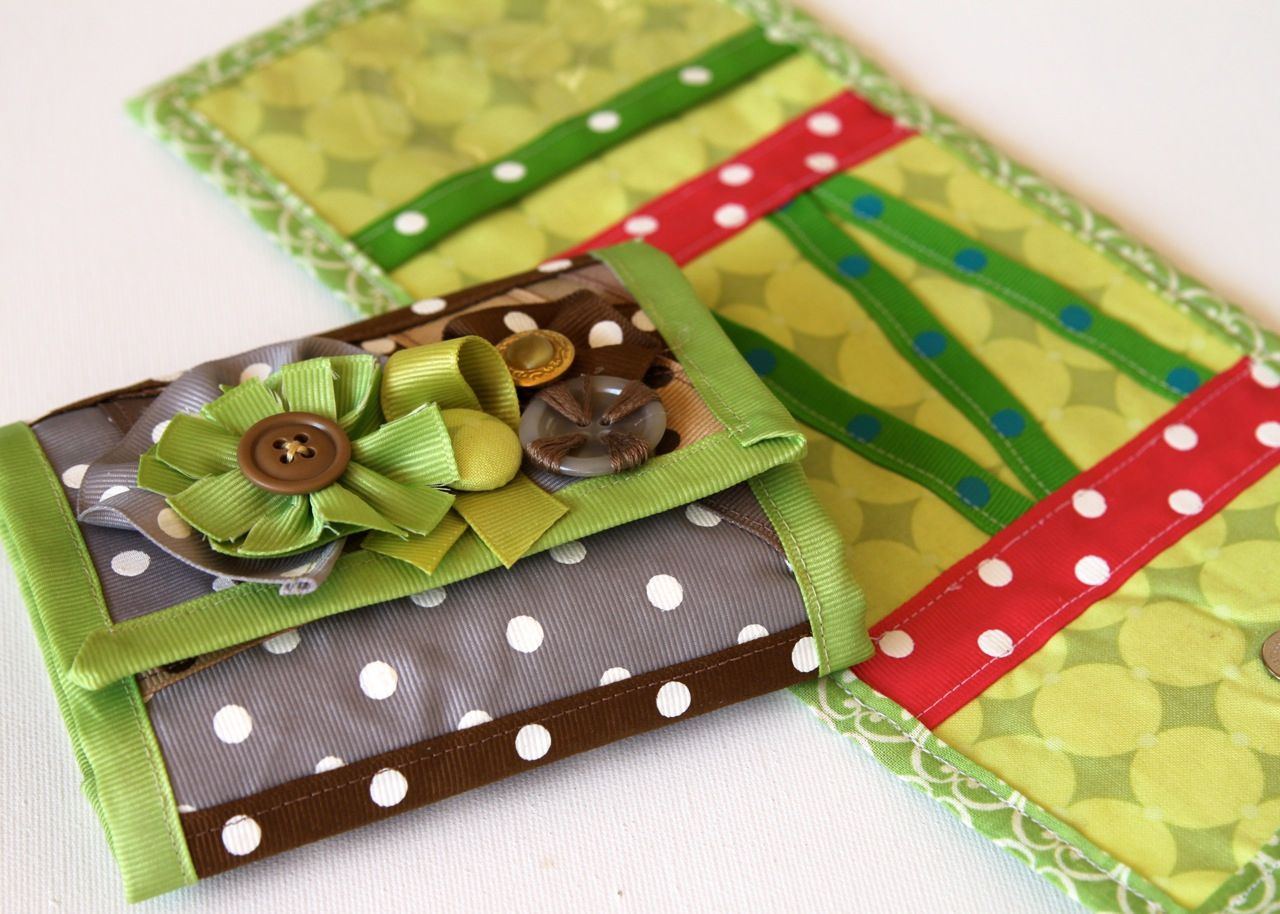
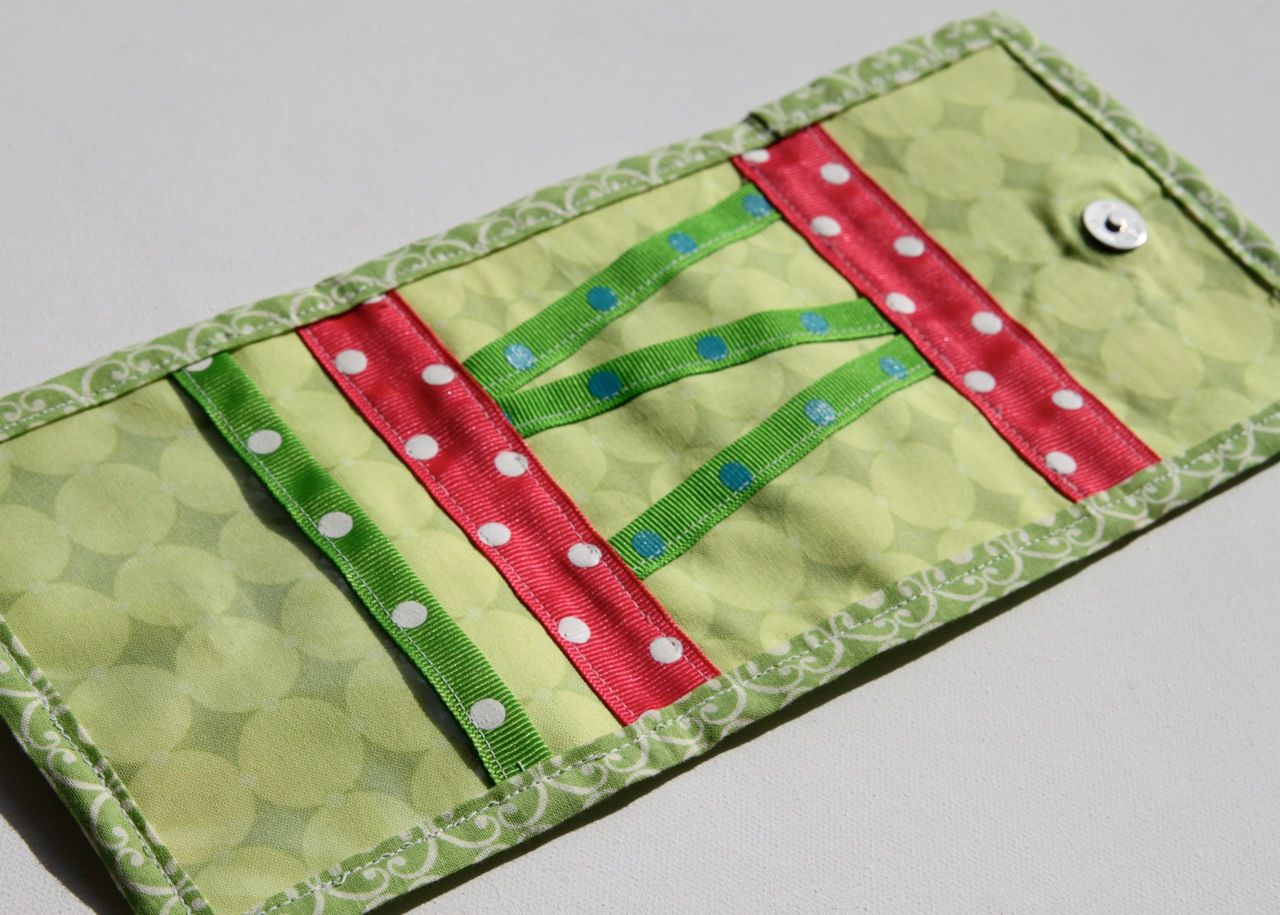
The wallets have a clear vinyl ID/photo wallet and three pockets for cash and credit cards.
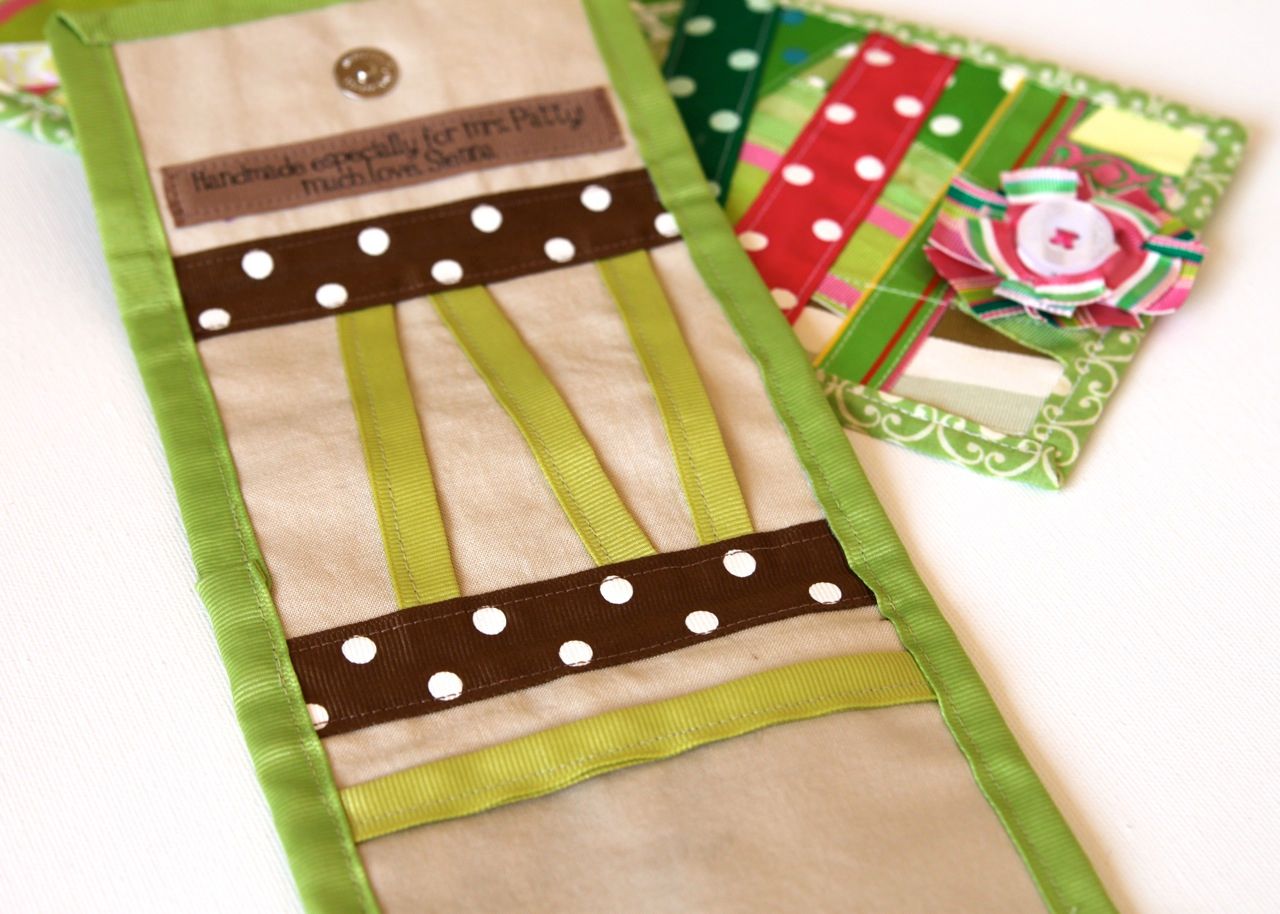
They are so interesting when folded out!

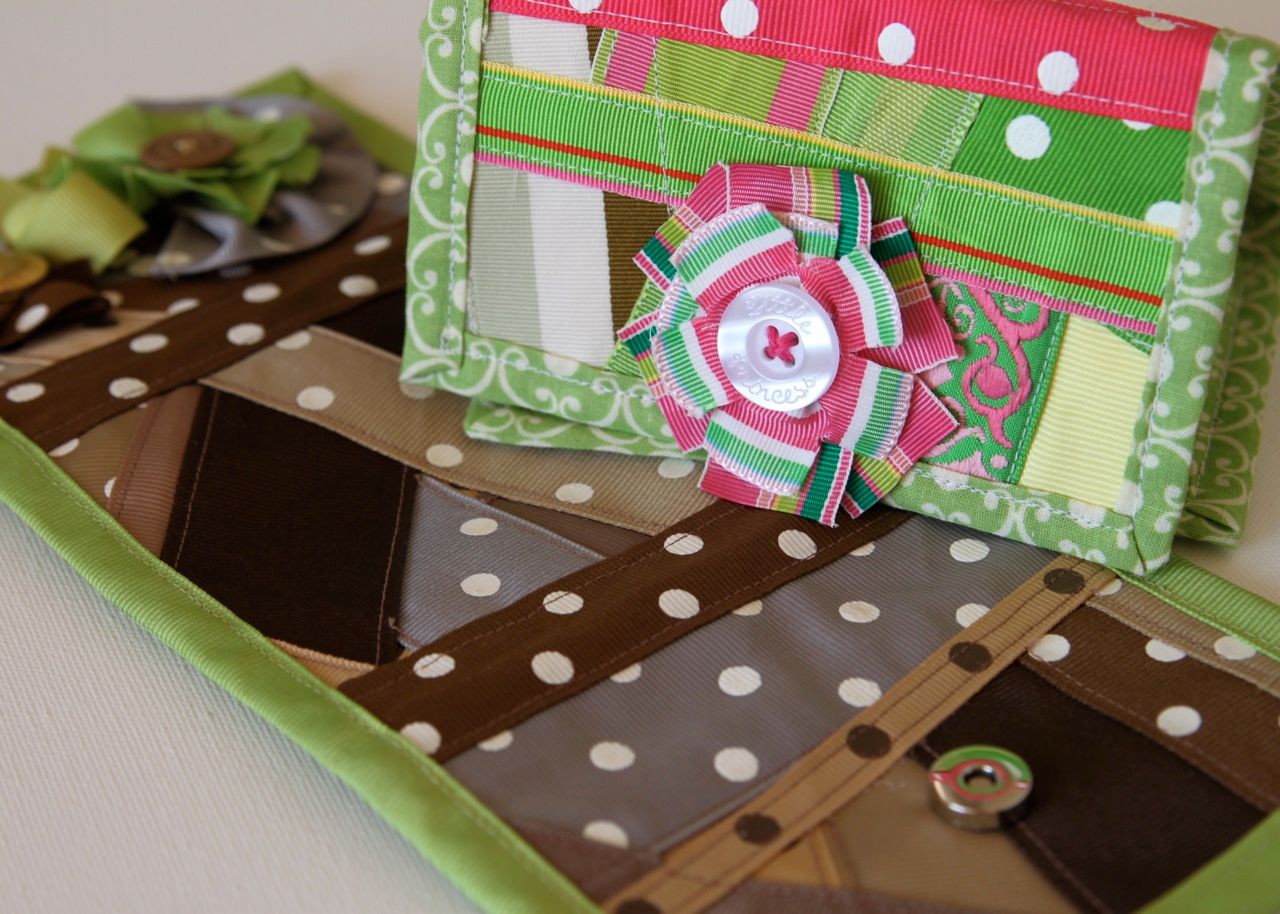
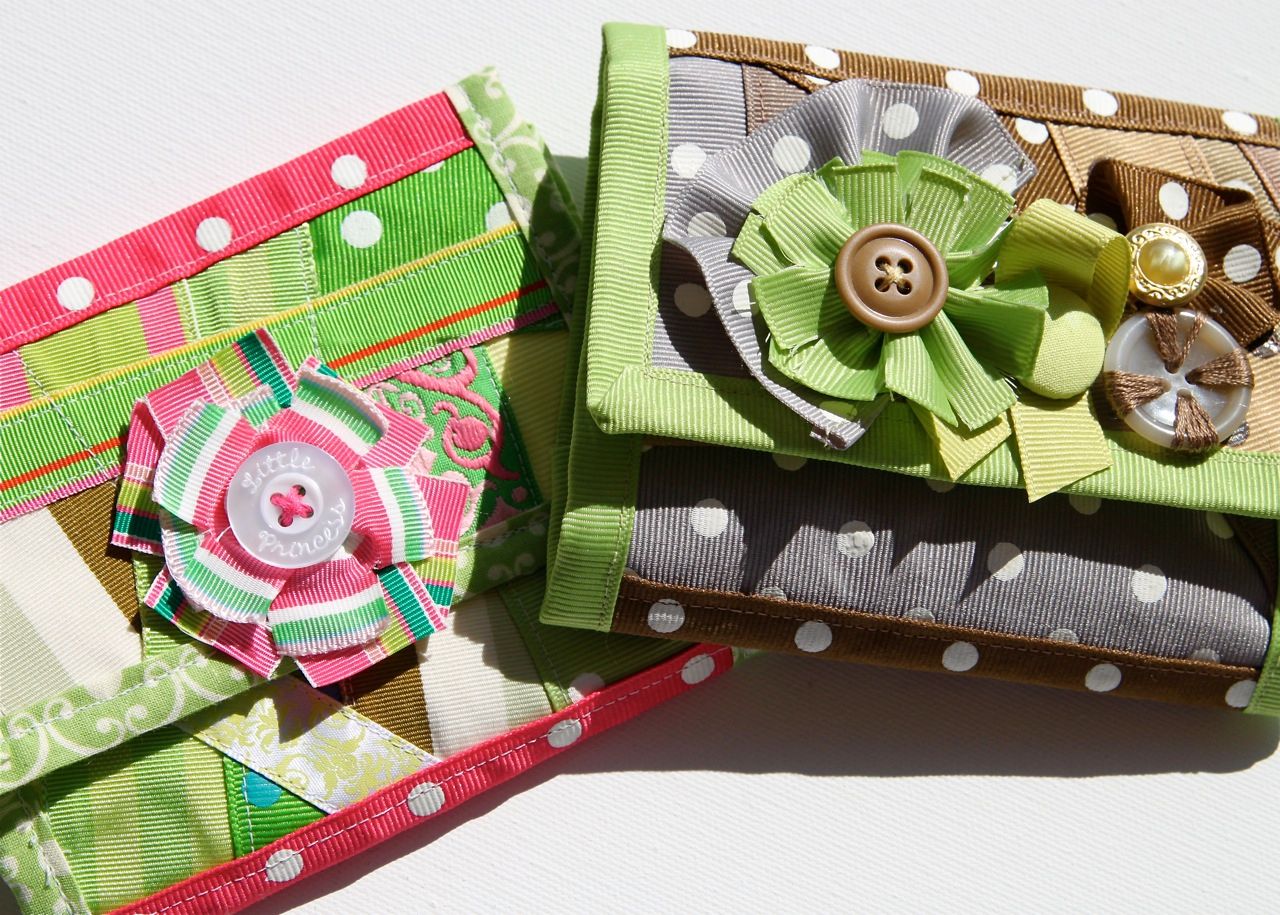
I made one of the wallets for Sienna's teacher and one for Sienna (with the little princess button/ribbon flower on the front). She keeps her little pet shop puppies in it now....she doesn't have any money....not even sure if she knows what money is yet.
Materials needed:
Scrap ribbon
Wonder Under or fusible web (I used the kind without backing)
Muslin fabric for the base of the outside
Fabric for the inside lining
Magnetic clasp
Optional: clear vinyl PVC (for the ID pocket)
Note: All the dimensions in this tutorial are for the wallet size. You will have to adjust them for the clutch size.
Step 1: Cut a 5" x 11" piece of muslin and a 5" x 11" piece of Wonder Under.
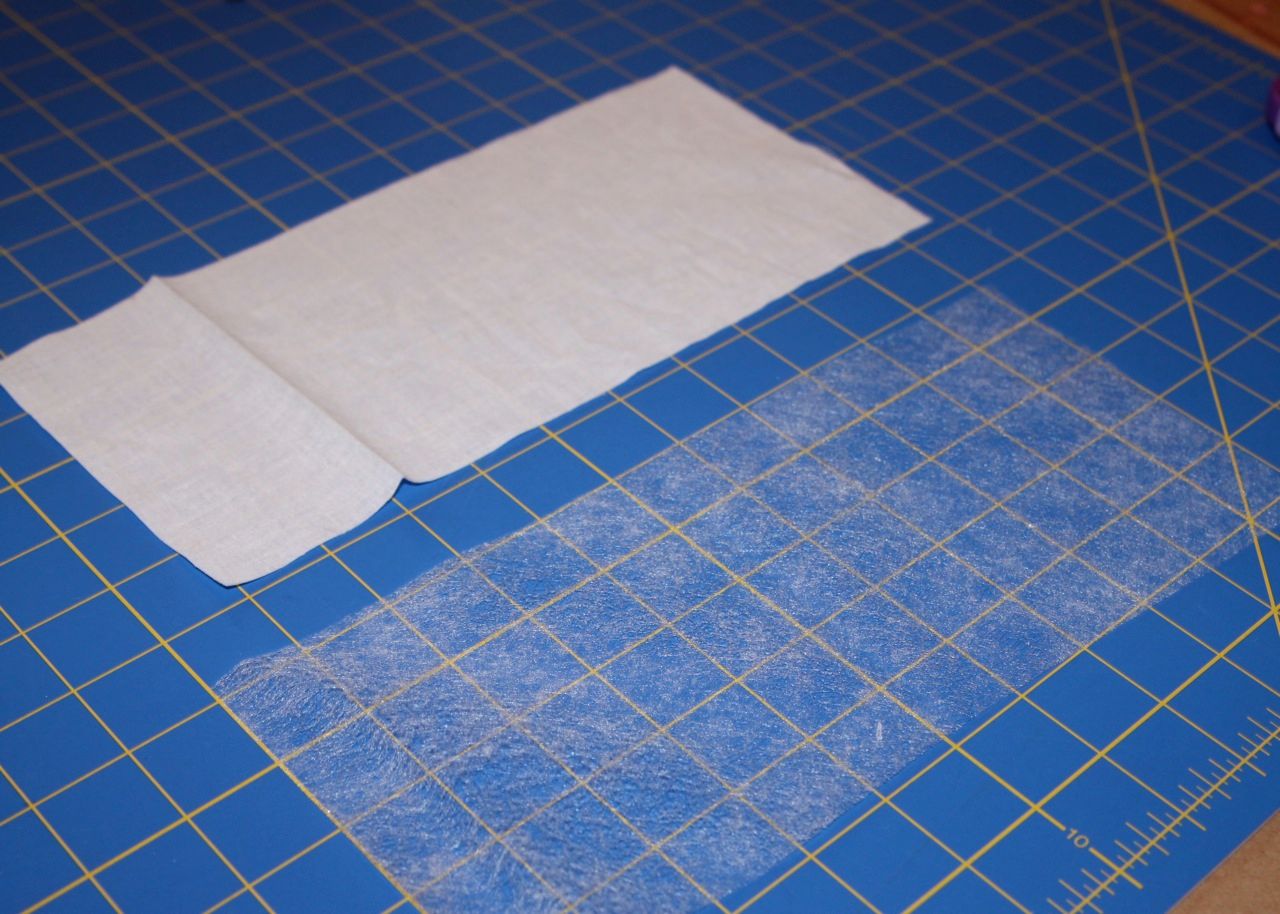
Step 2: Place the Wonder Under on top of the muslin and begin layering your scrap ribbon pieces on top until the Wonder Under is completely covered. Try to overlap all ends of the ribbon with other pieces of ribbon. As you get sections completed, place a piece of parchment paper over the ribbons (use parchment paper if there is printed design on the ribbons) and apply heat with an iron to fuse the Wonder Under. You may need to cut several small pieces of the Wonder Under and place it under pieces of ribbon that do not come into contact with the fusible web.

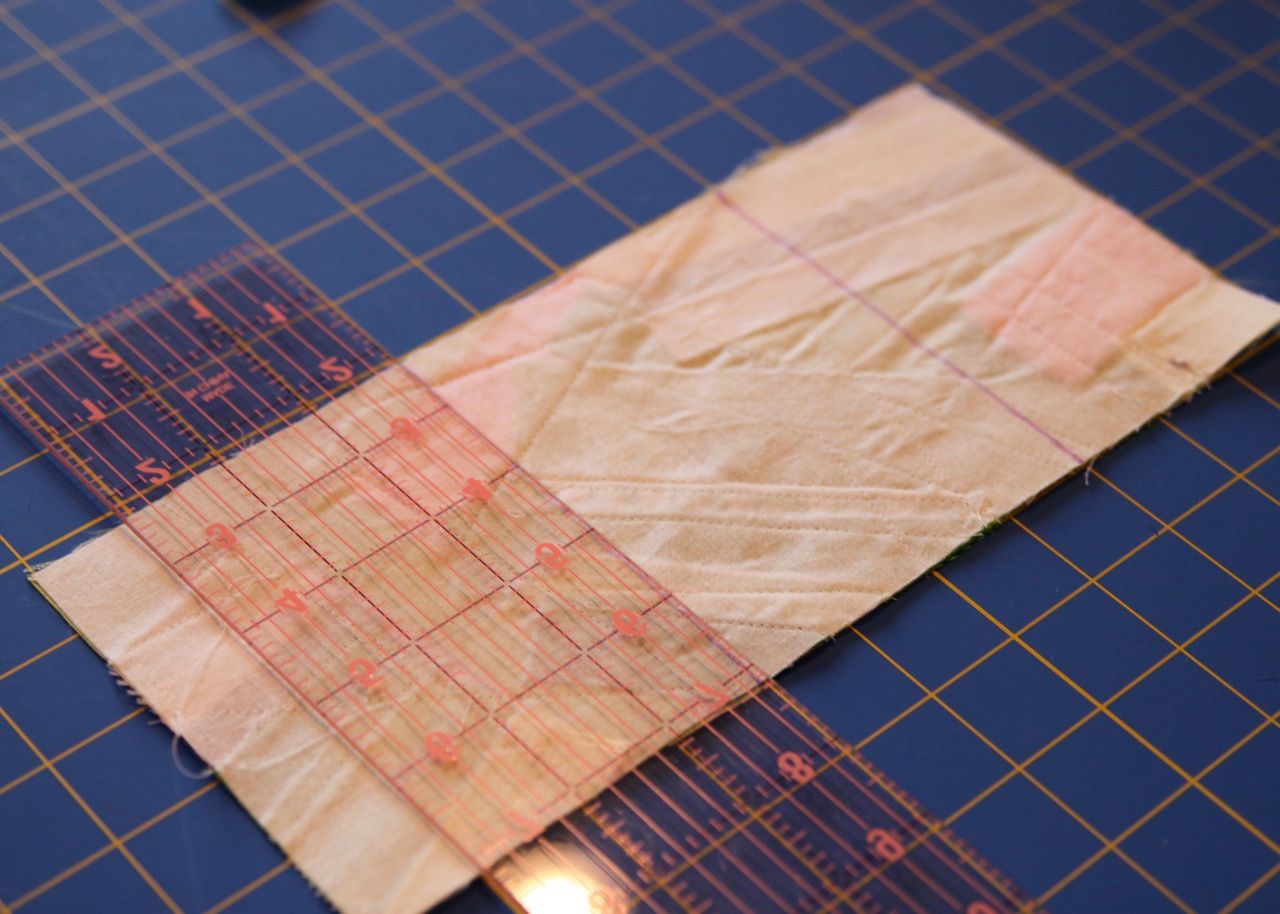
Step 3: Once all of your ribbon has been fused to the muslin, trim off the excess around edges....
......so you end up with a nice 5" x 11" piece.

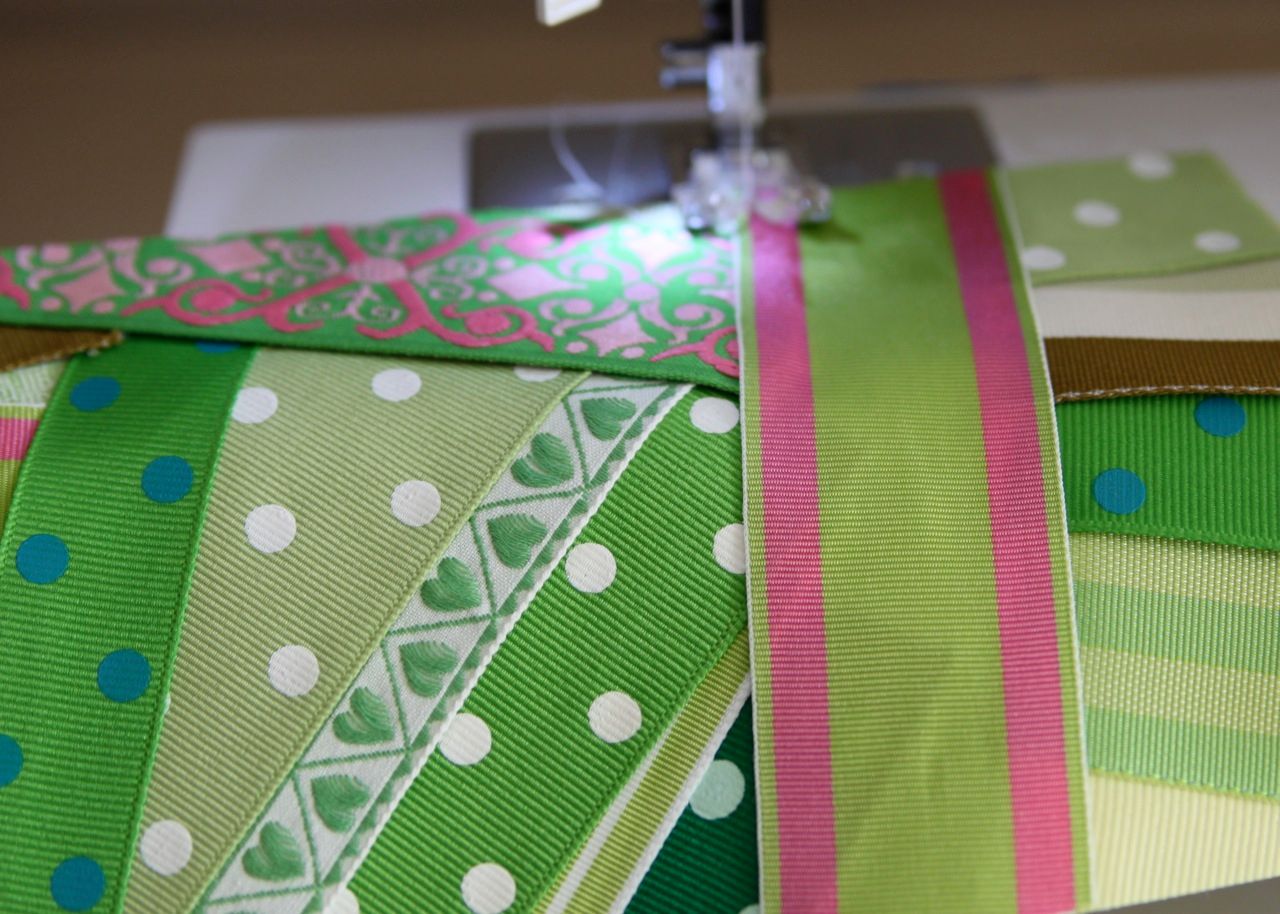
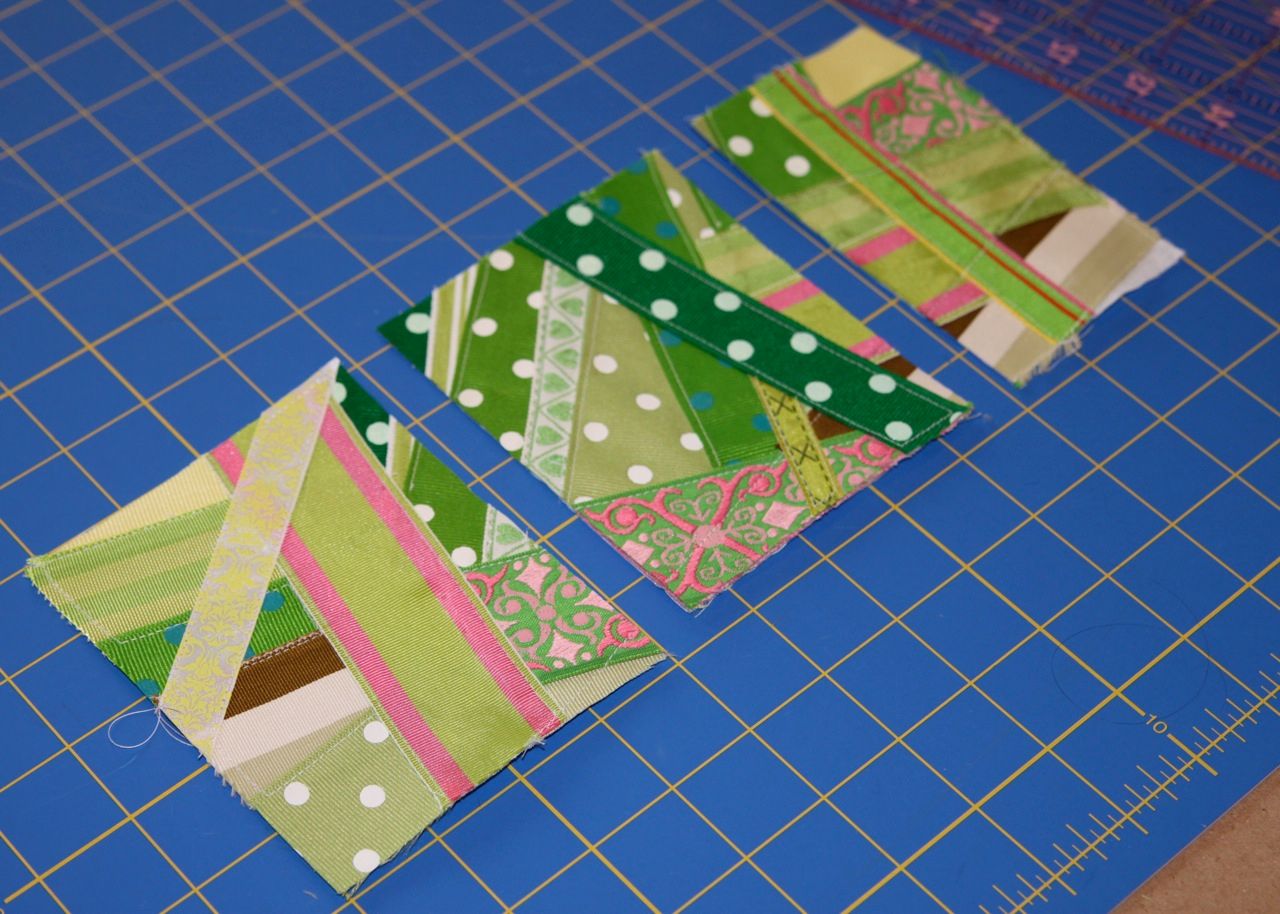
Step 4: Carefully sew all your exposed ribbon edges to the muslin....this doesn't have to be exact. There were areas where I just sewed directly across the piece instead of following a ribbon edge....it just depends on the look you want.
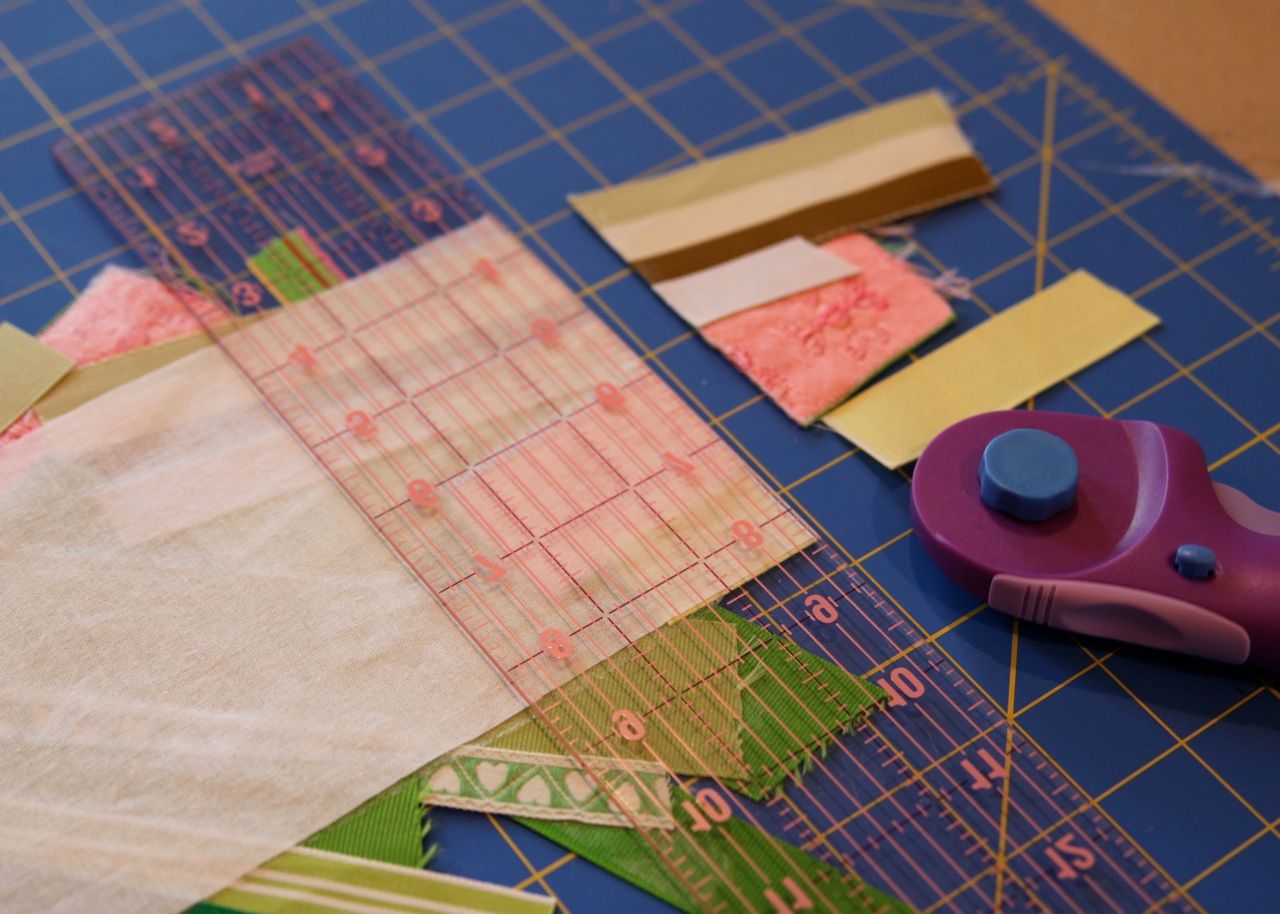
Step 5: Cut your 5" x 11" piece into 3 smaller pieces: one measuring 3" x 5" and two measuring 4" x 5".....
....and sew around the edges of each piece to keep all the ribbon secured.
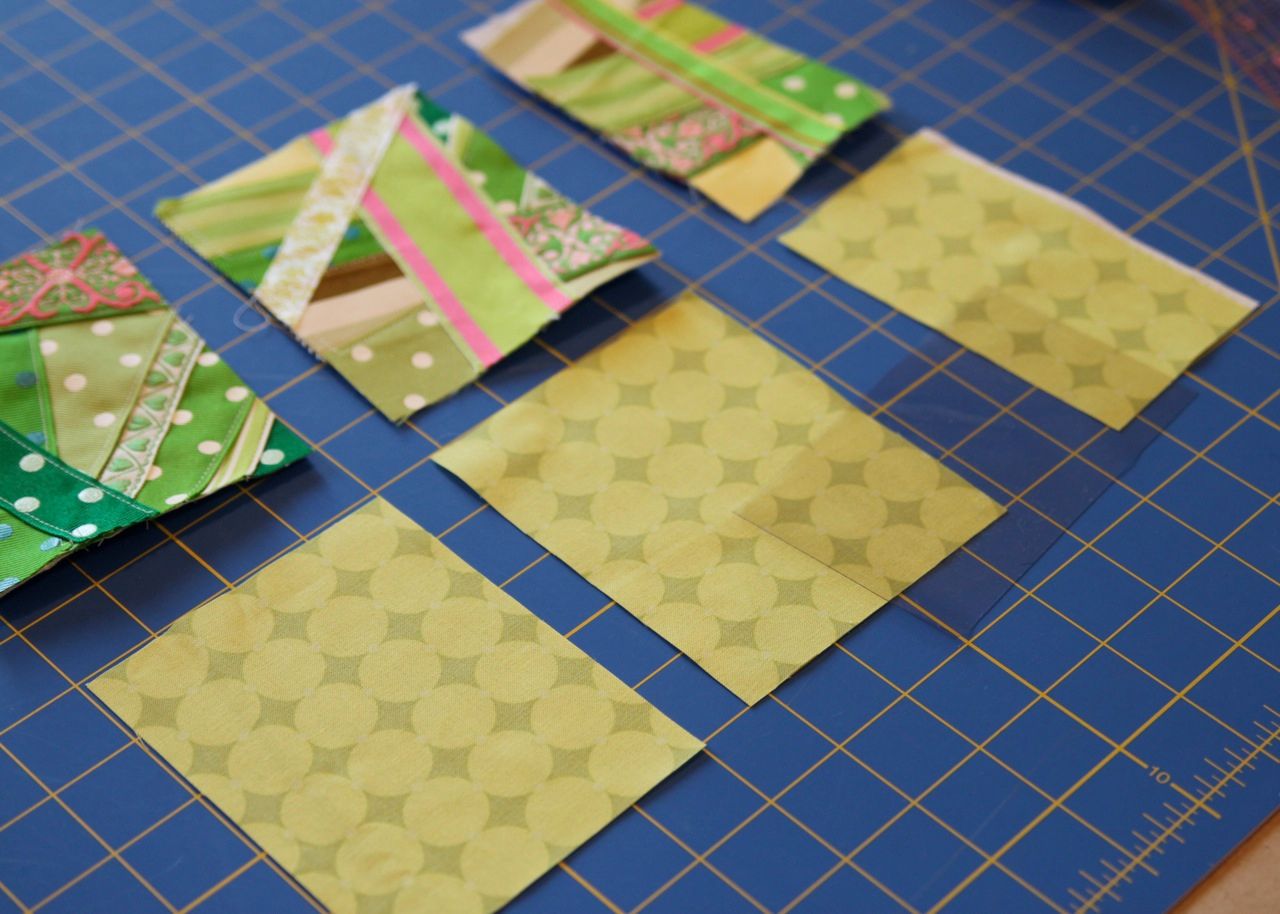
Step 6: Cut fabric pieces for your inside lining: one measuring 3" x 5" and two measuring 4" x 5". You will also need to cut a 3" x 5" piece of fabric or clear PVC vinyl for the inside pocket.
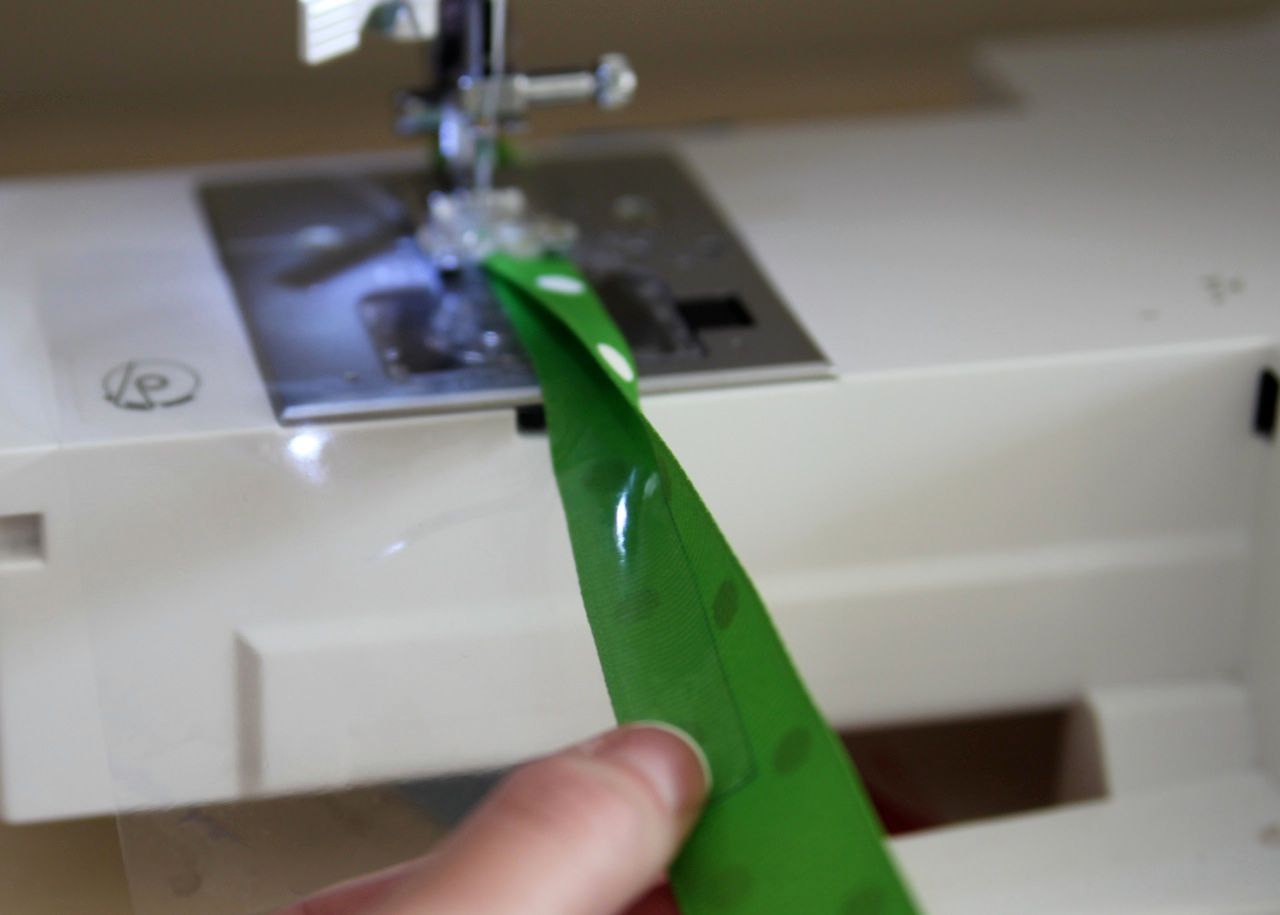
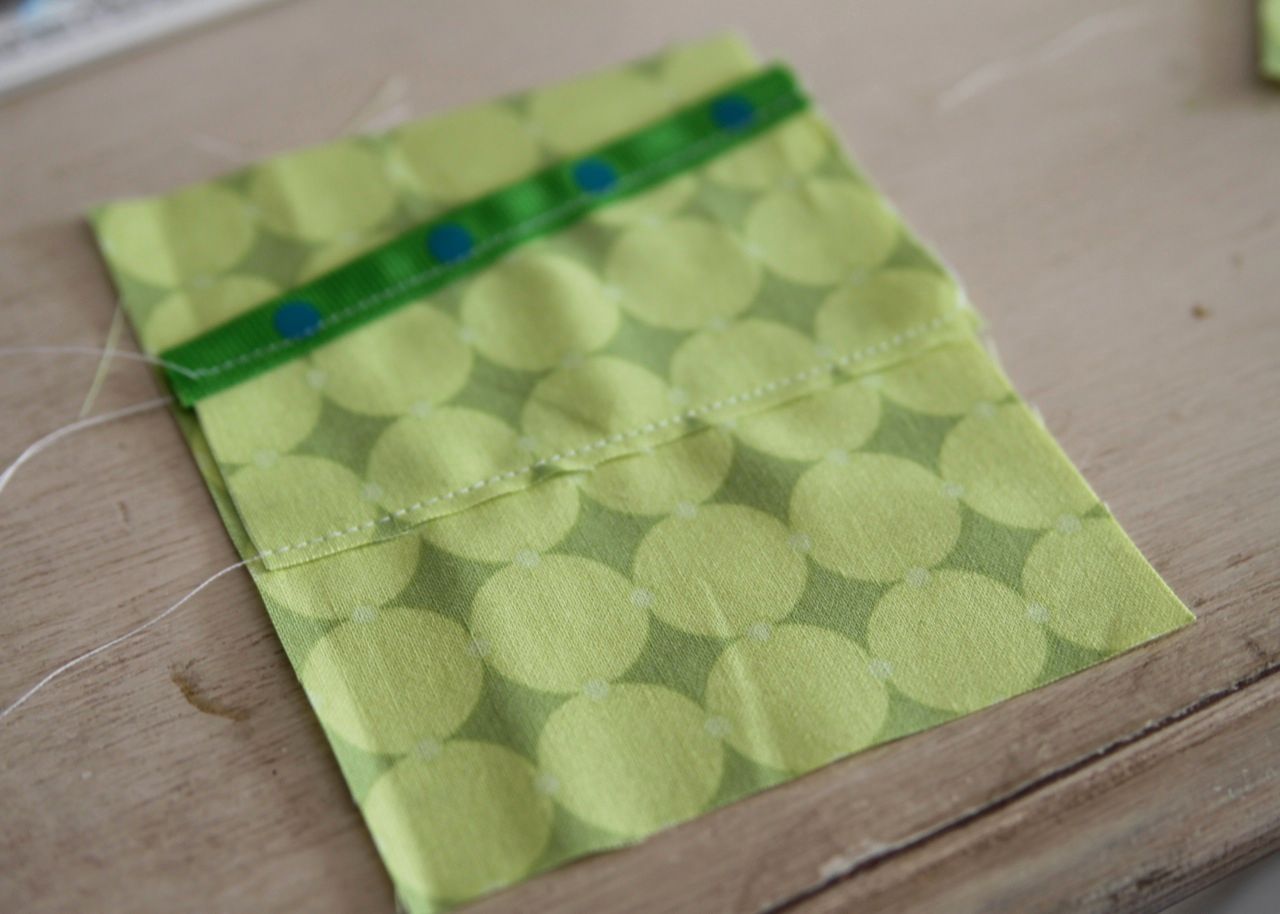
Step 7 Creating your ID pocket piece: Take a piece of ribbon and fold it in half over the 3" x 5" PVC piece. Sew along the ribbon edge.
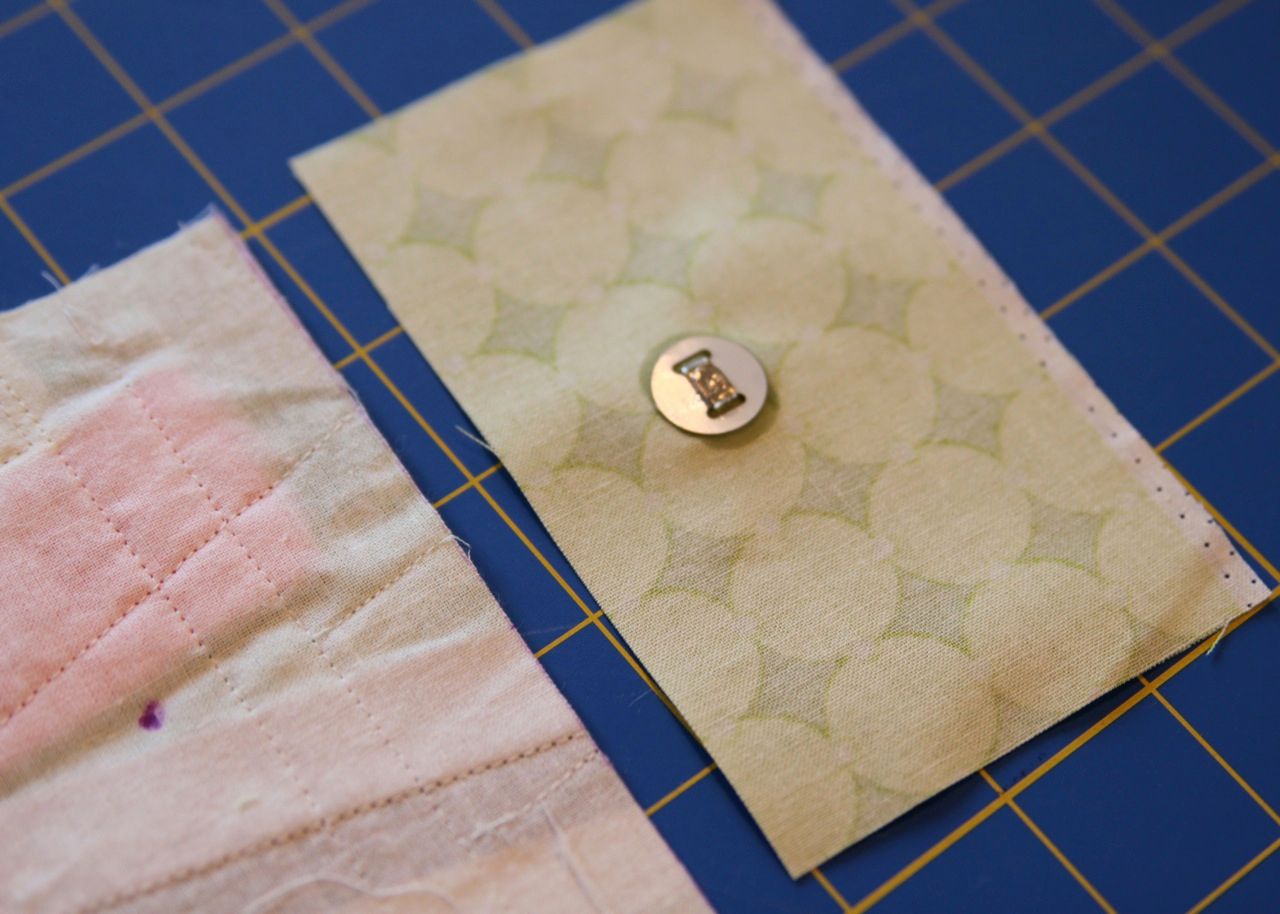
Take one of your 3" x 5" ribbon quilt pieces and add one side of your magnetic clasp.

Sandwich your ribbon quilt piece with the magnetic clasp and a 3" x 5" piece of lining wrong sides together. Add your PVC piece on top of the two and sew the bottom edge.

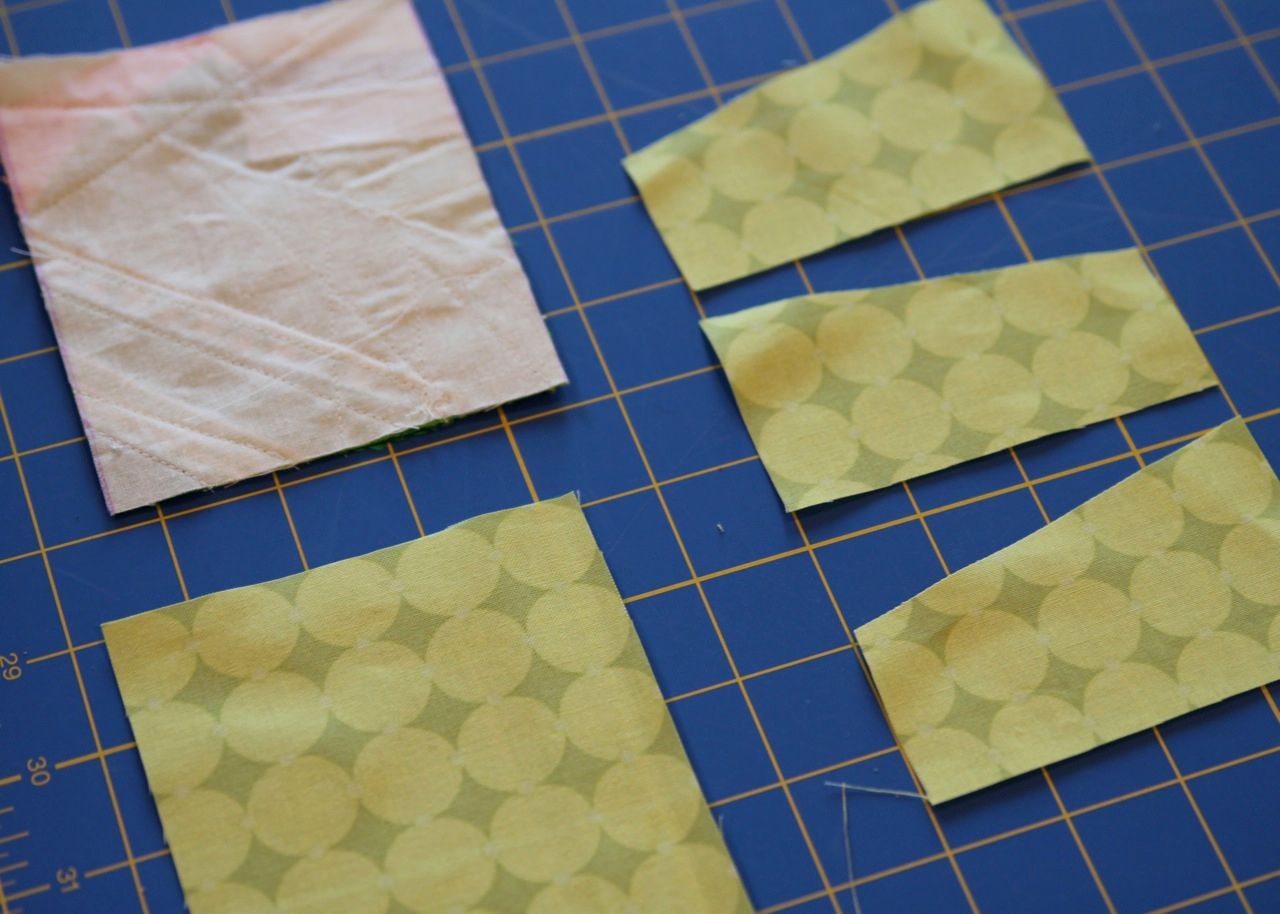
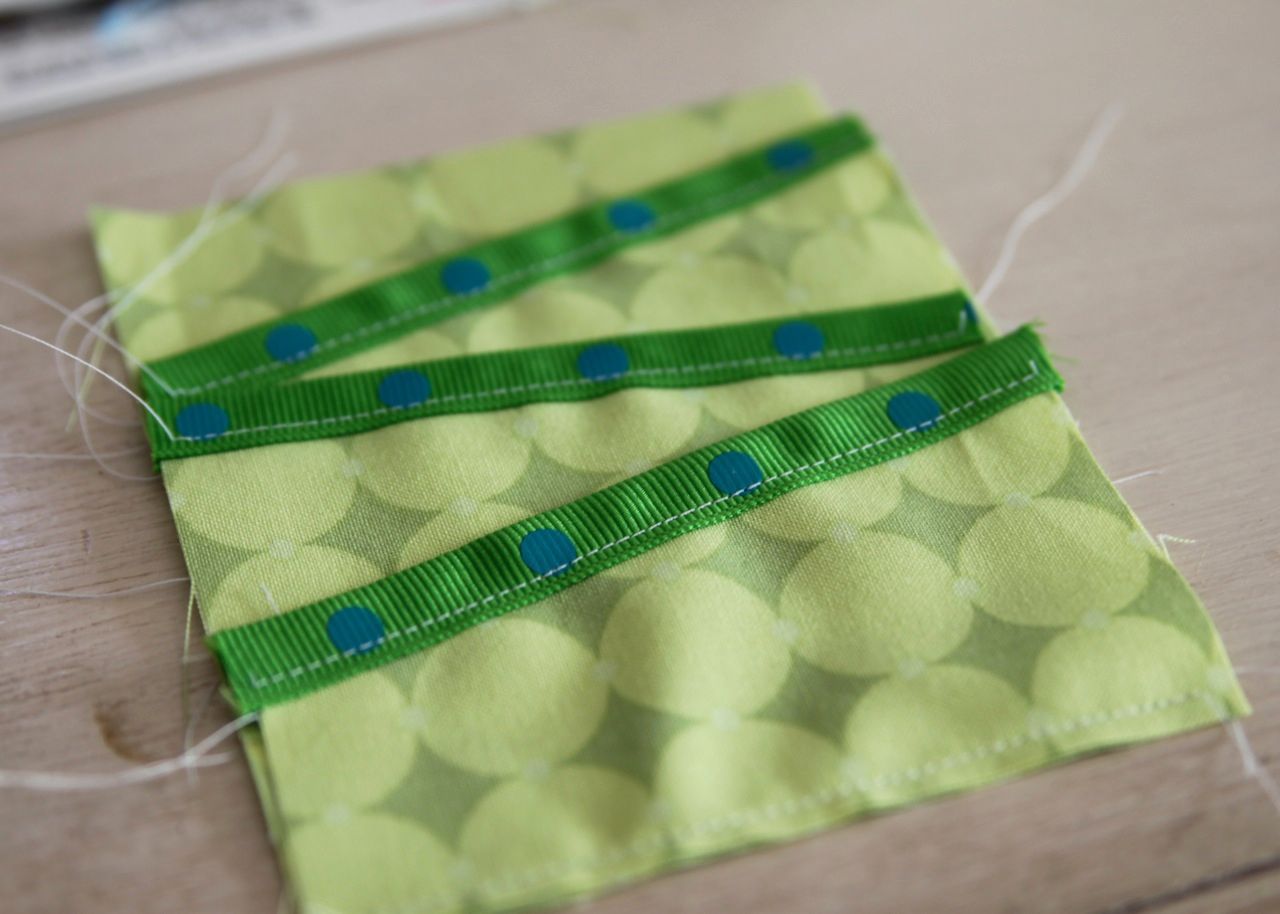
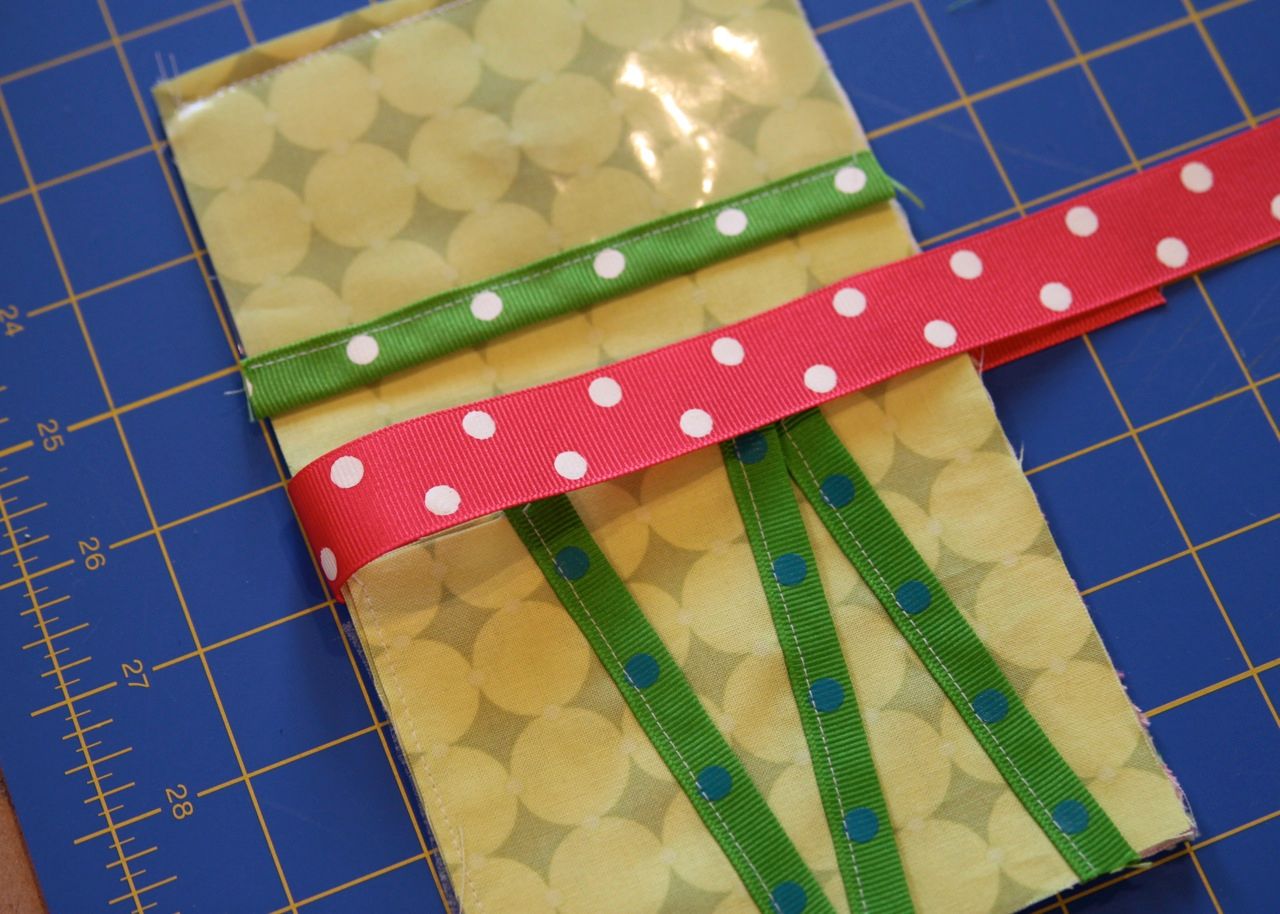
Step 8 Creating your middle pocket piece: Cut three pieces of fabric 4" x 2" and then cut a slight slant to each as shown below.
Take a piece of ribbon and fold it in half over the slanted edge of each piece (the same as you did with the PVC pocket. Sew along the ribbon edges. Place your top pocket in position first and sew along the bottom.
Then sew your middle on and then the bottom pocket on as well.
Step 9 Creating the top piece: Take your 3" x 5" piece of ribbon quilt and a 3" x 5" piece of lining and place them wrong sides together. Make sure to add your magnetic clasp first to the lining side. Sew around the edges to secure the two pieces together.
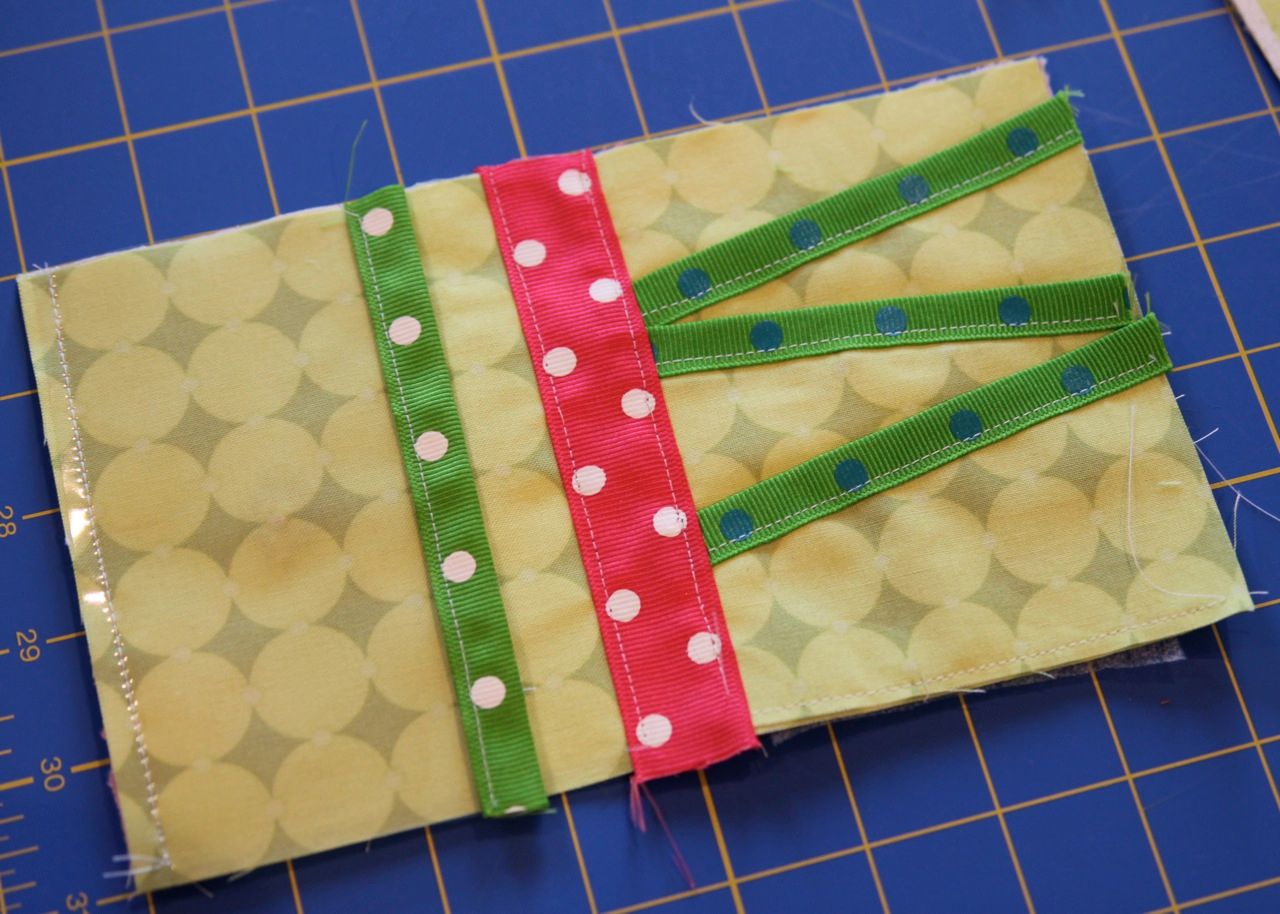
Step 10: Lay out your three pieces as shown....
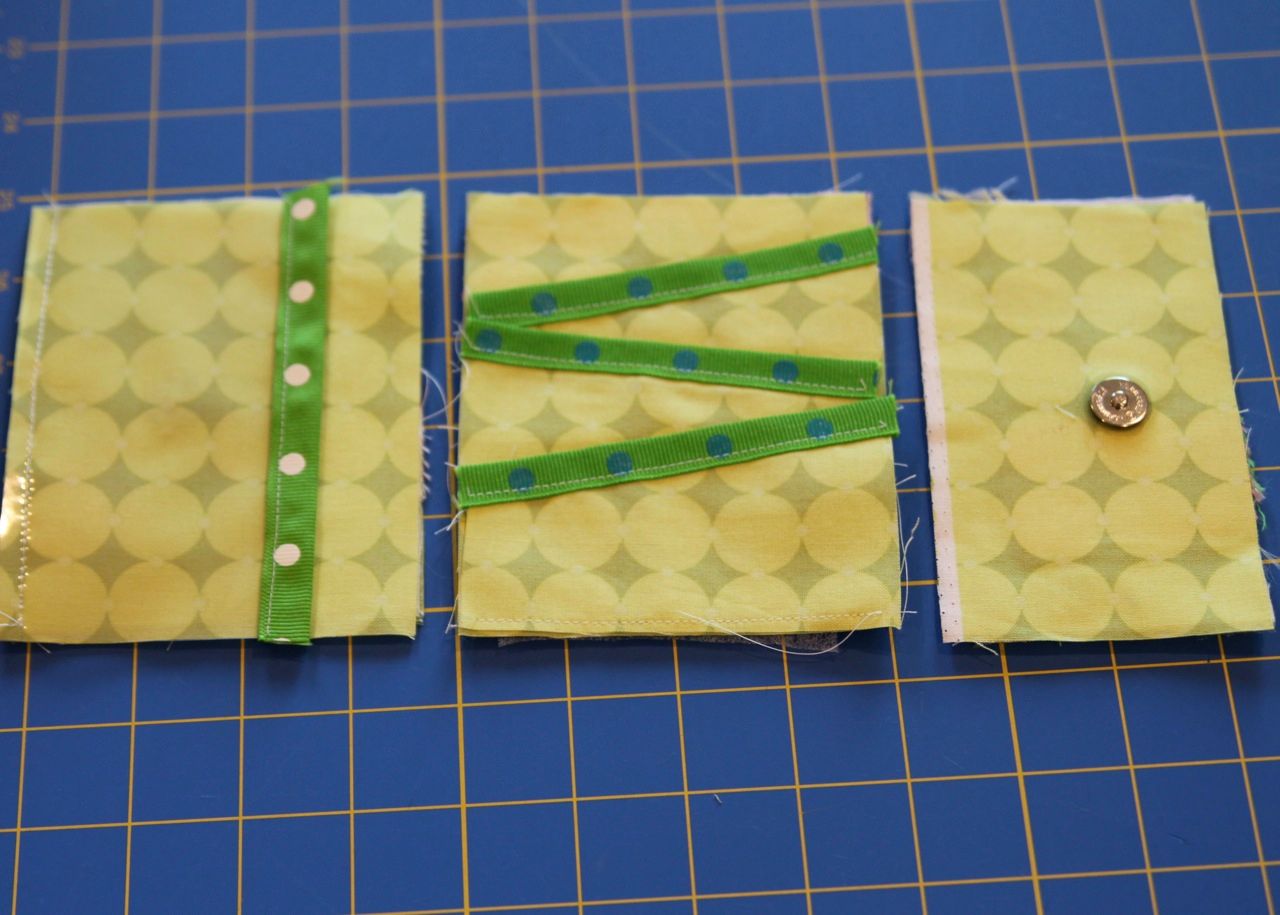
.....and find a piece of ribbon wide enough to cover where the pieces will connect but leaving a 1/4" gap in between.

Step 11: Fold your ribbon over the gap....
.....I used seam tape to secure (or you can use small pieces of Wonder Under).....
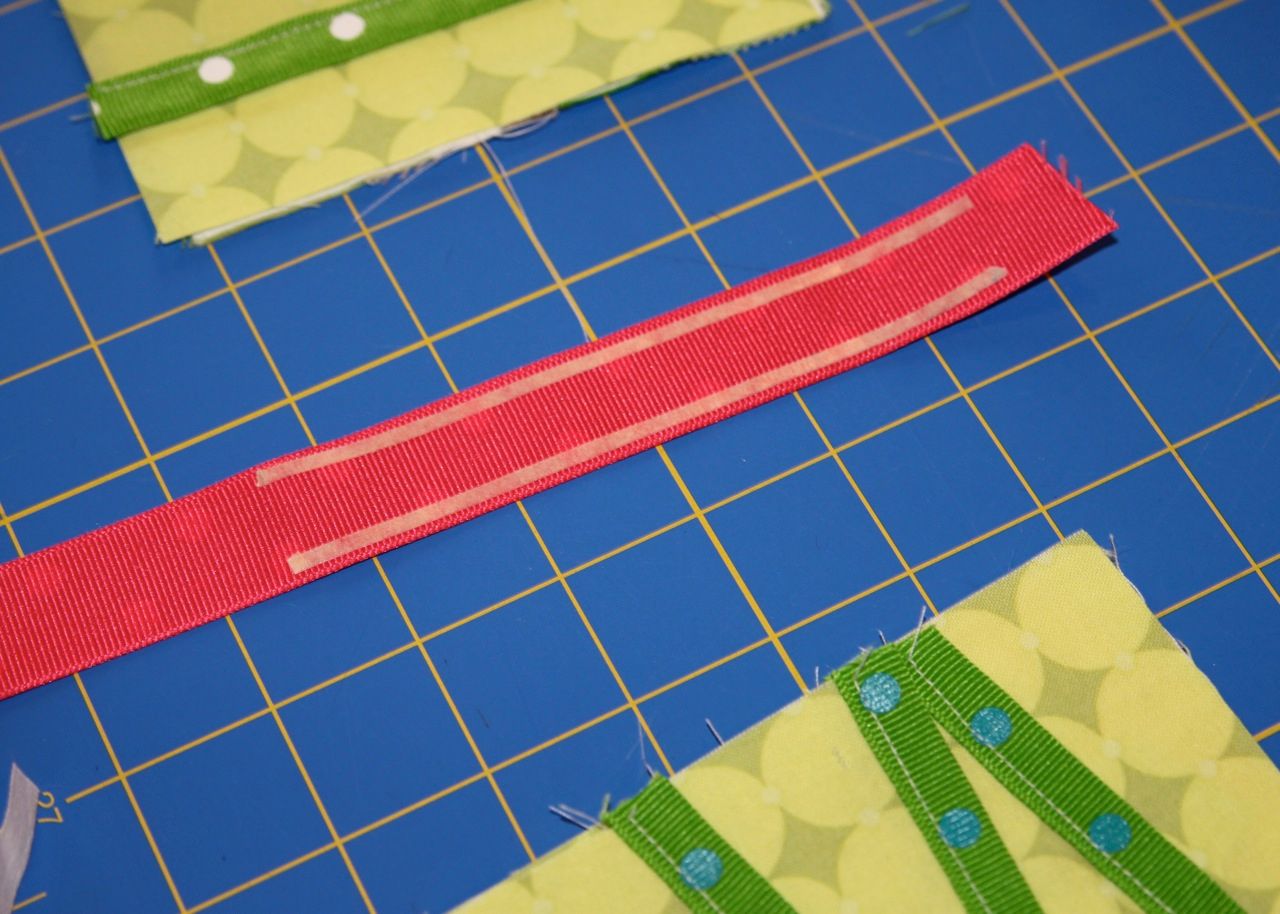
.....and sew both up both sides of the ribbon.....connecting the two pieces of the wallet.
Step 12: Repeat to connec the last two piece of the wallet. Use bias tape or ribbon to cover the outside edges of the wallet.....
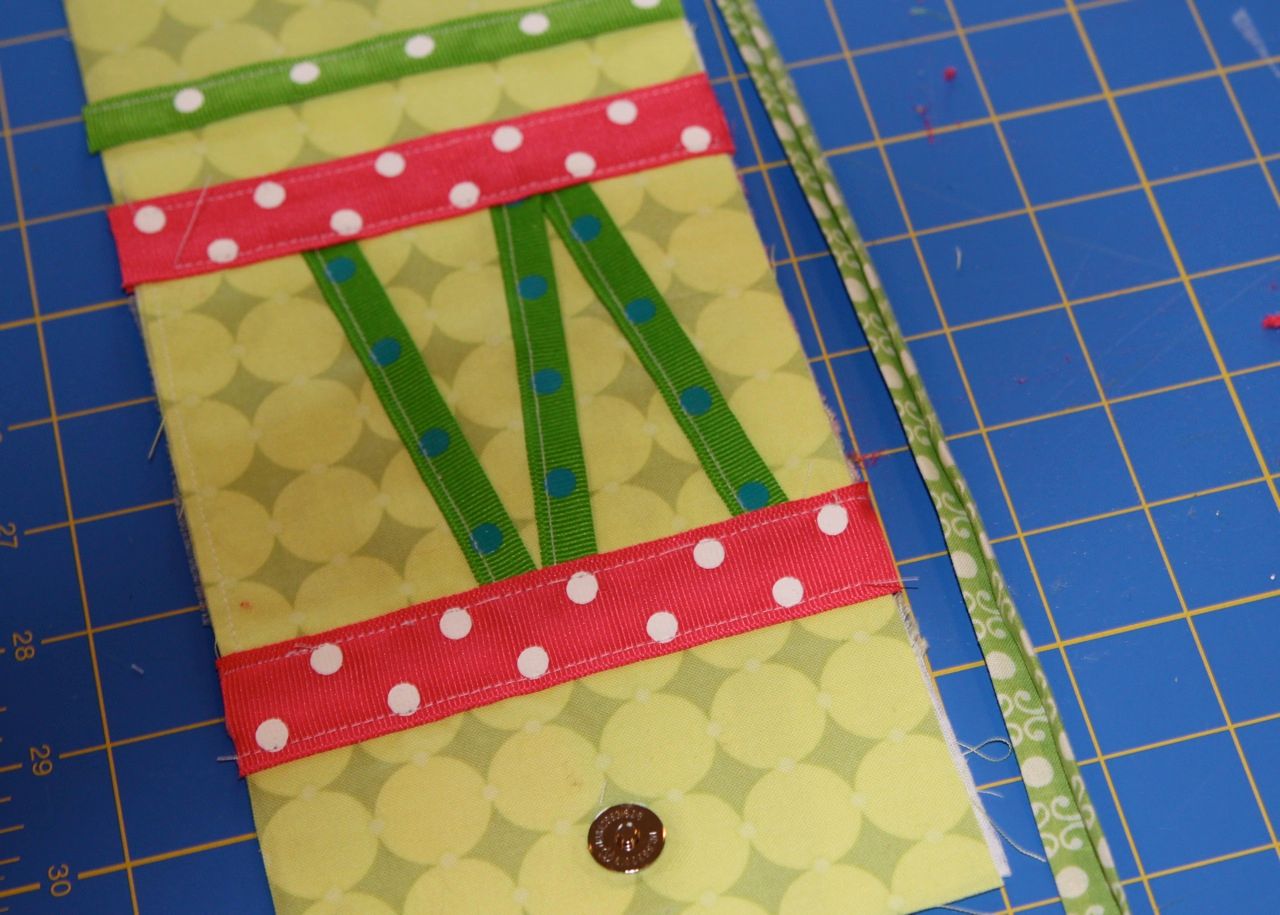
.....and now all seams should be covered!
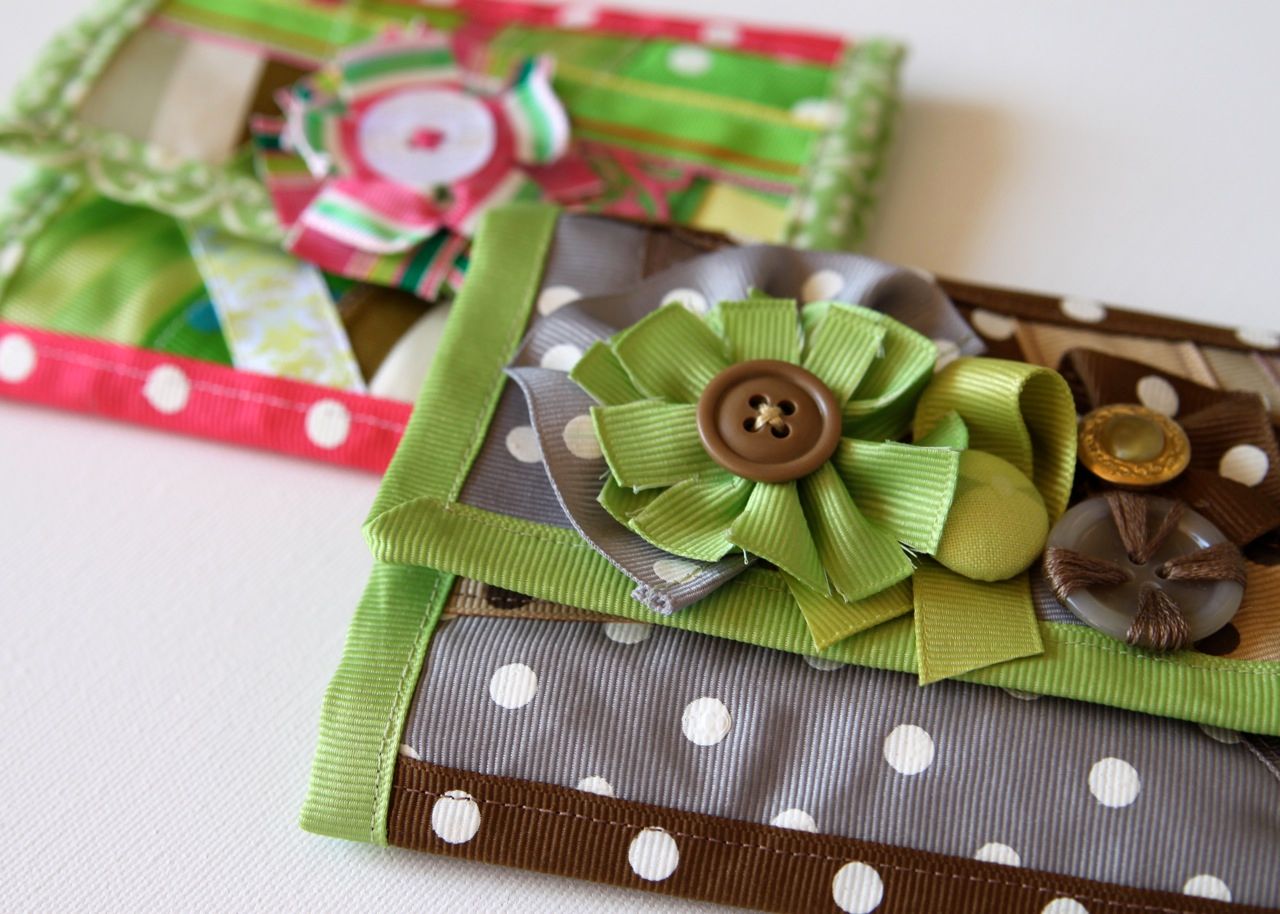
Now you can add embellishments to the front of the wallet if you like. For the brown/green wallet I added little flowers made from scrap ribbons, a plain button decorated with thread, a small ribbon "fan" covered with a gold/pearl button, and a ribbon badge with a matching fabric covered button.
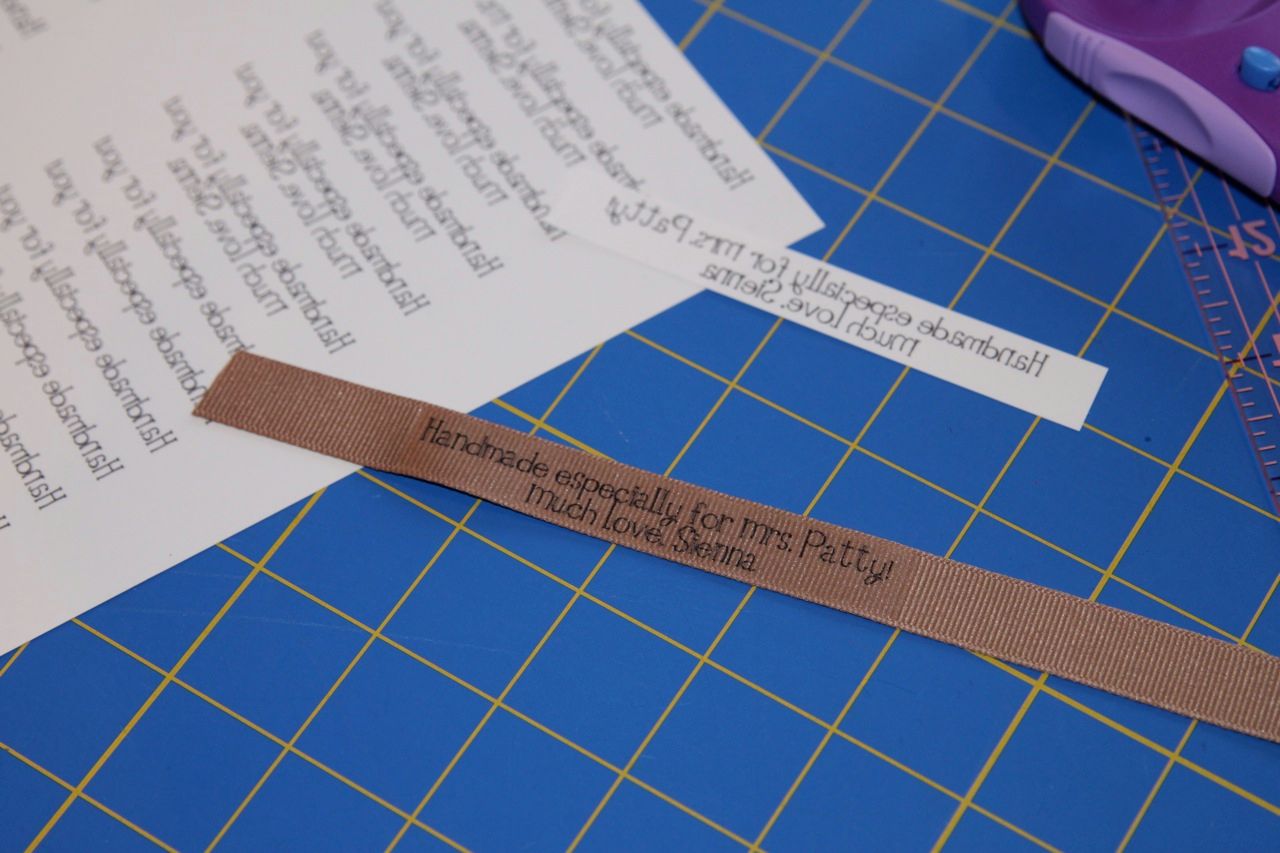
Optional: Add a personalized label
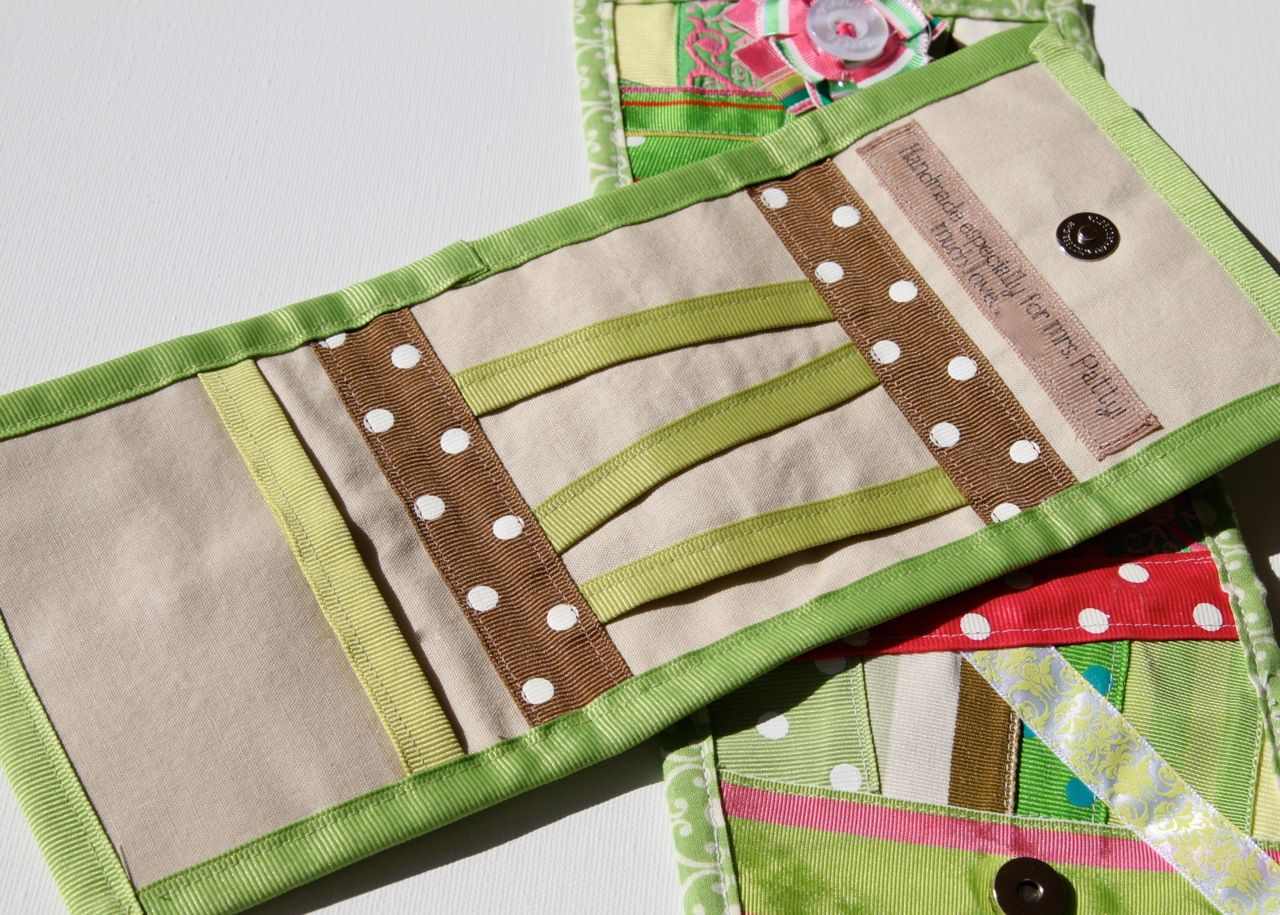
I added the little ribbon label inside that reads "Handmade especially for Mrs. Patty. Much love, Sienna" to make the wallet a little more special.
I printed the label on iron on transfer paper, adhere it to a scrap ribbon, and sewed it onto the lining before sewing the piece together in step 9.
Gosh Ashley! I am so, so, so loving these! I am still scared of my sewing machine - too chicken to even try it out. I think that this will inspire me enough to give it a shot! Thanks for being so detailed!
ReplyDeleteAre you for real??? I mean, how did you even come up with this??? :)
ReplyDeleteThese are adorable! I would not even know how to start something like this. My sewing machine is still collecting dust.
ReplyDeleteLoving it and for sure will be trying it! Thanks Ashley, clever idea as usual!
ReplyDeleteso cute!! i want to make one!
ReplyDeleteYou make the most amazingly cute stuff! I just LOVE your creativity!!!
ReplyDeleteThis comment has been removed by the author.
ReplyDeleteThey are
ReplyDeleteA B S O L U T E L Y
F A B U L O U S
!!!!!
RobyGiup
(robygiup.splinder.com)
This comment has been removed by the author.
ReplyDeleteThis is SO stinkin' cute!! I posted a link to your tutorial on Craft Gossip Sewing:
ReplyDeletehttp://sewing.craftgossip.com/tutorial-super-cute-scrap-ribbon-wallet/2009/11/26/
--Anne
Totally adorable - I want to make one!
ReplyDeleteHow cute..I have put a link to your tutorial on my freebies blog if thats okay....regards, Khris
ReplyDeleteOh my that is an adorable wallet! Great idea for a gift.
ReplyDeleteI love it! The colors that you used for the wallets are great. Hope to make a few as gifts.
ReplyDeleteI love your blog, and i love the wallet
ReplyDeletethanks
maria
xxoo
This wallet is absolutely darling! I'm going to feature it & you on my blog http://sewwhattoday.blogspot.com on December 5th. You are welcome to grab a button for those we've featured @ the bottom of our blog. :)
ReplyDeleteWow, this is really, really beautiful! I love how you used the ribbon! Thanks so much for the how-to, I'll be linking
ReplyDeleteAshley, this is soooo amazing!!
ReplyDeleteThese are so pretty. You do great work! Great job on the project & your tutorial! I wish I had a stash of scrap ribbon now! :)
ReplyDeleteOh my word, these are incredible. Thanks for sharing.
ReplyDeletewow! that's what I call creativity!! thanks so much for the tutorial. I will definitely be giving this a try!
ReplyDeleteAWEOME JOB!!! Love these cute wllets!!!! thanx for the tuto!
ReplyDeleteLove it!
ReplyDeleteI posted a link to your tutorial at
http://mycreativeway.blogspot.com/2010/01/how-to-make-ribbon-wallet.html
I love this idea...great job on the tutorial!
ReplyDeleteThis comment has been removed by the author.
ReplyDeleteDear Ashley,
ReplyDeleteAmazing idea, tutorial and creativity, you are so special!!!
Thank you very much for your tutorial!!!!!!!!!
I posted a link to it on my blog, at http://feltroaholic.blogspot.com/2010/04/carteira-feita-com-scrap-de-fitas.html
Best Regards,
Carine Calé
Dear Ashley,
ReplyDeleteAmazing idea, tutorial and creativity, you are so special!!!
Thank you very much for your tutorial!!!!!!!!!
I posted a link to it on my blog, at http://feltroaholic.blogspot.com/2010/04/carteira-feita-com-scrap-de-fitas.html
Best Regards,
Carine Calé
Dear Ashley,
ReplyDeleteAmazing idea, tutorial and creativity, you are so special!!!
Thank you very much for your tutorial!!!!!!!!!
I posted a link to it on my blog, at http://feltroaholic.blogspot.com/2010/04/carteira-feita-com-scrap-de-fitas.html
Best Regards,
Carine Calé
First of All. I just found your blog visiting Prudent Baby! And I fell in love with it! I am going to be making one of these for my sister for her birthday next month.
ReplyDeleteYou are truly amazing!!! I just linked you to one of my friends and she loves it too!!!
I really like your ribbon wallet! Thank you for the good tutorial. I hope you don't mind I posted a link on my blog-www.thriftypals.blogspot.com
ReplyDelete