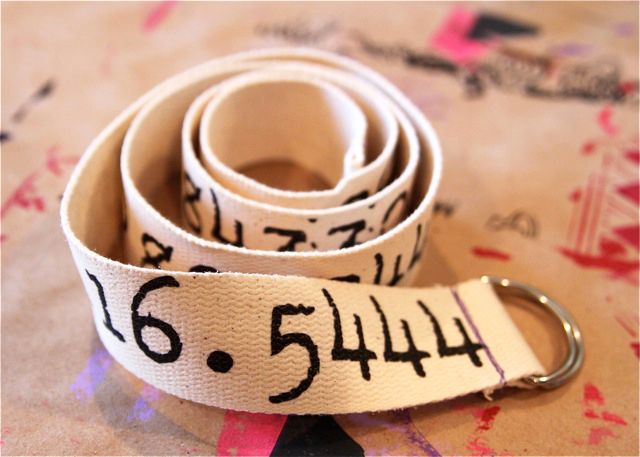
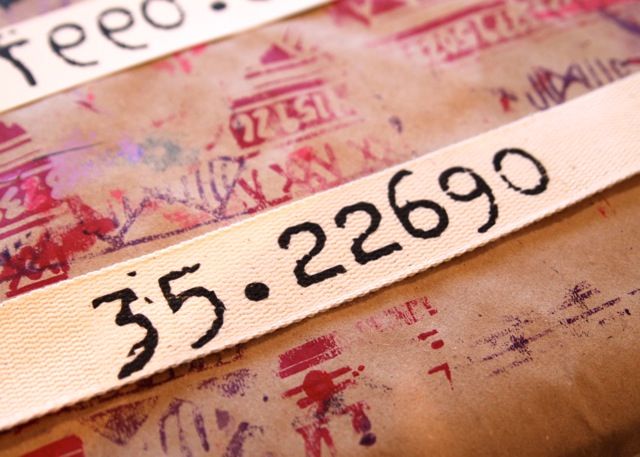
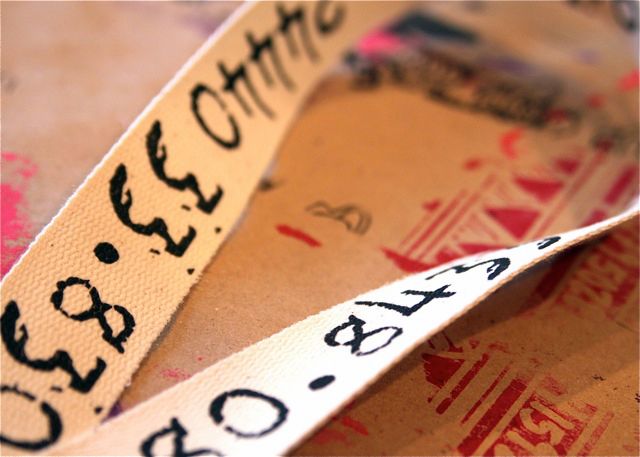
Are you thinking about holiday gifts yet? This is such an easy belt to make and can be personalized with any words or images. My plan was to make a belt for myself that had a favorite quote on it but all my favorite ones were almost a paragraph long....so I decided to make my belt with the longitude/latitude coordinates of where Mr. LBB, Boo and myself were born (similar to the pendant I made for the SYTYC contest).
So many ideas came to mind when making this...here are just a few to help you brainstorm for gifts:
*A kid's belt with your cell phone number when at Disneyland in case they get lost!
*A Pi belt for a numbers lover: 3.141592653589793238462643383.
*A belt filled with names or birthdates of grandchildren for a Grandparent.
*A mini nesting doll belt or skull/crossbones pirate belt.
*Personalized tote bag/handbag straps.
*Inspirational quote or verse belt.
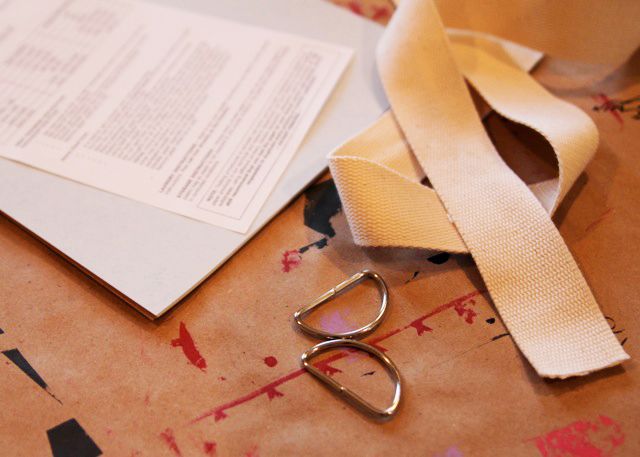
All you need for this project are: cotton/belting webbing (must be cotton, the iron will melt any plastic webbing and if you plan to dye the webbing a different color), D-rings, and Super Soft Transfer Paper.
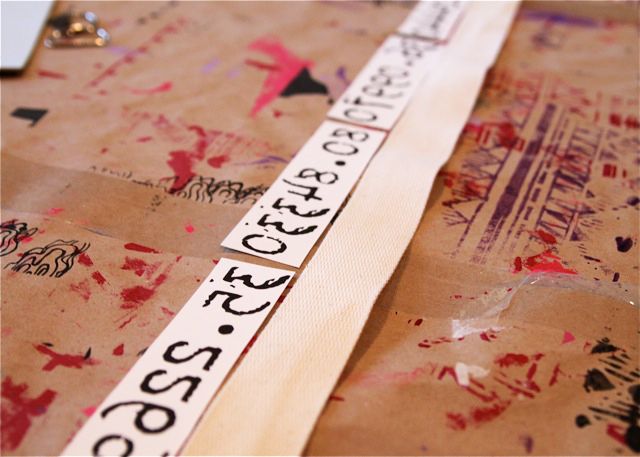
Step 1: Set up your images or words and print off a copy to make sure it will all fit on your belt. Print the final copy off onto Super Soft Transfer Paper. Make sure to print in reverse! (I use Powerpoint to set everything up and then save the image as a picture that I can easily import back in and drag to reverse.) Note: I used "1942 report" font. You can download it here.

Step 2: Cut a piece of cotton/webbing long enough to fit around your waist adding about 10-12" for overlap. Cut out your images/words and place them along the top of the belt in the order you want to add them.
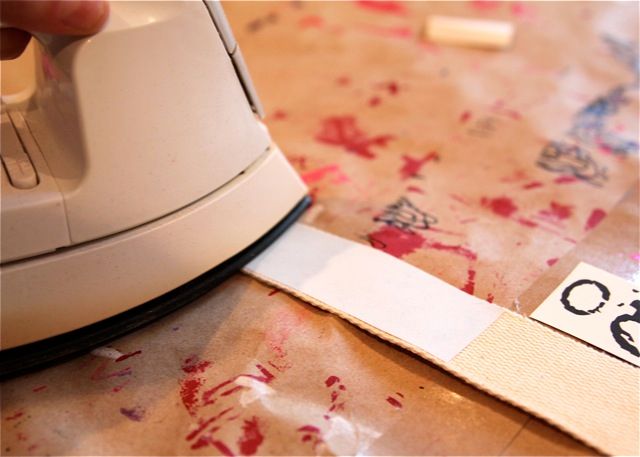
Step 3: Follow the instructions of the transfer paper.....but make sure you use a hard surface like table....not an ironing board. For the Super Soft Transfer Paper you will use the hottest setting and iron firmly back and forth for about 20 seconds.
Peel off the transfer paper backing the image is left behind!
Repeat for each image until you have covered the belt:
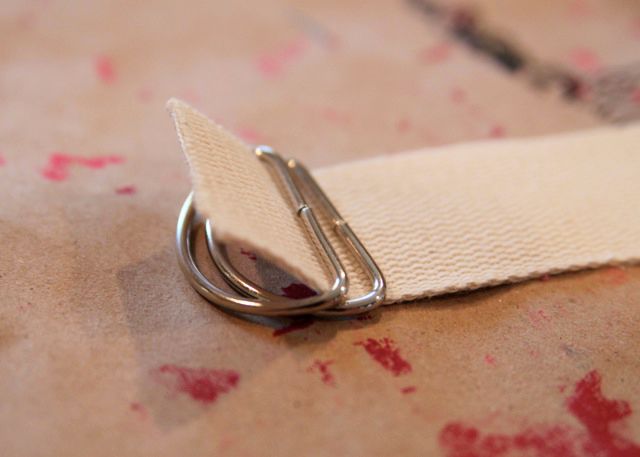
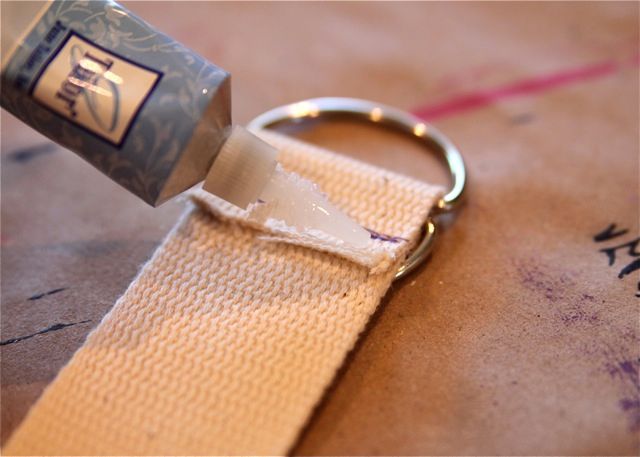
Step 4: Insert the D-rings onto one end of the belt.......
.....and fold the belt over and secure it by sewing it together as shown below or you can also sew it shut with a needle and thread:

Step 5: Fold the other end of the belt over about a 1/2".....
.....and secure it by sewing it shut:

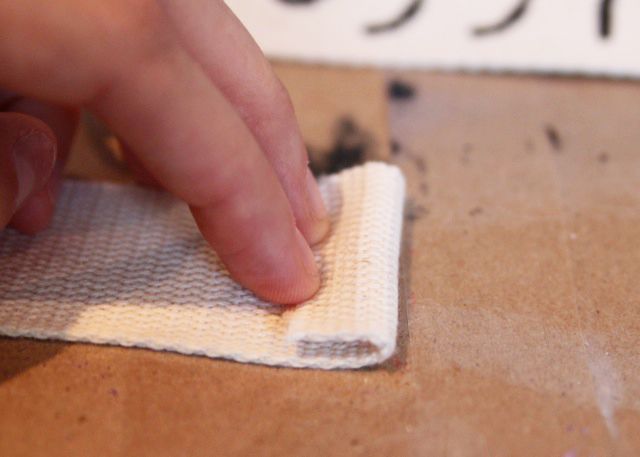
Step 6: Treat the raw edges so that they won't fray using Fray Block or craft glue.
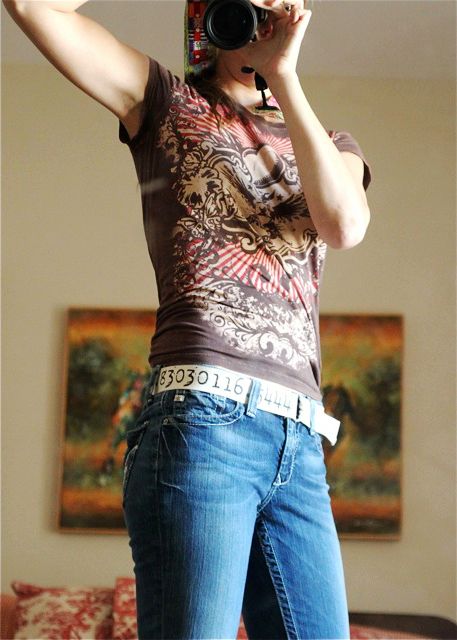
I love the finished result: A funky, one-of-a-kind belt filled with special meaning.....a perfect conversation piece!
What will YOU make with this tutorial? I'd love to hear your ideas!
It is amazing! I love it. Now to get some iron on transfer paper. The font is what makes this belt perfect. Nice work!
ReplyDeletehttp://www.holy-craft.blogspot.com
I Love it!I love all ur DIY design=)
ReplyDeleteThank you for this post. I am working on a project right now that this will work for. I especially love the font. Thanks again!
ReplyDeleteGosh Ashley...if I only a body like yours to rock a belt like this! ha! :) Love how you used the lat. and long. of where you guys were born! Fantastic! Thanks for sharing!
ReplyDeleteOMG I just LOVE it!! appeals to both the crafter and the mathematician in me!!
ReplyDeleteI love the tutorial... i just wonder if it's a bit too much attention on my hips... my hips are something that are more like 'comfort added' than adorable!
ReplyDeleteLove the belt! The first thing that came to mind was making one for my nephew...just have to think of something "cool" to put on it.
ReplyDeleteYeah, I can't wait to wear a pi belt. I'm serious! They are out of the transfer that you are talking about, so I'll have to find some other way to make this
ReplyDeleteThat is so super cute! I love this idea!
ReplyDeleteLOVE LOVE LOVE this!!!! AND I adore your new profile pic. So sweet you two!
ReplyDeleteWell this just went straight to the top of my to-make list, what a creative idea and meaningful too!
ReplyDeleteThis is so awesome!! I can see this printed with words to a song, too. I linked to your tutorial over on Craft Gossip.
ReplyDelete--Anne
Love it!!! What a great idea! I agree, it would be an awesome gift (:
ReplyDeleteCan you use either a ink jet or laser printer or does it need to be specific? Also, would this work in color? Thinking this would be so cute for my daughter.
ReplyDeleteThanks.
Heather
Oh man...brilliant! Hubby is so getting a digits of Pi belt for Christmas. He'll love it...and since he's a high school teacher now, he'll have plenty of opportunity to wear something quirky like that.
ReplyDelete