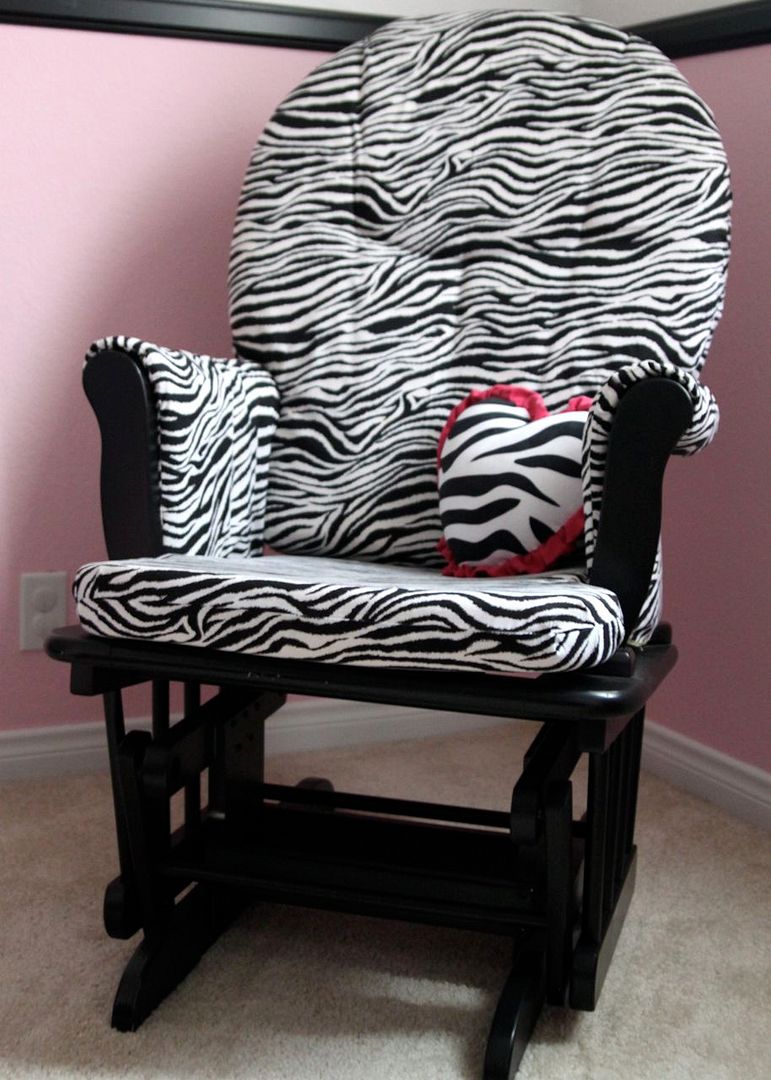
My brother-in-law had repainted her black and adding these new cushions completed the whole pink, black and white nursery look for my new niece!
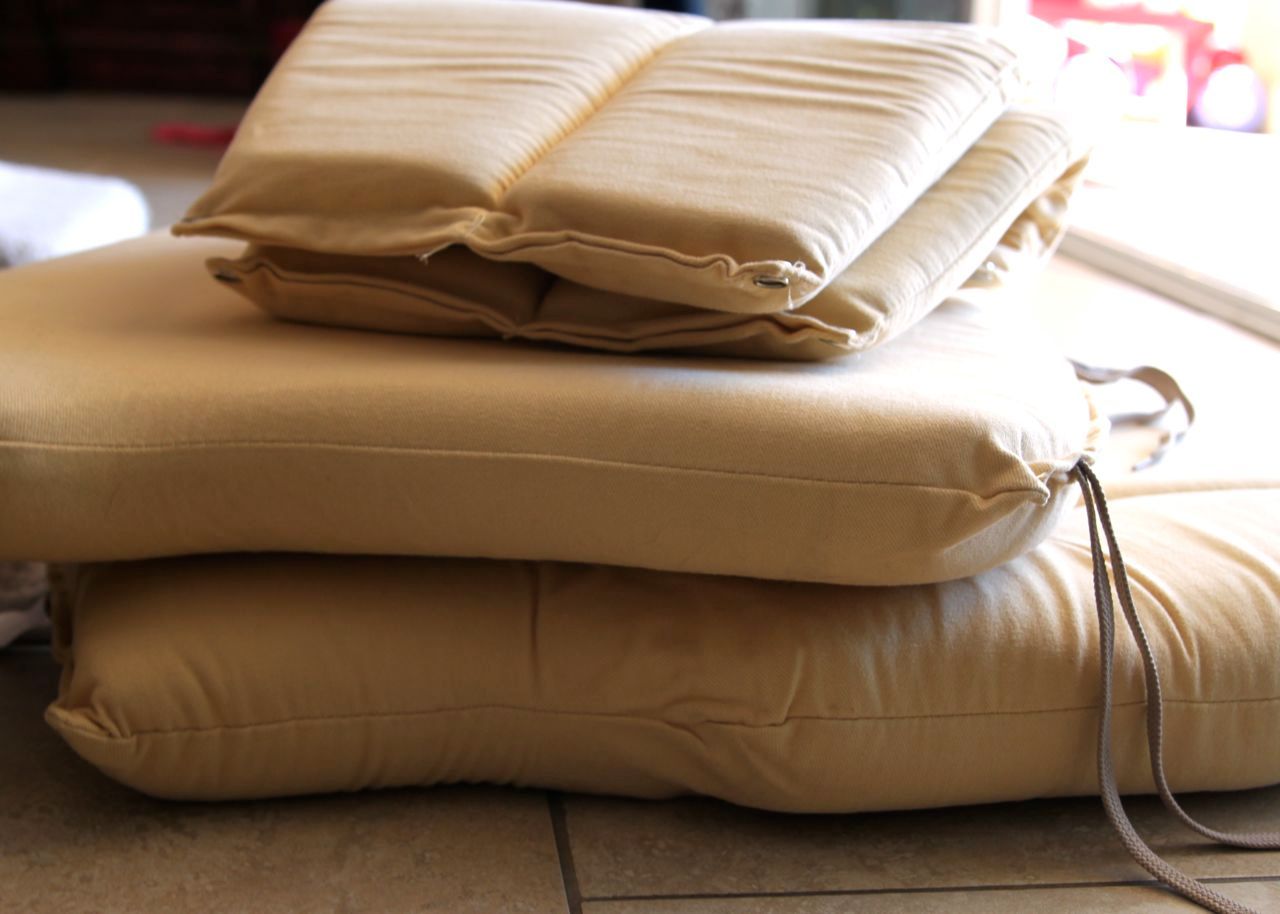
The easiest way to recover foam cushions is to use a seam ripper to remove the old covers and use them as your pattern....then you'll get a perfect fit!

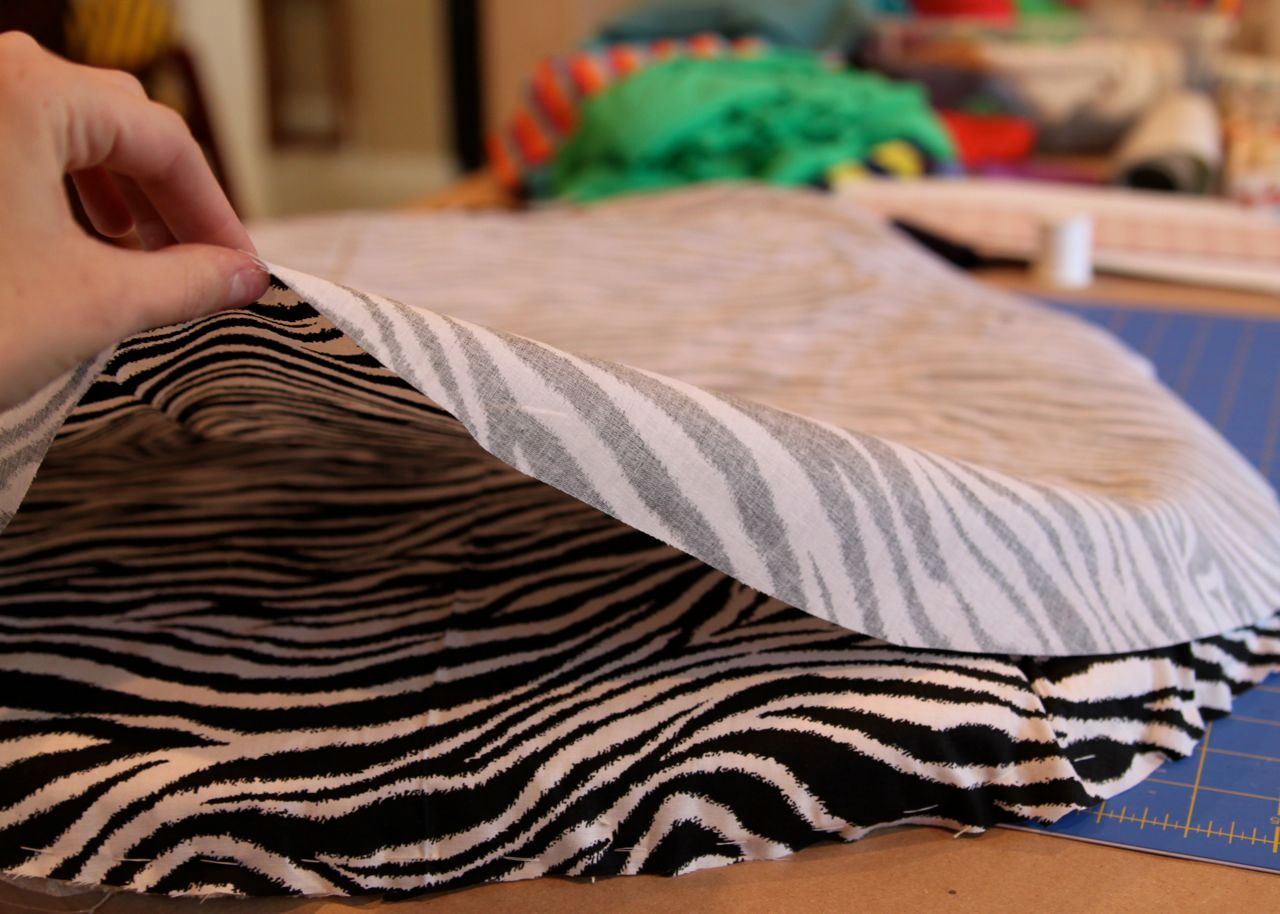
I carefully removed each cushion cover and pinned each piece to the new fabric to cut out an identical piece:
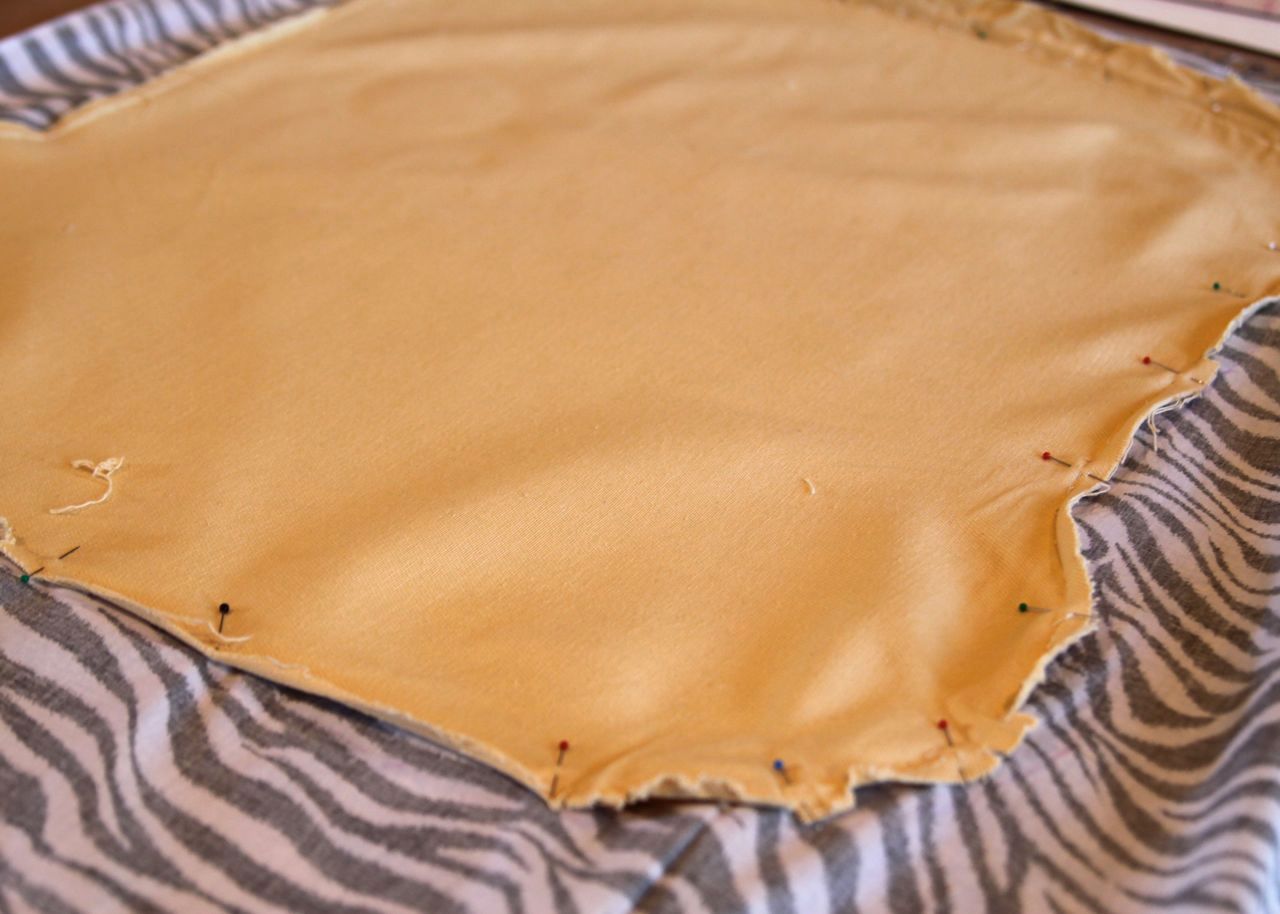
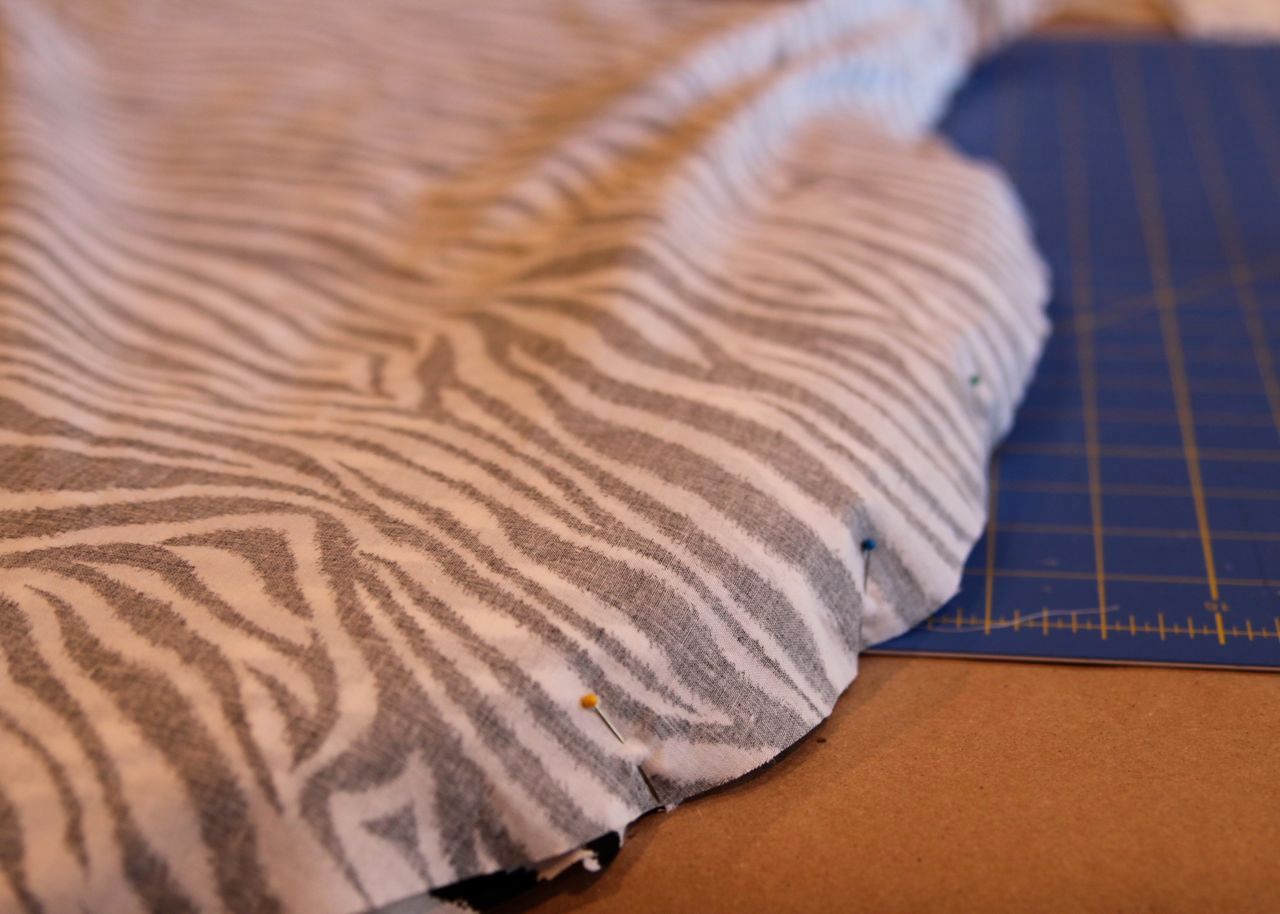
I marked any pleats with my disappearing ink pen....
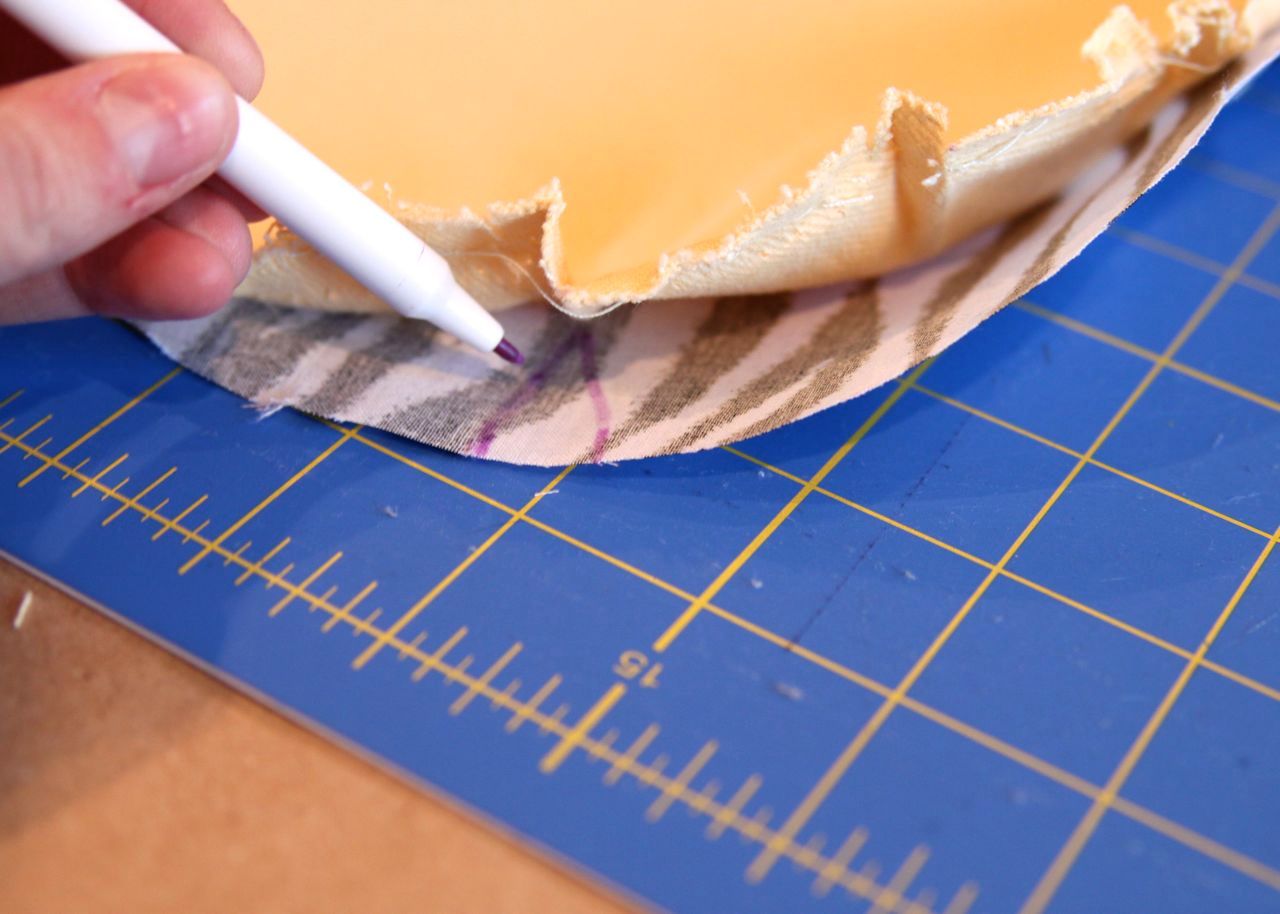
....and then pinned them into place.
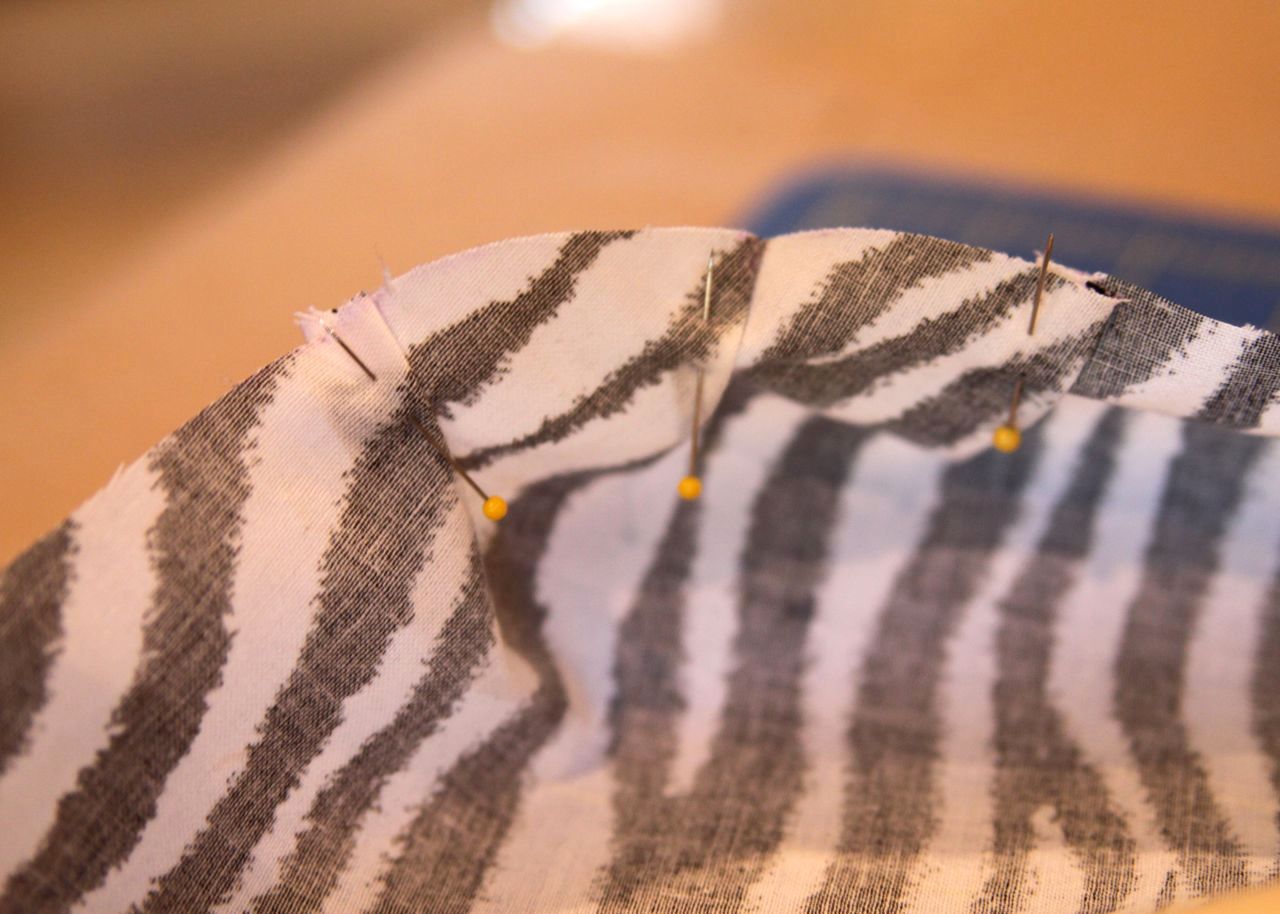
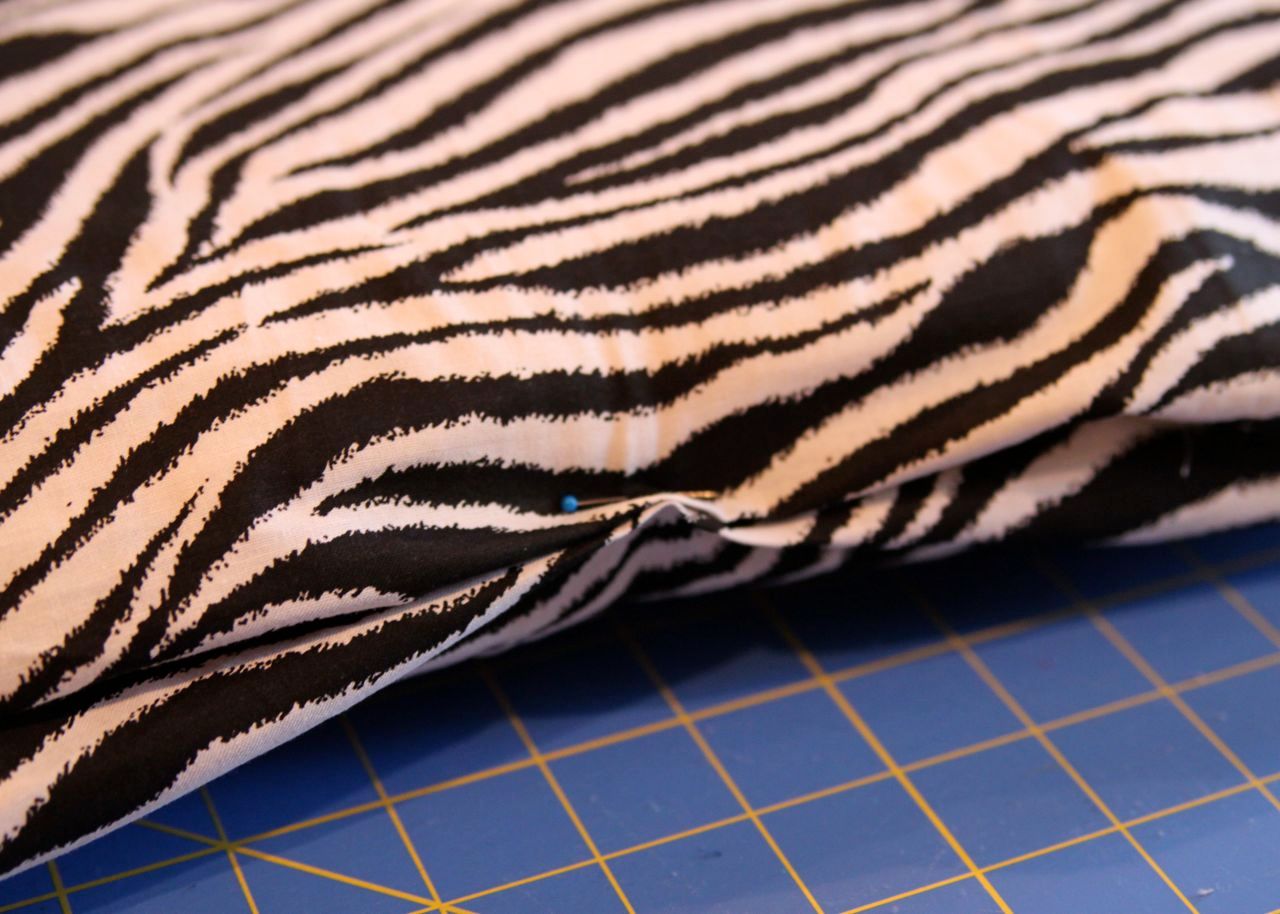
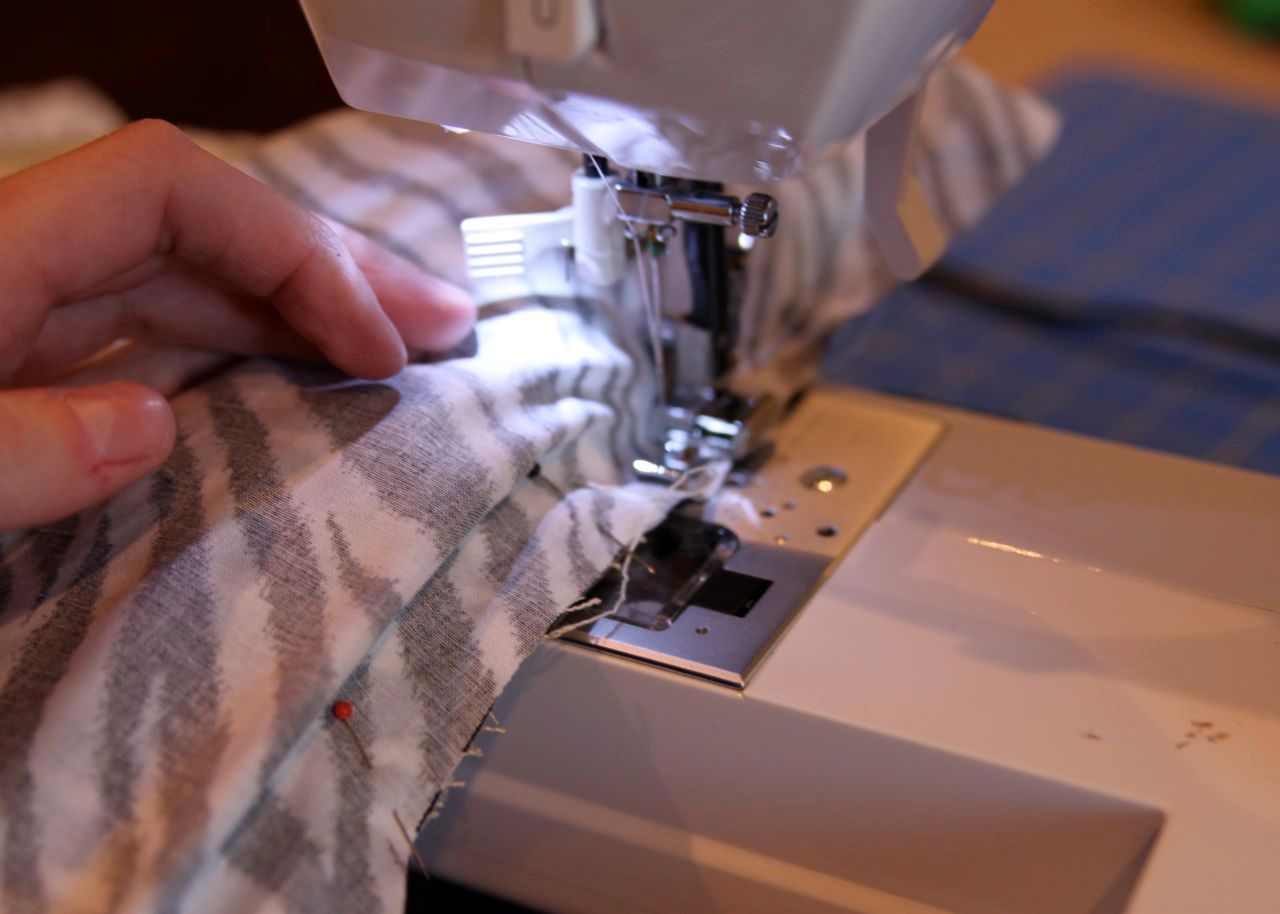
Matching the pleats, I place the two pieces for this particular cushion together and then sewed all the way around the edges leaving the back open to re-insert the cushion.
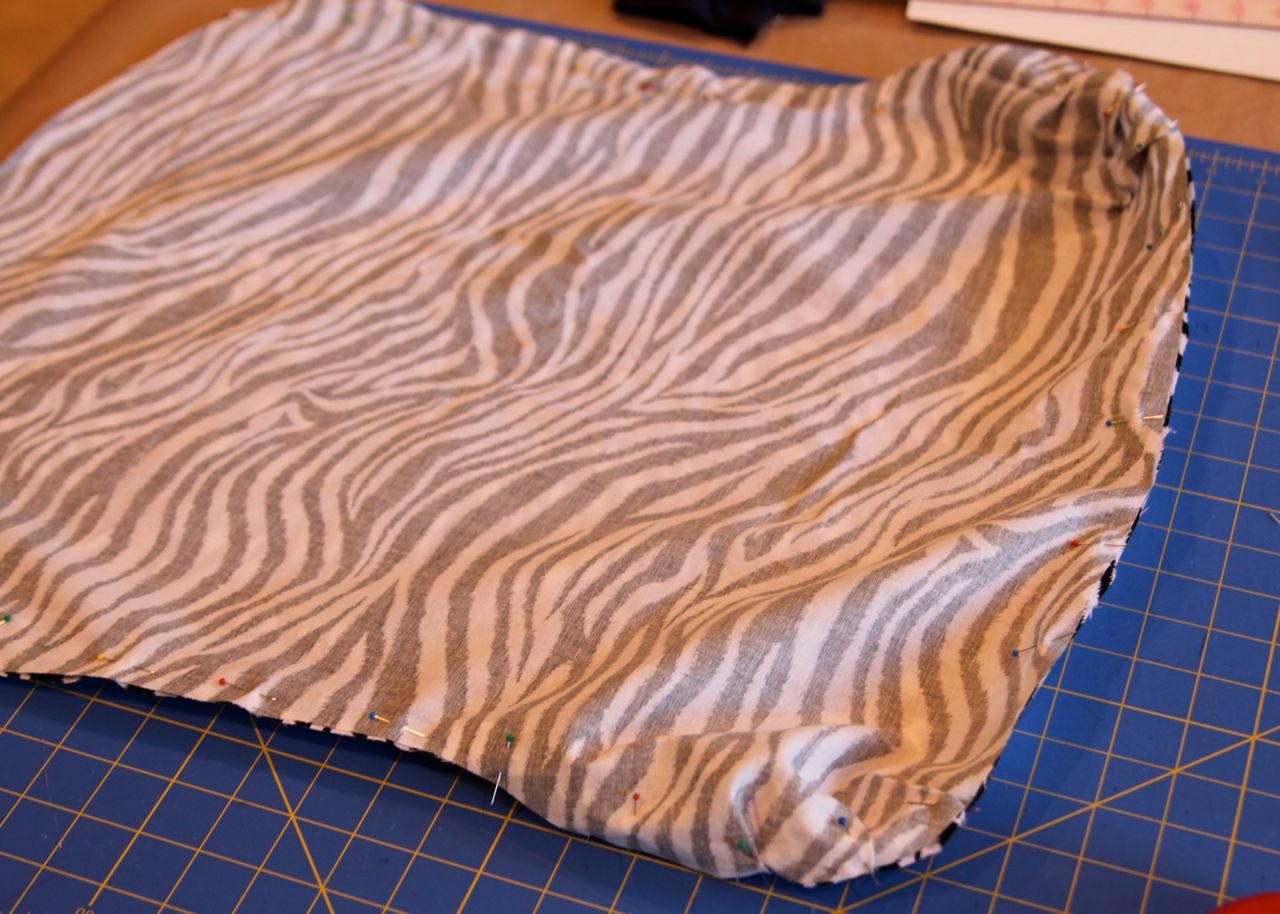
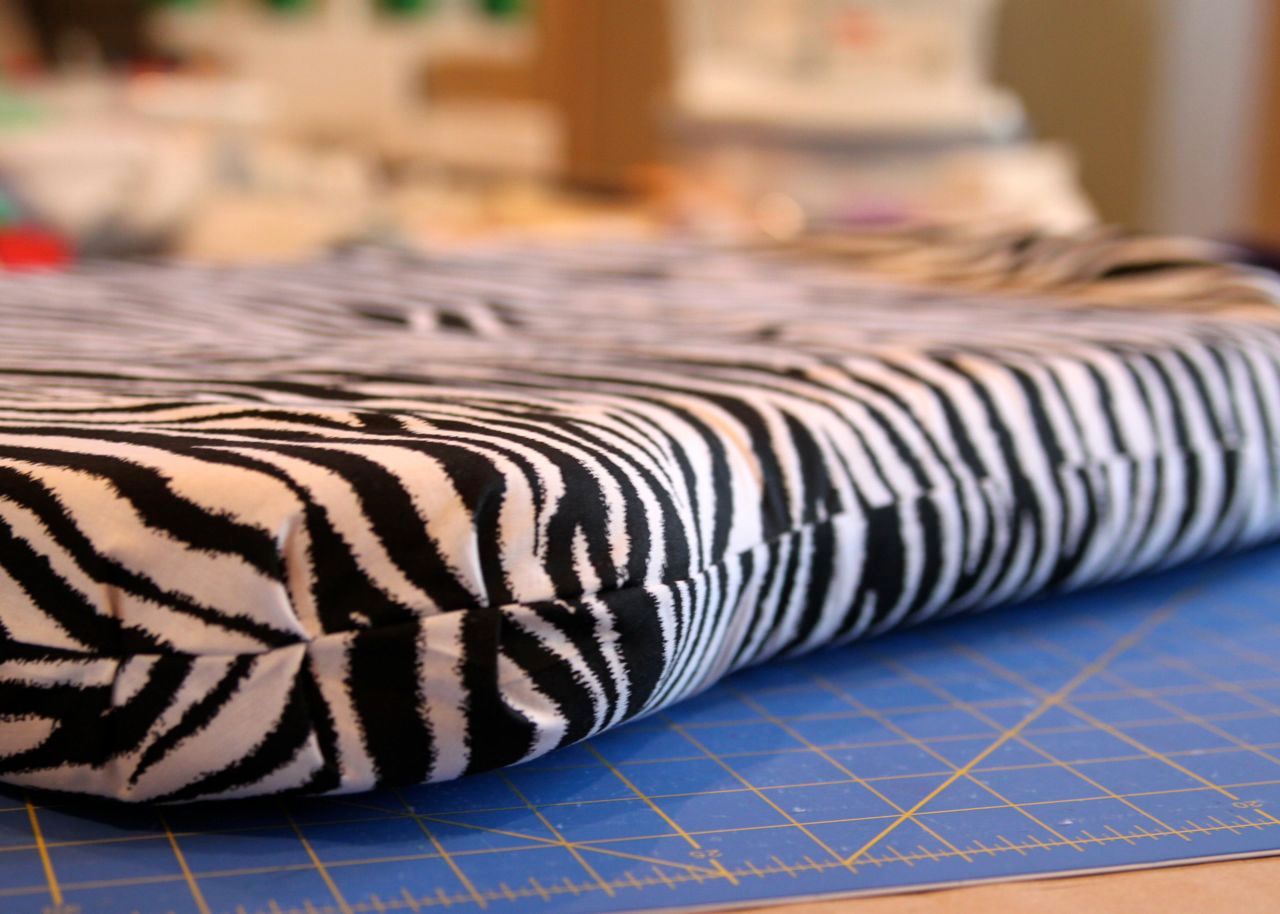
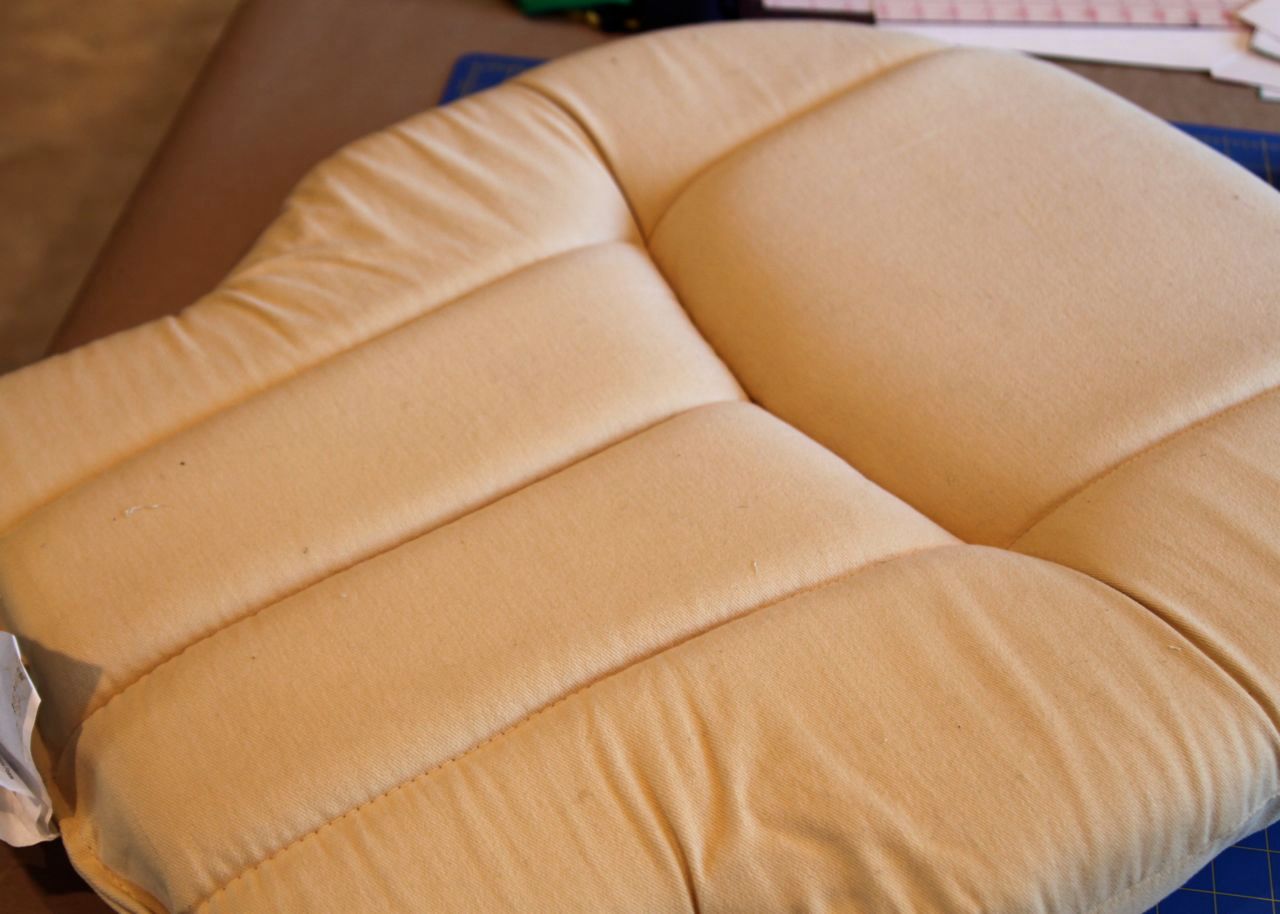
Here is the finished bottom cushion turned right side out:
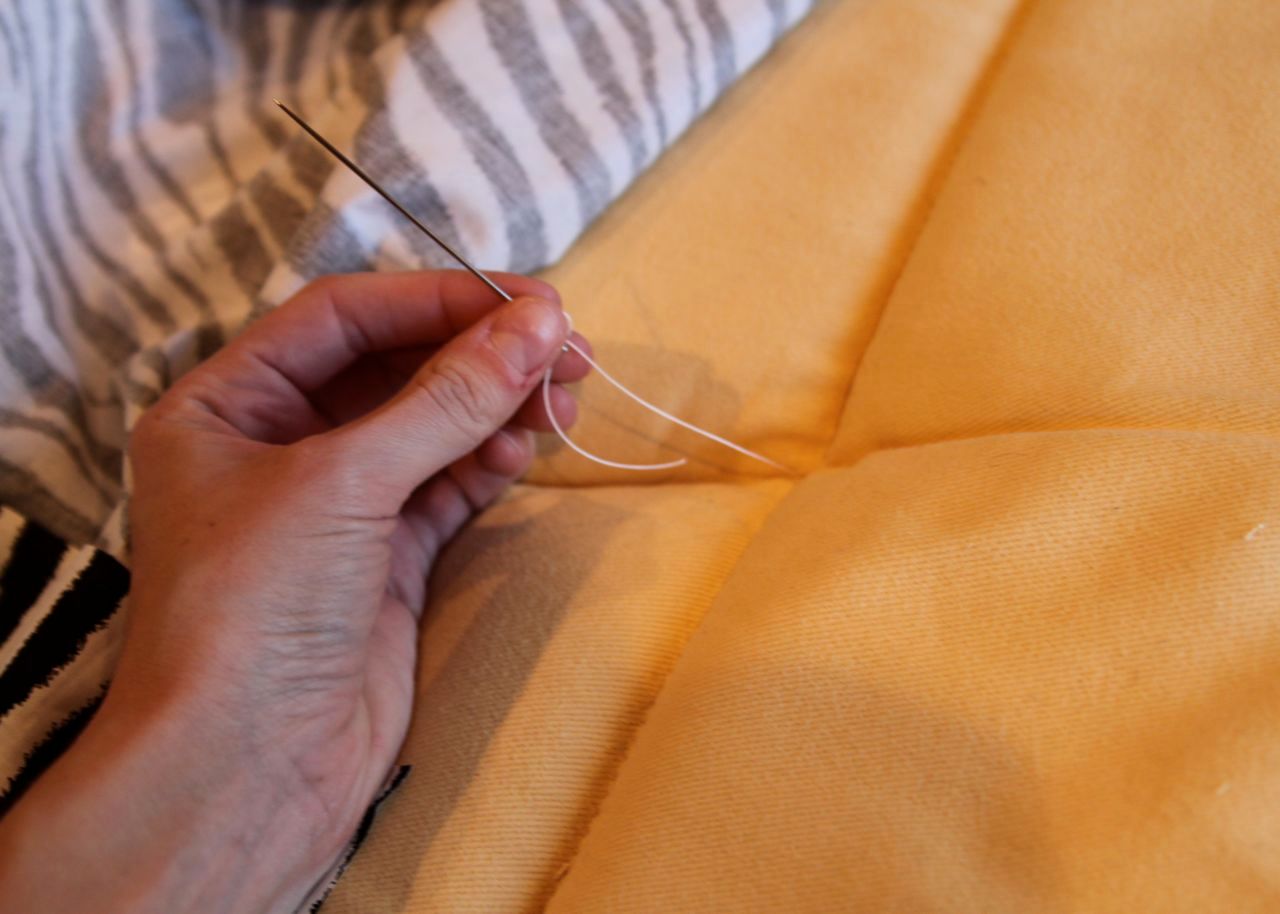
To close the backside of the cushion...
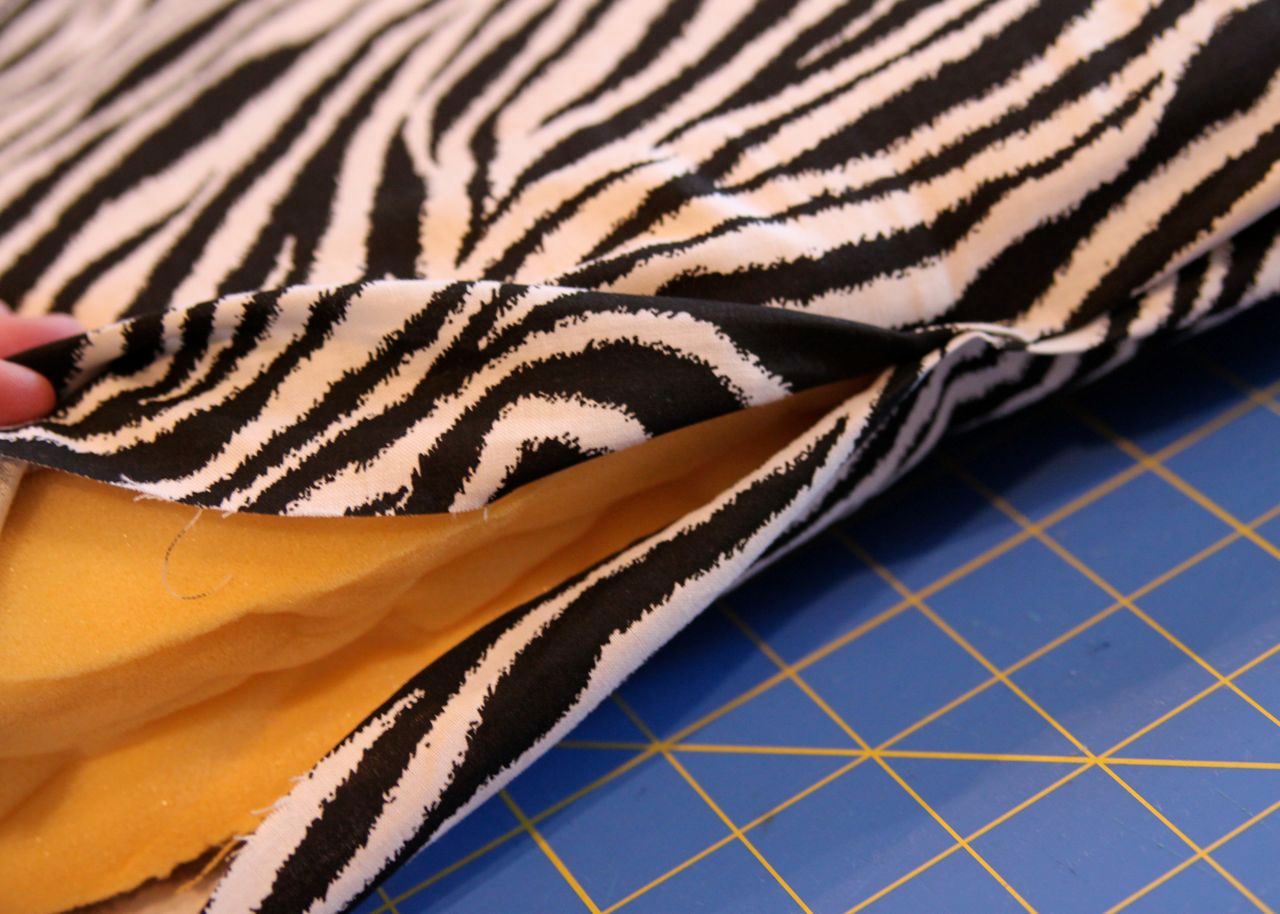
......I turned the edges inward on the backside of the cushion, pinned the together and used a blind stitch to close.
Some cushions are made of multiple pieces and are slightly more difficult....but if you break the cushions down into pieces you can easy recover them as well. Just approach each cushion as its own project!
You can see how this one had two pieces:
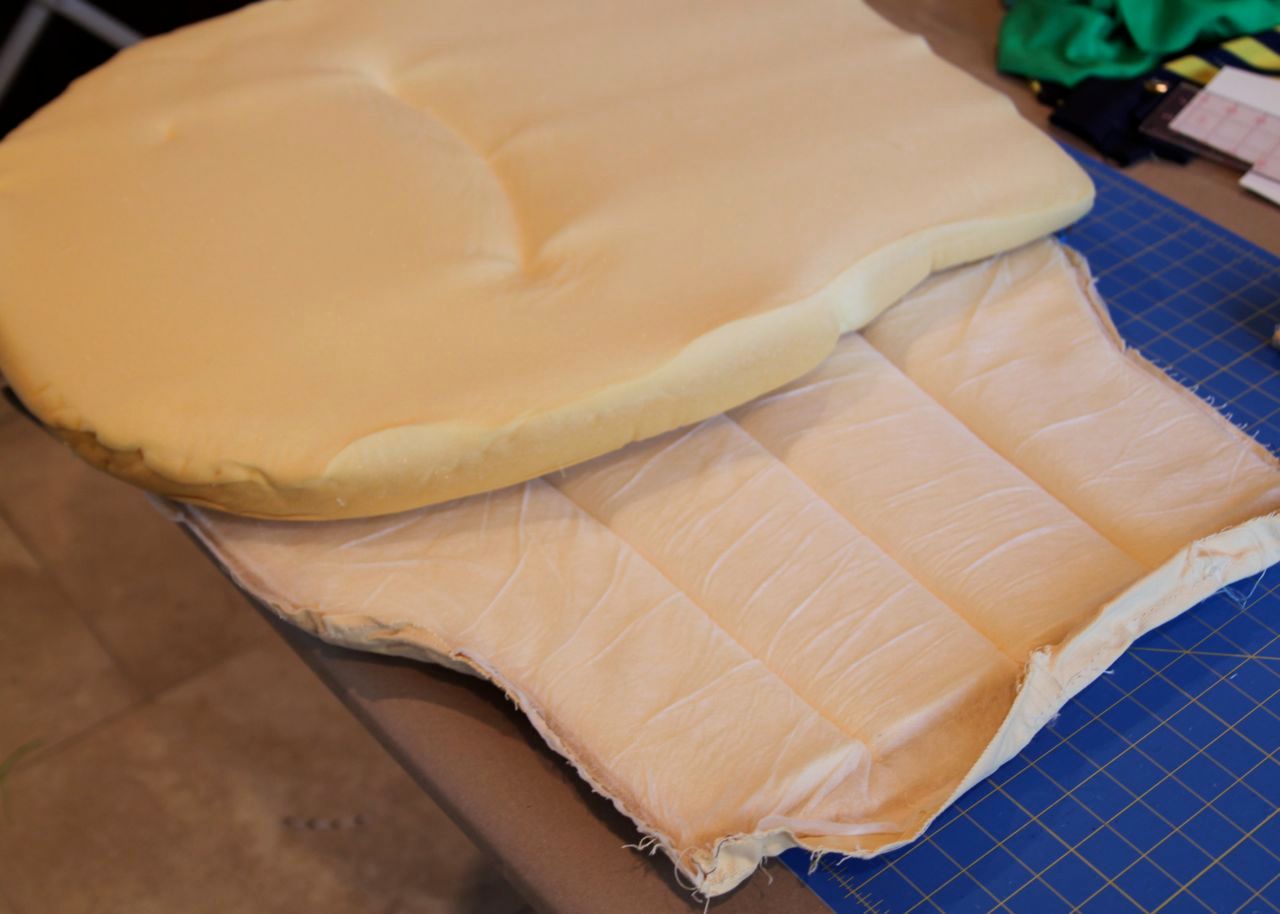
I left the cover on the top piece (the piece with all the fancy stitching):
I simply stitched any indentations into the cover.....

......by just adding a stitch through the new fabric and straight through the foam, knotting the thread in the back of the cushion.
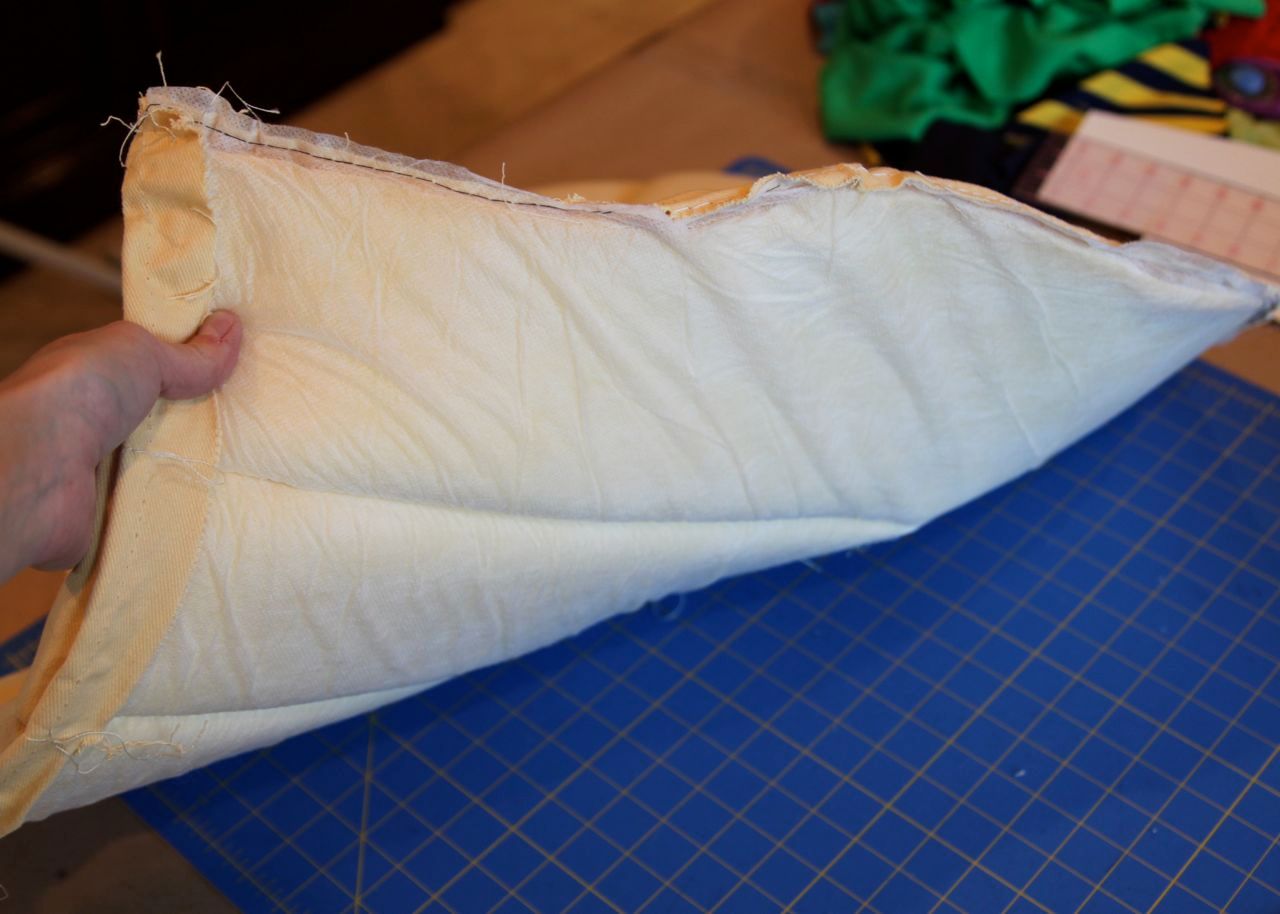
Here you can see the stitched indentations. Then I basted the edges of the zebra fabric to the edges of the original cushion cover using a needle and thread.

I laid the 2nd piece of the cushion cover on top of the one just finished.......
........and pinned the edges together.
Then I carefully sewed the edges together (a little awkward with the thinner cushion attached....but go slowly and it works fine).
Turned the pieces right side out and then inserted the other foam piece.
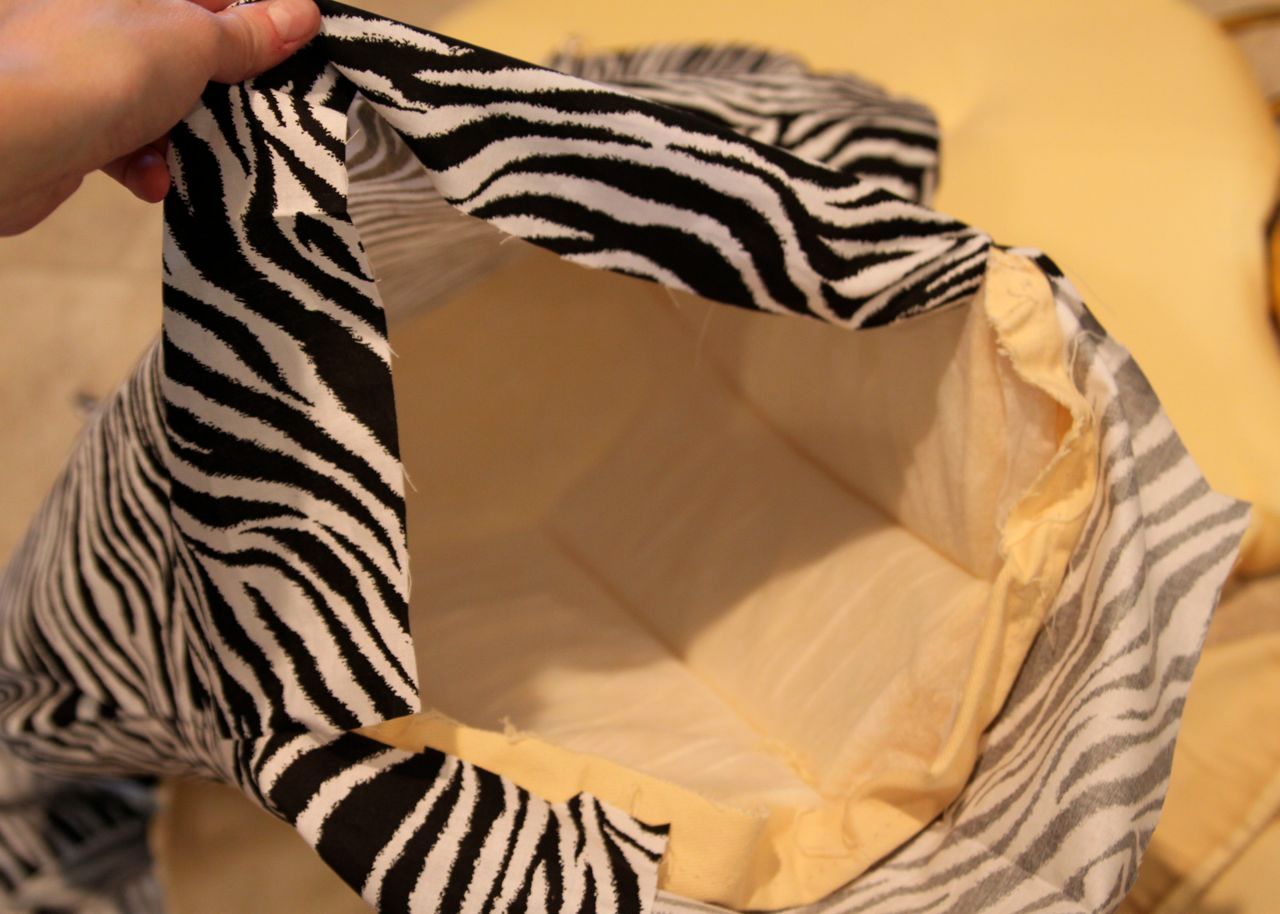
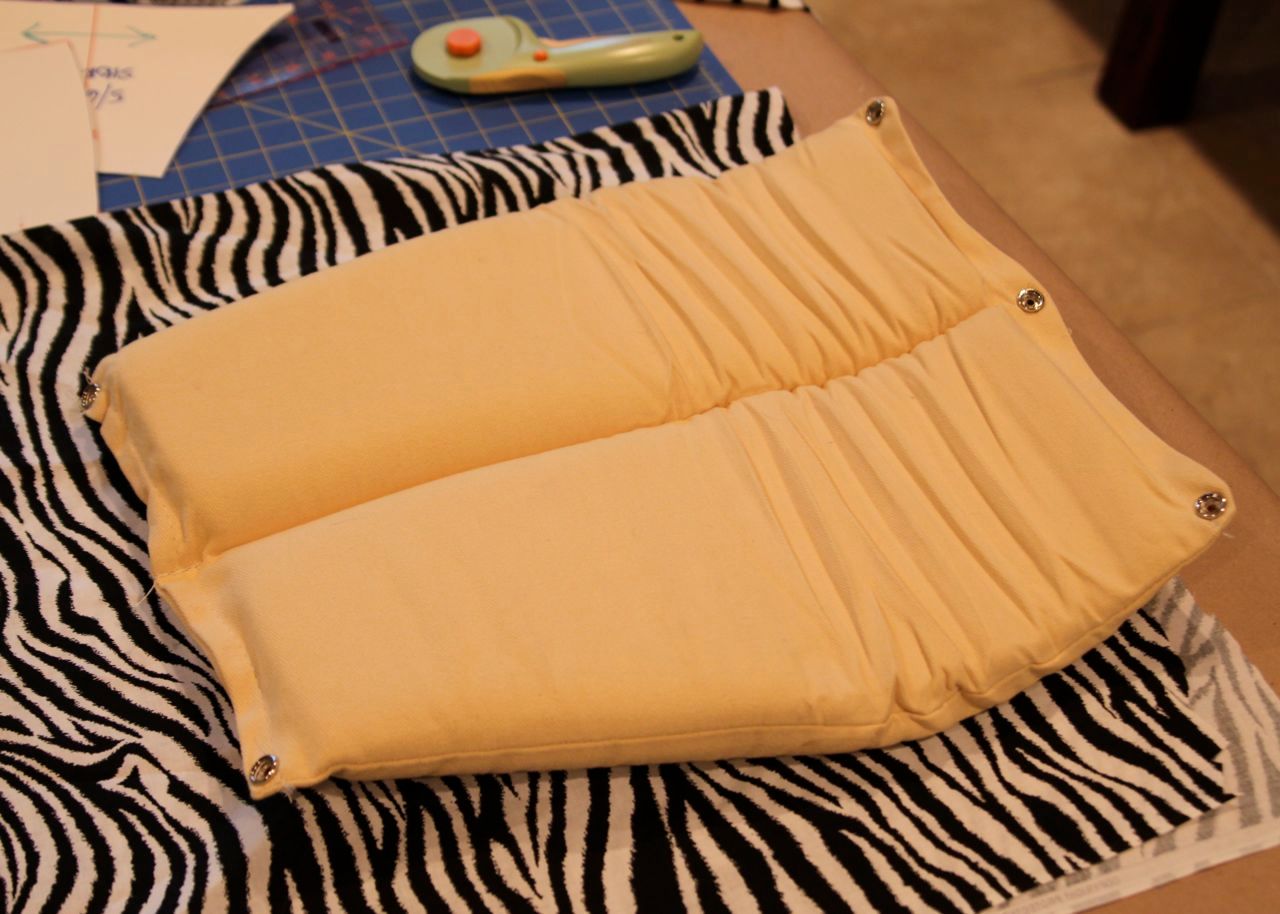
I didn't want to have to buy new hardware for the straps that attach the cushion to the chair....so I made tiny sleeves for them....
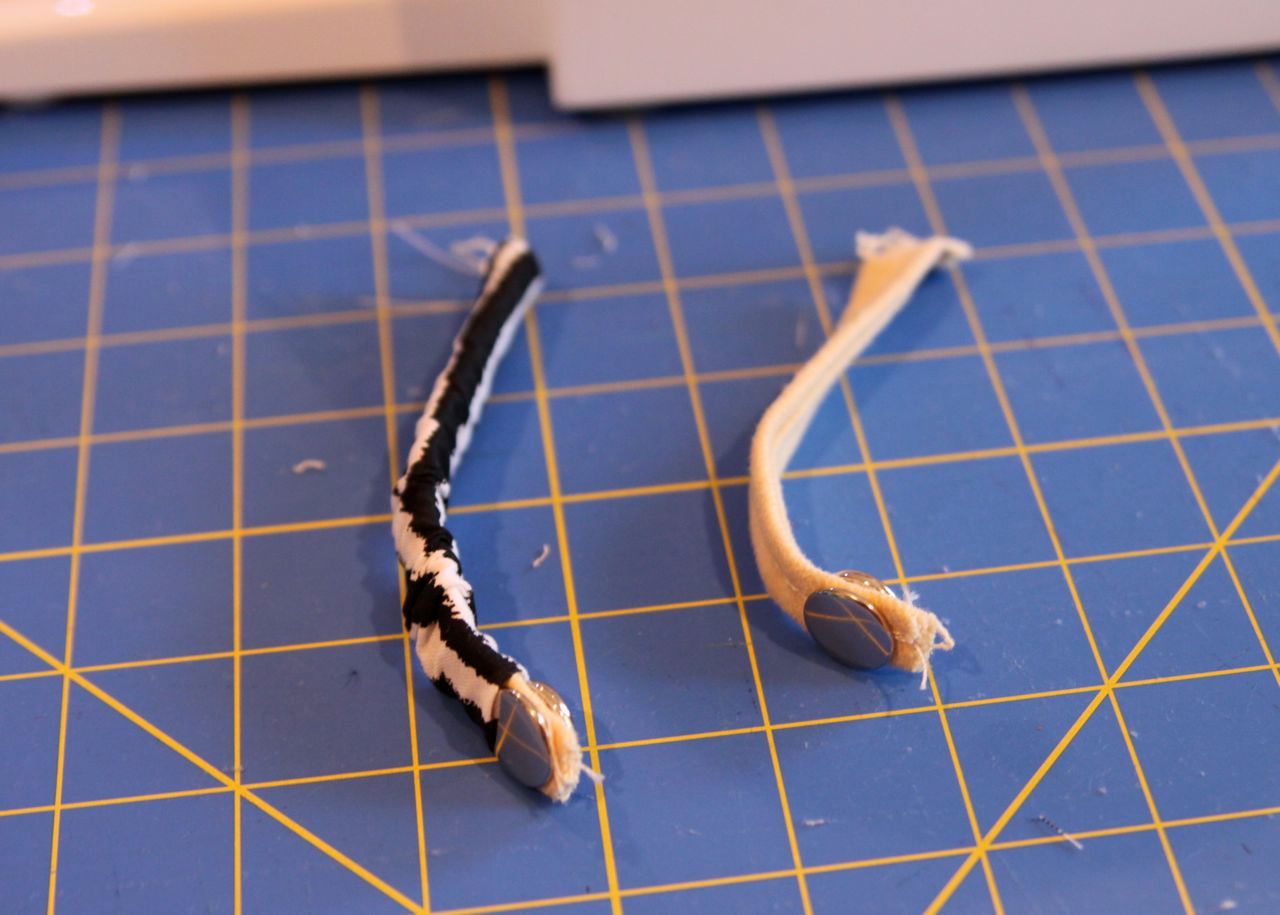
....and opened up a small area on the back of the cushion with a seam ripper to slide each strap into place and then resewed the cushion shut.
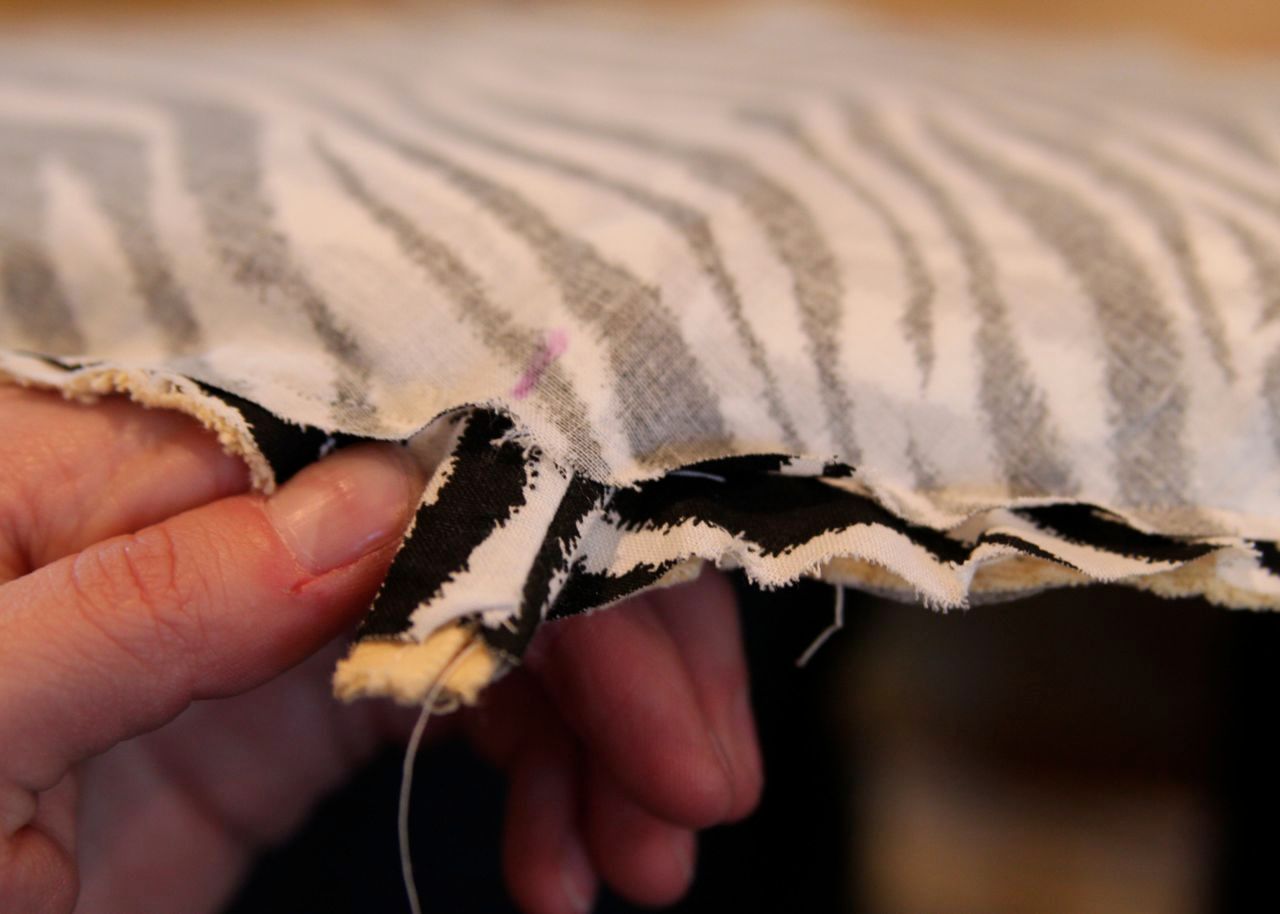
For these side pieces, I didn't want to mess with the hardware either, so I made slipcovers for them. I just traced the pieces, added seam allowance.....
....and then stitched the sides together. I just serged the ends to finish since they were hidden once attached to the chair.

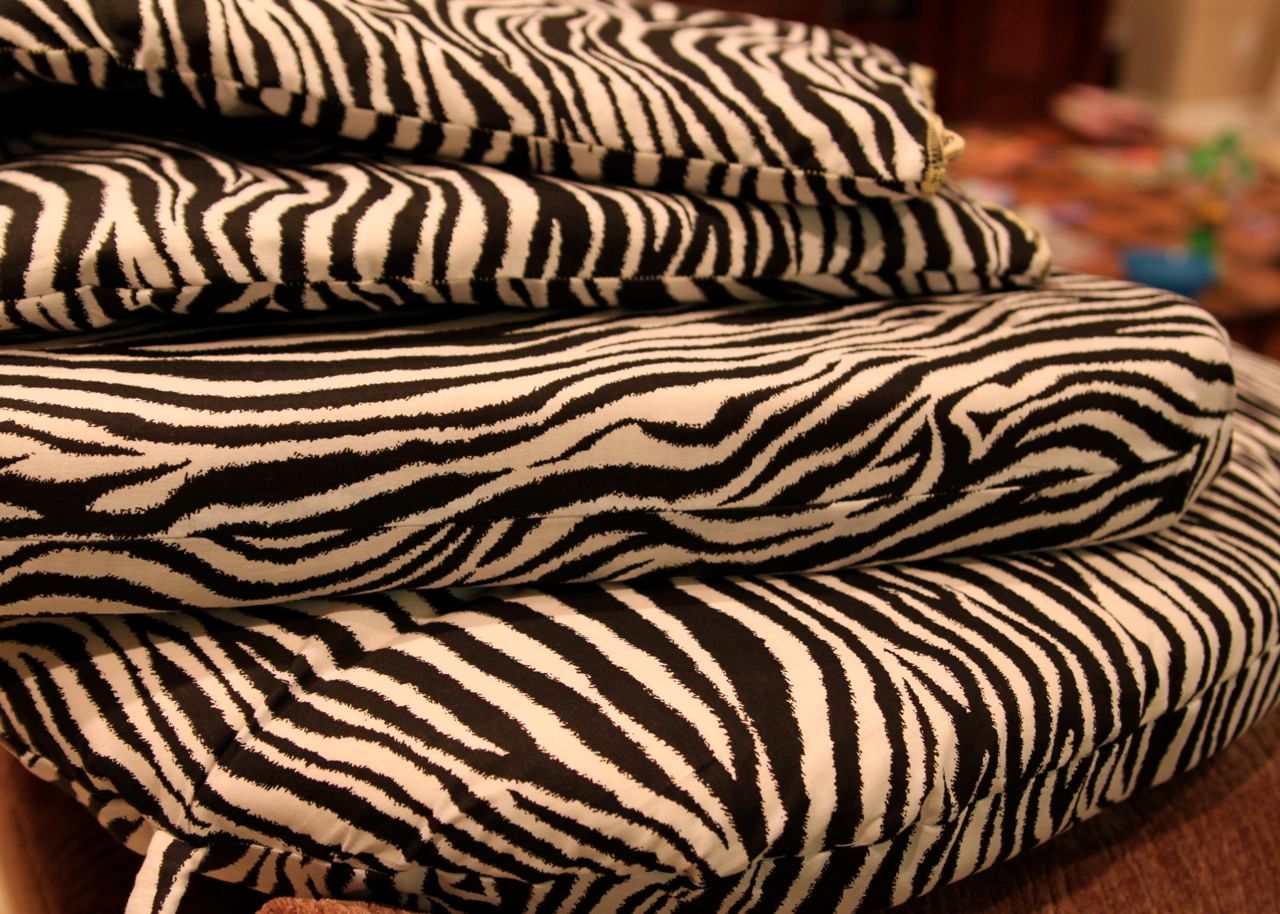
Finished cushions! Better than new because they were custom!
Perfectly coordinated nursery:
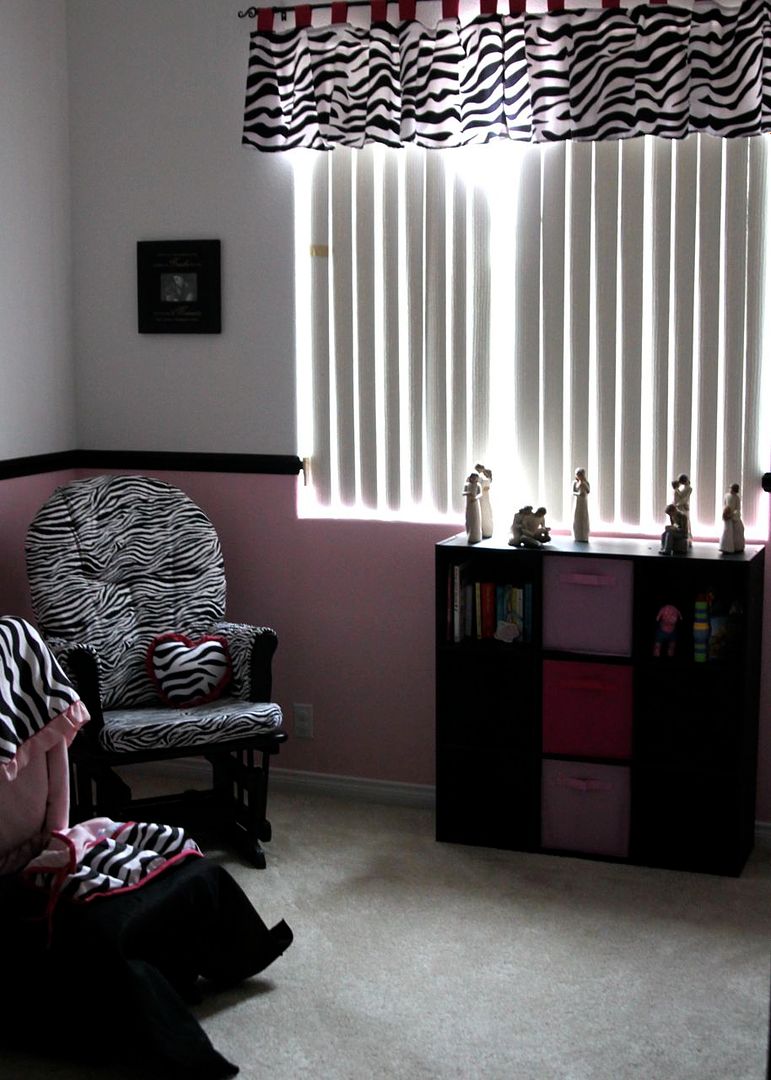
Even the name painting I made my sweet niece Cari before she was born matches!

What an adorable room!
ReplyDeleteWhat an amazingly timely tutorial! I just spent a half hour scrubbing chocolate out of my beige rocking chair cover (looks just like the one you did). Time to recover--they shouldn't make rocking chairs in light colors. Thanks!
ReplyDeleteYou are brilliant! Thank you so much. I have been trying to wrap my brain around attempting something like this. Thank you!!
ReplyDeleteI always thought you were a little bit crazy, now I know you are a lot crazy ;) haha! JK! But seriously, the time and dedication to doing it and photographing it...well, just plain amazing!!! You ROCK!
ReplyDeletehow so pretty...you're reminding me of when my parents got me a wicker relaxing chair for my room (aged 21 - loooong time ago!) i then did new covers to match my curtain, duvet cover etc. the same chair has now moved with me to my marital home and soon i will be revaming the cushions AGAIN to match the childrens room,as that is our next imminent project! hopefully the kids will love it as much as i did!
ReplyDeletebecky
How beautiful that turned out! My mom and I used the same method to recover a $10 chair for my first apartment. If you have someone to work with it makes the job lots of fun! I hope your SIL loves her refashioned room :)
ReplyDeleteMy dream nursery! Great Job Ash! Super and amazing!
ReplyDeleteHow long did this take you total? My grandma's Birthday is Feb 14th and I think it would be an awesome gift for her if I redid her rocker. She has one similar to your sister's. Is that just regular cotton fabric or special upholstery fabric?
ReplyDeleteThis comment has been removed by the author.
ReplyDeleteAmaaaaazzzzing! Have been thinking about doing this myself with cushions for our rattan chairs and trying to figure it out in my head. Thank you soooo much for sharing this tutorial--it is sooo helpful. You are so amazing and generous to share your creativity with us. That room looks fabulous! Thanks again! :)
ReplyDeleteThat's gorgeous! What a lucky SIL. Thanks so much for sharing the process with us, I'll be linking.
ReplyDeleteYou rock!
ReplyDeletetime to hit up the fabric store? Yes indeed.
ReplyDeleteCrystal, it took me about 3 to 4 hours....wasn't too bad!
ReplyDeleteFantastic! It looks gorgeous!
ReplyDeleteThese kind of projects intimidate me sometimes, but I think the end result looks to be well worth the effort. Great job! This summer I'm going to be doing something similar when I make new couch cushion covers for my mother-in-law. :)
ReplyDeleteHoly stinking cute!!! that painting is AWESOME too!!!!
ReplyDeleteWhat a fab and funky room. The rocker looks amazing. You have inspired me to finally re-do my the seat pads on my kitchen chairs. A project long over due!
ReplyDeletegreat job! i love it!
ReplyDeleteExcellent job! I need to redo the one in my dd's room. It was one of my first sewing projects and I'm embarrassed everytime someone sees it!!
ReplyDeleteThat is amazing! I wish you were my sister-in-law. :)
ReplyDeleteThanks for the tutorial. I have a chair in mind that I'd love to redo like this.
Ashley, you never cease to impress me. Seriously. Could you please post next on how to reupholster my couch? I think I could handle the seat cushions, but I'm a little worried (freaked, actually) about the back and sides. Or, you know, you could just use my couch as an example for a tutorial or something if you want. :) Great job on the chair!
ReplyDeleteWow! This transformation makes a great statement! :) It's so bold! How fun!
ReplyDeleteWow how cute!
ReplyDeleteNice job! I wish I was that focused.
ReplyDeletehow perfect1 I just adore this idea to make it so personal!
ReplyDeleteOh my love. Zebra? HOW girly and fabulous. I know I don't comment much but I LOVES YOUR SITE. Here is two chairs I redid...
ReplyDeletehttp://infarrantlycreative.blogspot.com/2009/04/big-boy-glider-remake.html
http://infarrantlycreative.blogspot.com/2008/10/from-boy-to-girl.html
Your pictures and choice of fabric blows mine out of the water!
Great detailed how-to! Super cute!
ReplyDeleteWow! You have done it again... inspirering me to try something I wouldn't have other wise.
ReplyDeletewow! so gorgeous! although i have no need anymore for a rocker chair, i may just have go on a search for a chair to re-upholster!!
ReplyDeletelove your blog!
hollie-in-bloom.blogspot.com
helen x
Awesome rocker! You make it look so simple
ReplyDeleteThis looks fabulous!! I'm lovin' the zebra print with the black paint!
ReplyDeleteI blogged your tutorial over at Craft Gossip Sewing:
http://sewing.craftgossip.com/tutorial-recover-nursery-rocker-cushions/2010/02/09/
--Anne
It looks wonderful! Thanks for the instructions - now I can attempt mine, which has migrated to the living room and really needs freshening up.
ReplyDeleteYou make it look so easy! What a great transformation!
ReplyDeleteCongratulations... This is really a professional craft and you are really practised, perfect...
ReplyDeleteThanks so much for the tutorial!!!! I have always wanted to redo the fabric on my rocker cushions but haven't had the guts to tackle it. Now that I am pregnant with my fifth I think I might give it a go! So excited to get rid of that 90s dark green floral print! :)
ReplyDeleteFab! Fab! Fab! Love this! You know I had to add this to our link luv roundup today...couldn't resist hun! http://bit.ly/d9rBZB
ReplyDeleteLove...love...love it!! I need you to come live next door to me so that I could be inspired and you could teach me your ways:)
ReplyDeleteVery cool Ashley. Who knew you did upholstery too?? Great job. Something I hope to tackle one day.
ReplyDeleteThat looks AWESOME! Great Job
ReplyDeleteHow beautiful and cool that turned out! :)
ReplyDeleteHave a nice weekend!
Oh, how I wish I could actually *successfully* do this! We just moved Leila's rocker into the baby's room and I discovered that Leila went in there and drew all over it. Not cute.
ReplyDeleteWhat a cute room!
I love this tutorial. I had planned on doing something like this for my nursery I'm doing, but I wasn't exactly sure how to go about it. Thanks for the pictures!
ReplyDeleteI linked to it on my blog:
http://thedabblingcrafter.blogspot.com
hi! this is great, thank you!! i have that exact rocker and was JUST thinking about recovering it last week. perfect! quick question, how mnay yards of fabric did it take? thanks!
ReplyDeleteHallelujah! I was googling this exactly and found your tutorial link on another blog. I have a customer who sent me her cushions to recover and I have been dreading doing this. I don't care for these kind of orders. I have new hope! May the sewing Gods bless you! Not only so helpful but so well done. Thankyou
ReplyDeleteI'm a newcomer to your blog and I'm glad I found it. I have been hired to recover the same rocker. I have reupholstered before but I wanted to see if there was an easier way and I think you just showed me. THNX
ReplyDeleteWhat a very nice and beautiful way to use old stuff. Thanks for the photos and the tips, too!
ReplyDeletedining table
I love this SO much! Thank you for taking the time to document and post this!!!
ReplyDeleteWow! This looks great! Just wondering how much fabric was needed for this project? I have a glider in need of a redo and would like to know approx. how much fabric to buy BEFORE I rip it apart, LOL!
ReplyDeleteI have a glider that has the same color cushions. I'm in a time crunch before baby gets here...how do you think dying the cushions would work? In a big tub? Sounds like a good idea in theory...
ReplyDeleteI have a glider that has the same color cushions. I'm in a time crunch before baby gets here...how do you think dying the cushions would work? In a big tub? Sounds like a good idea in theory...
ReplyDeleteYou did a very good job on the nursery rocker! You are so patient with it by the way. I had never made something like that even if I love doing things with my hand.
ReplyDeletehardwood furniture
This comment has been removed by a blog administrator.
ReplyDelete