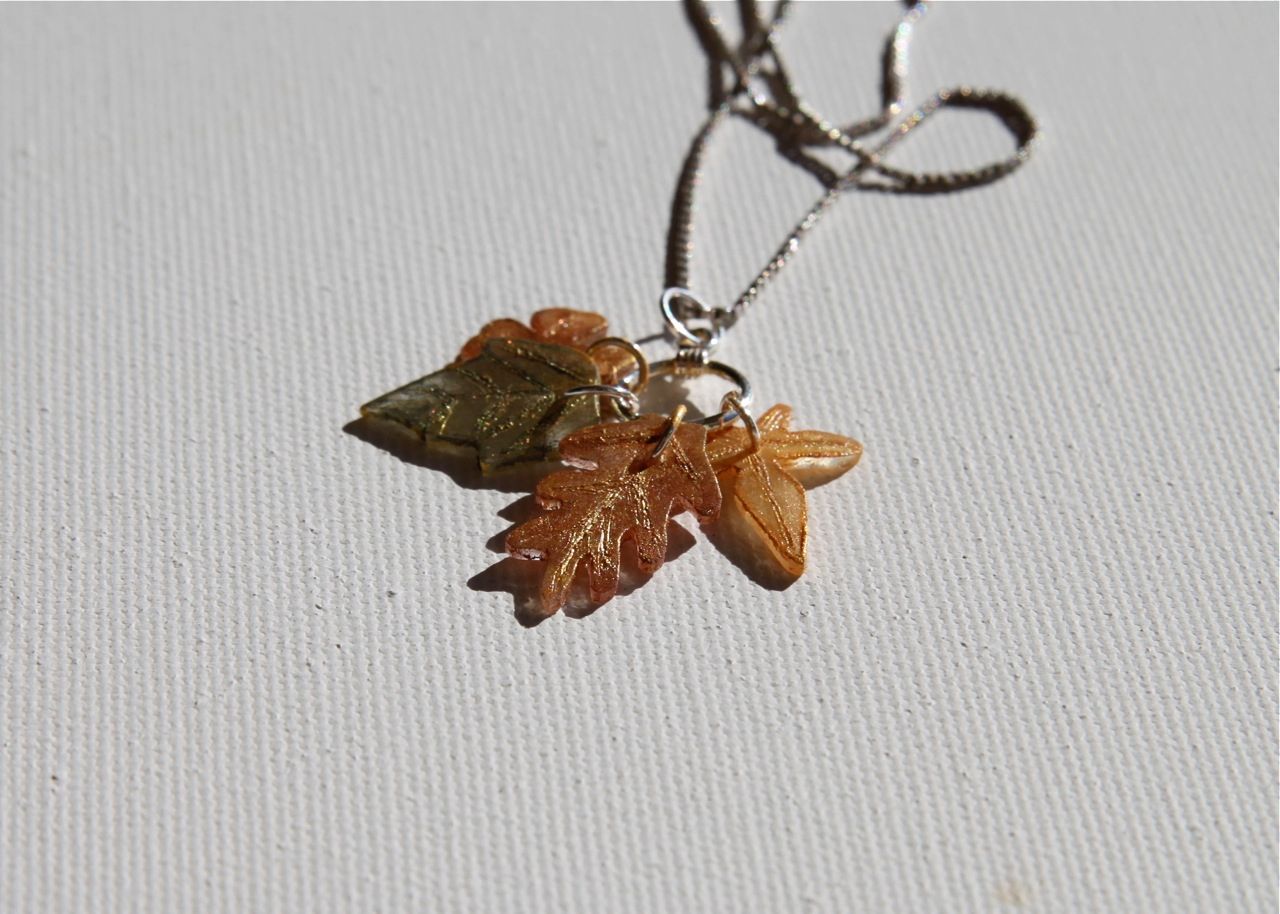
Everything is cuter when it is miniature. This “leaves” necklace is made from a bracelet “end clasp” and teeny tiny shrinky dink shapes. Each tiny leaf has been carefully cut out, hand painted, and then shrunken to its small size. Here they are on my little child manny:
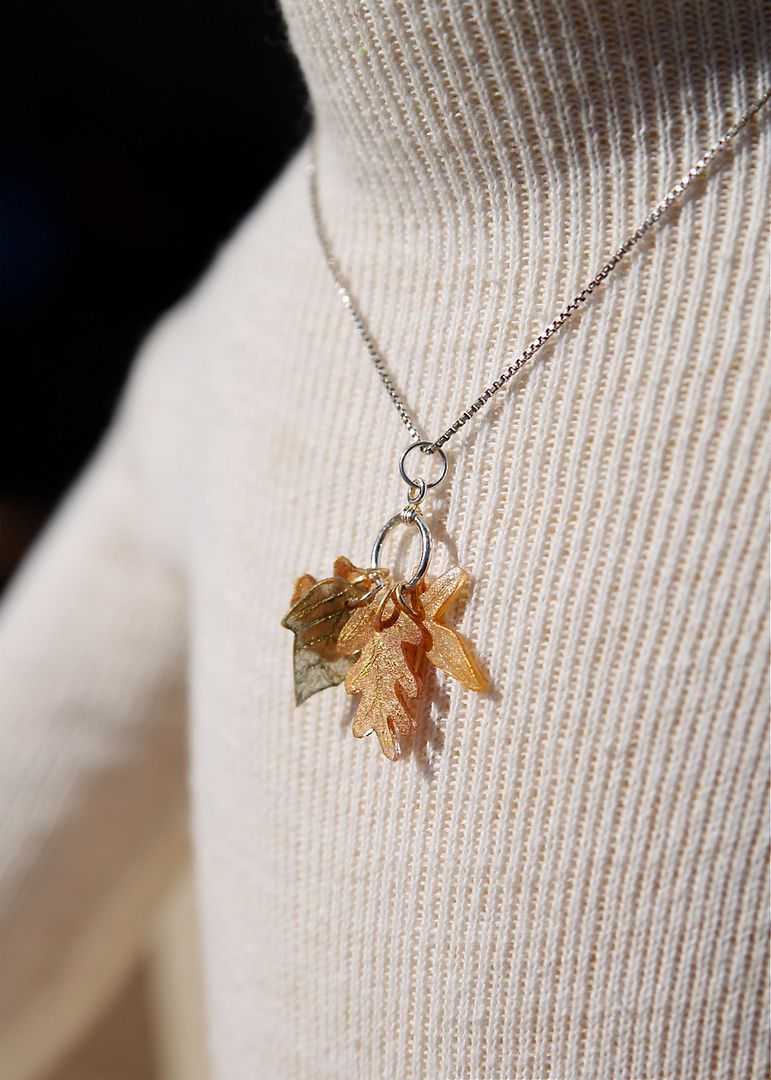
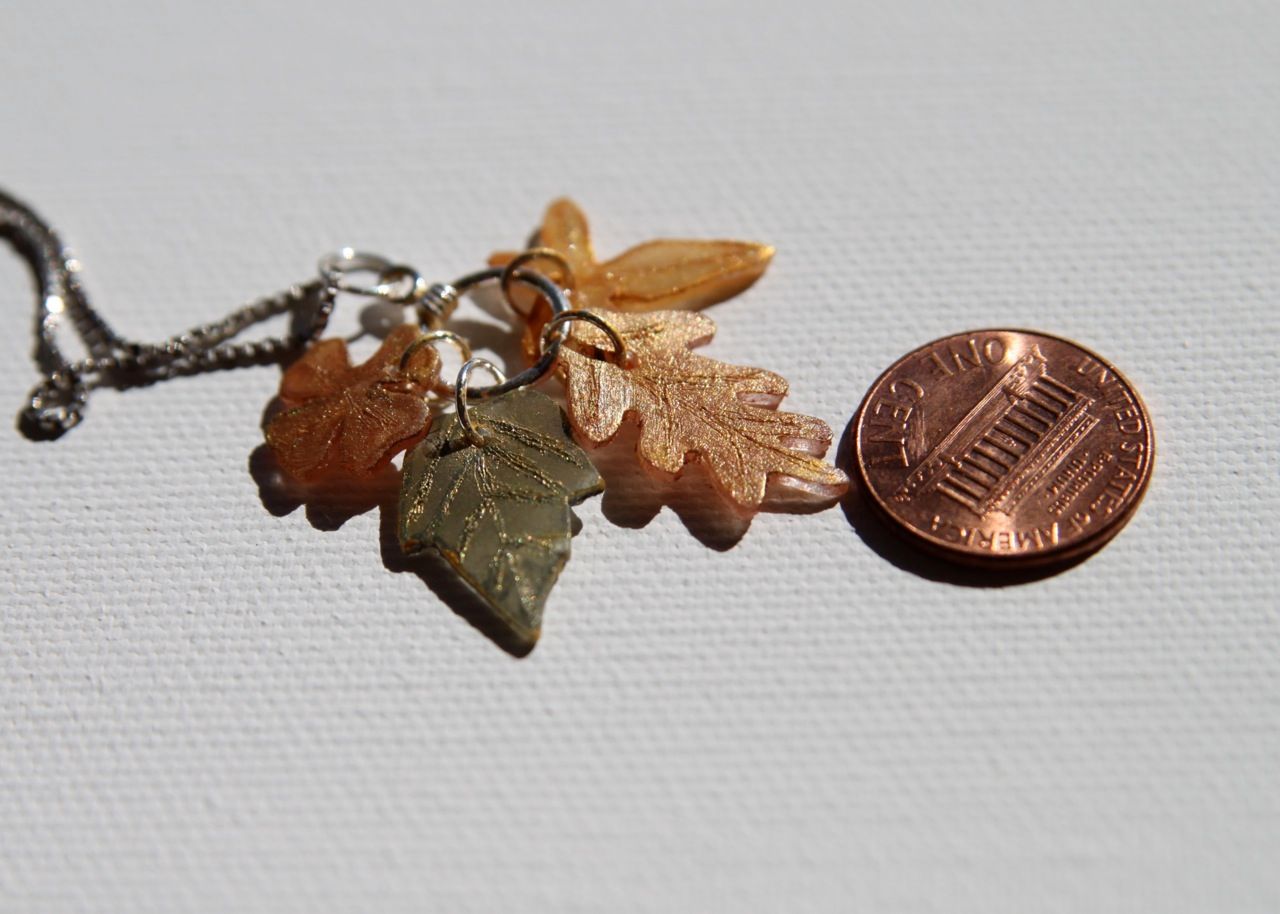
I hand-carved the little leaf veins, added jump rings and attached them all to a “charm ring” made from one end of a bracelet clasp that you can find at any craft store. Each leaf charm is less than 1/2” long.
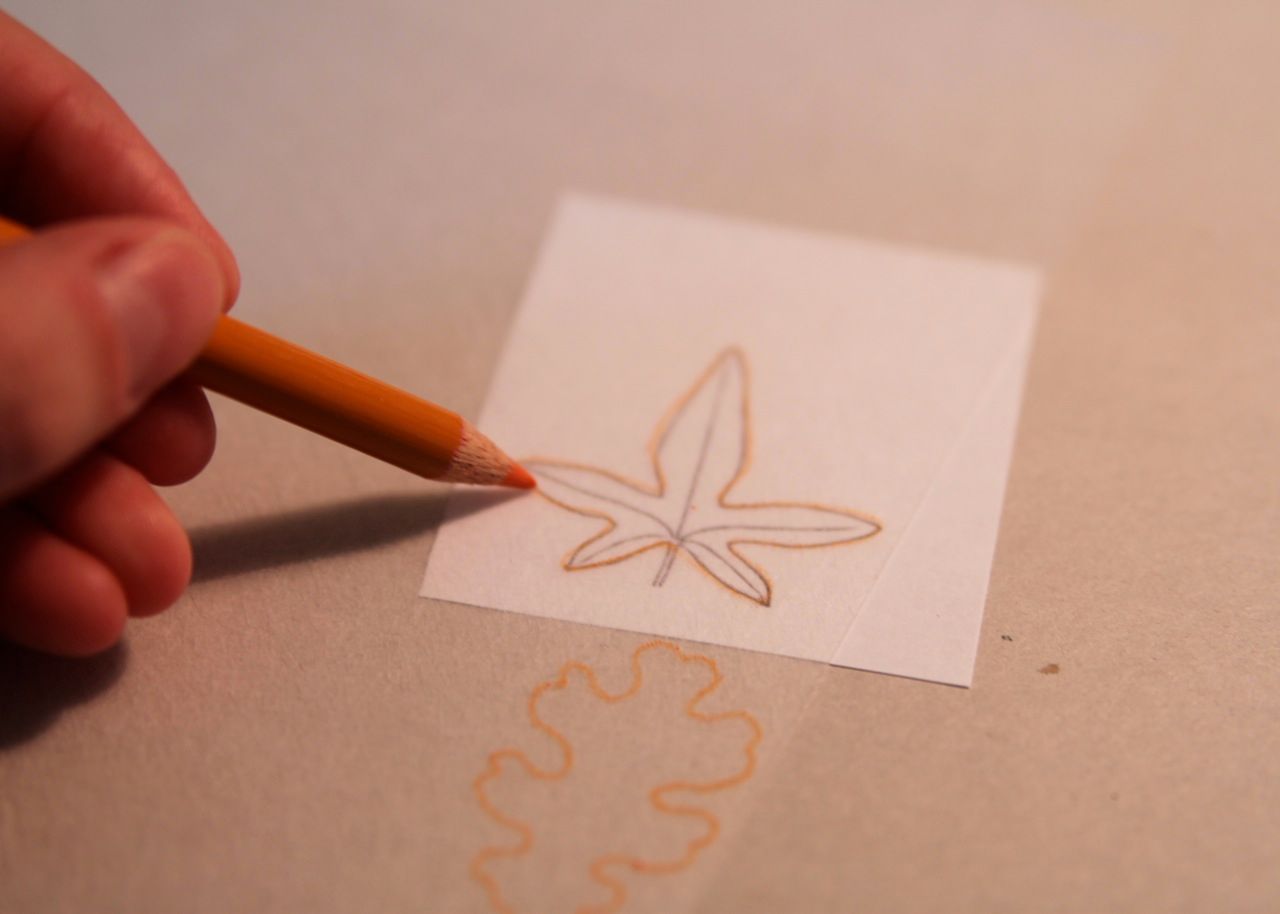
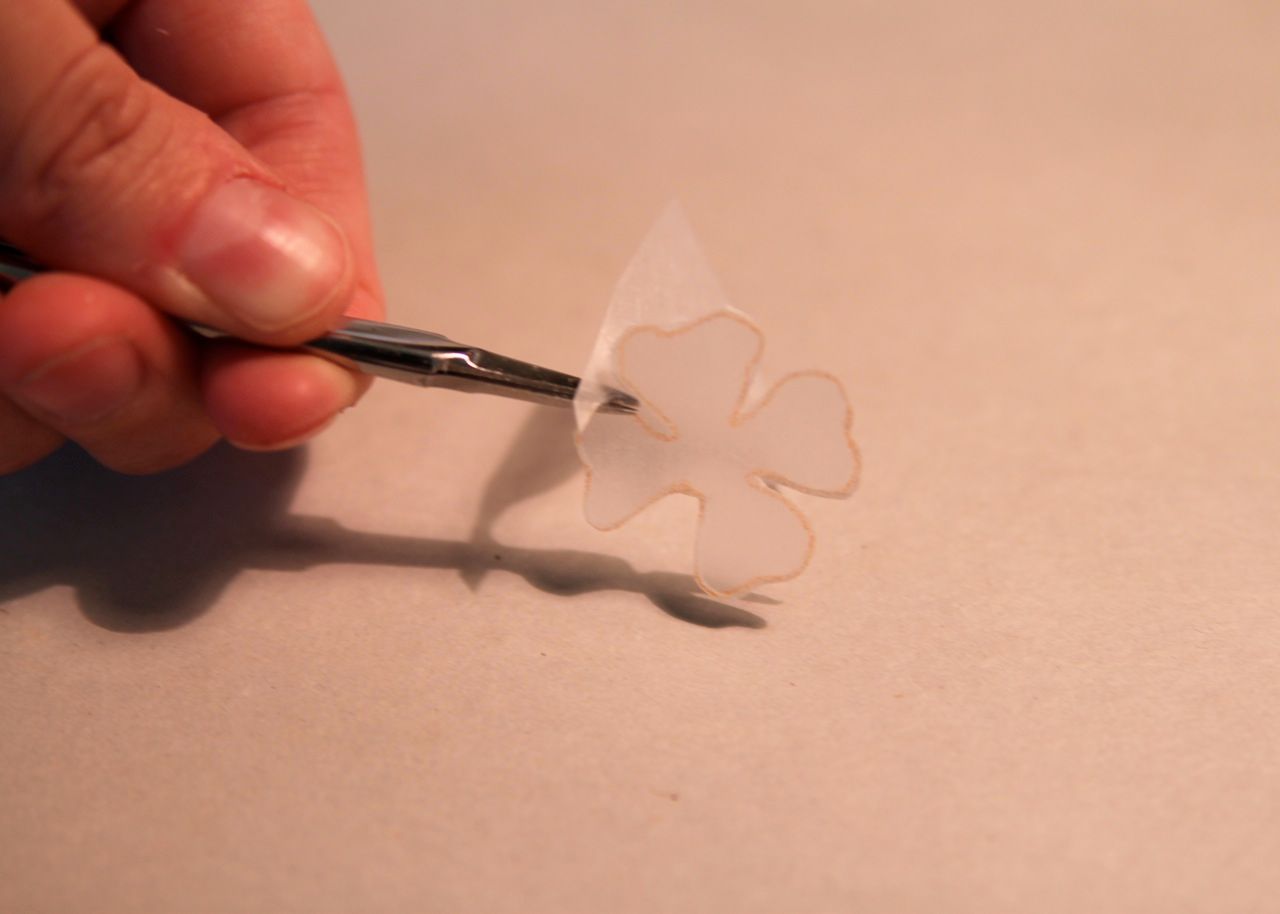
Step 1: Draw your leaf shapes onto the "rough" side of the Shrinky Dink paper using a light colored pencil.
Step 2: Score the shapes with an craft knife first.....
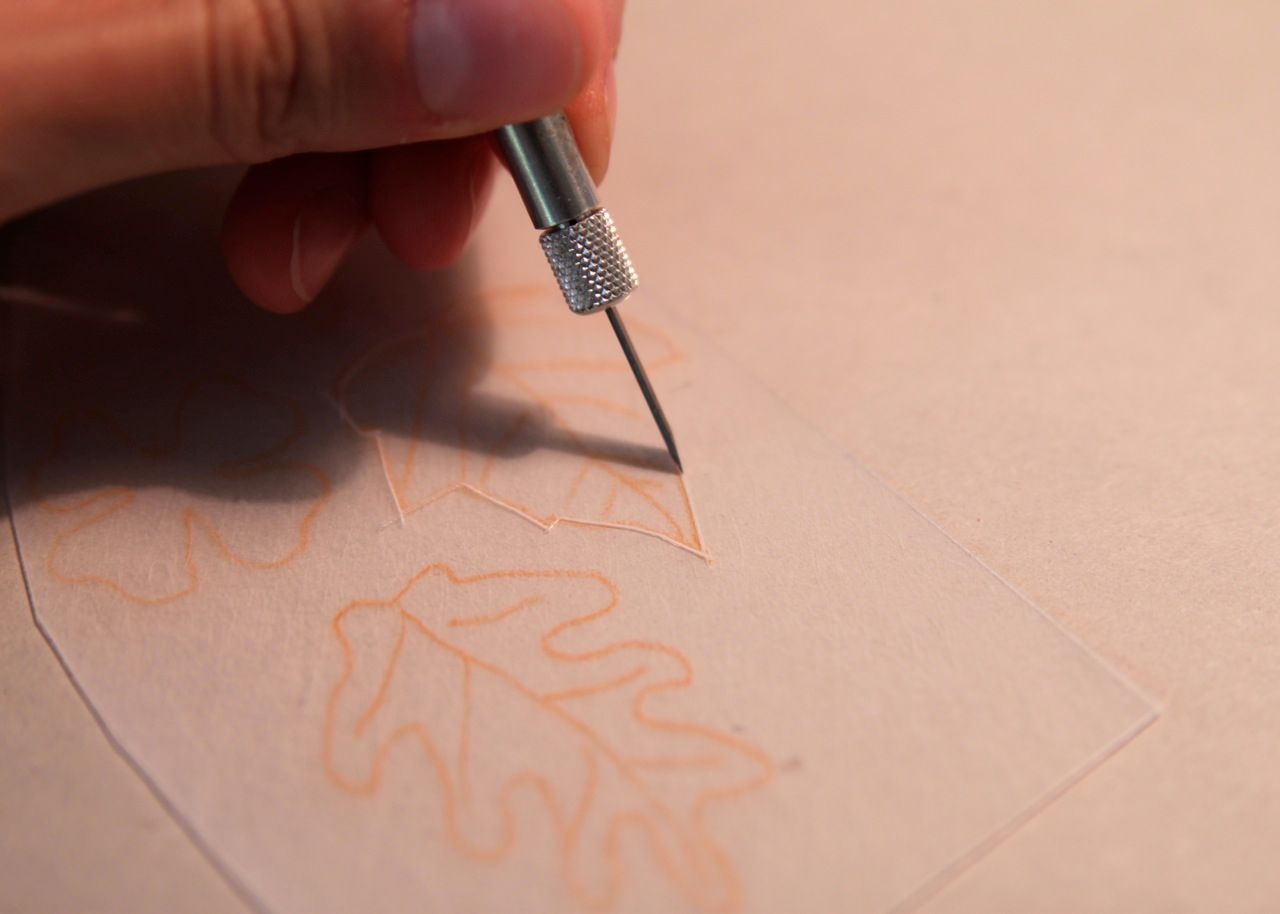
....and then carefully cut them out using detail scissors.
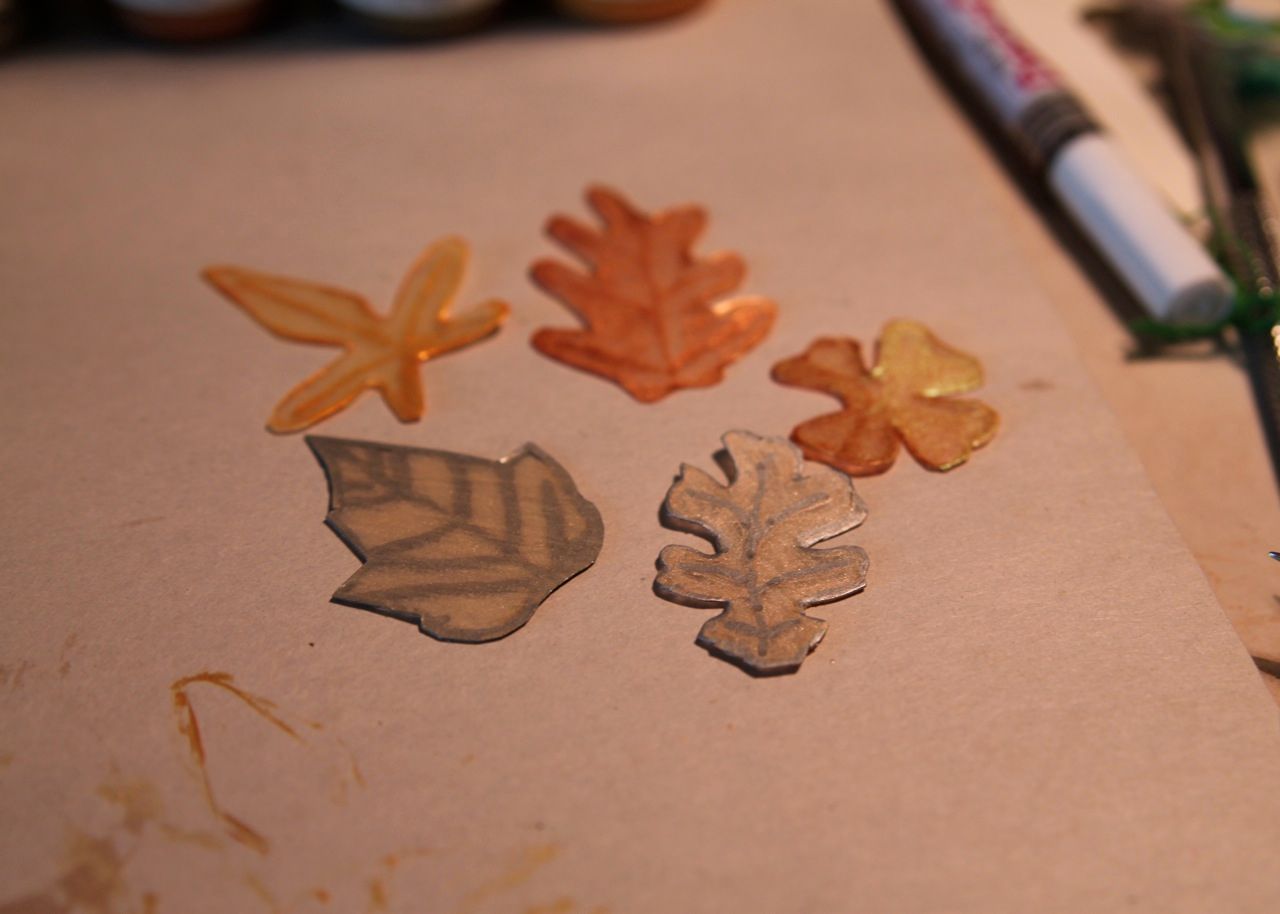
Step 3: Paint the top of the leaf shapes with a sheer coat of metallic acrylic paint and then trace the exterior edges and leaf veins with a slightly thicker coat of paint.
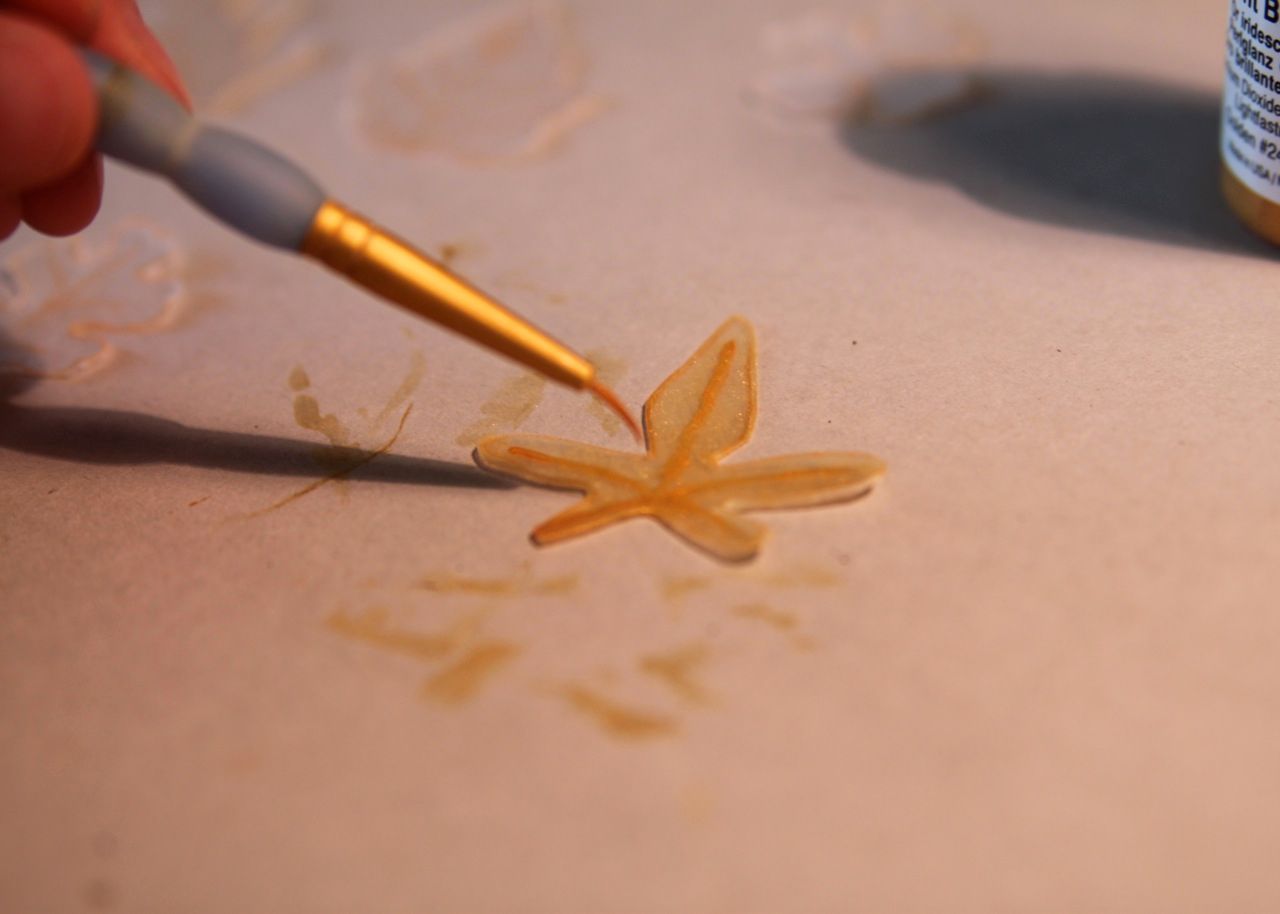
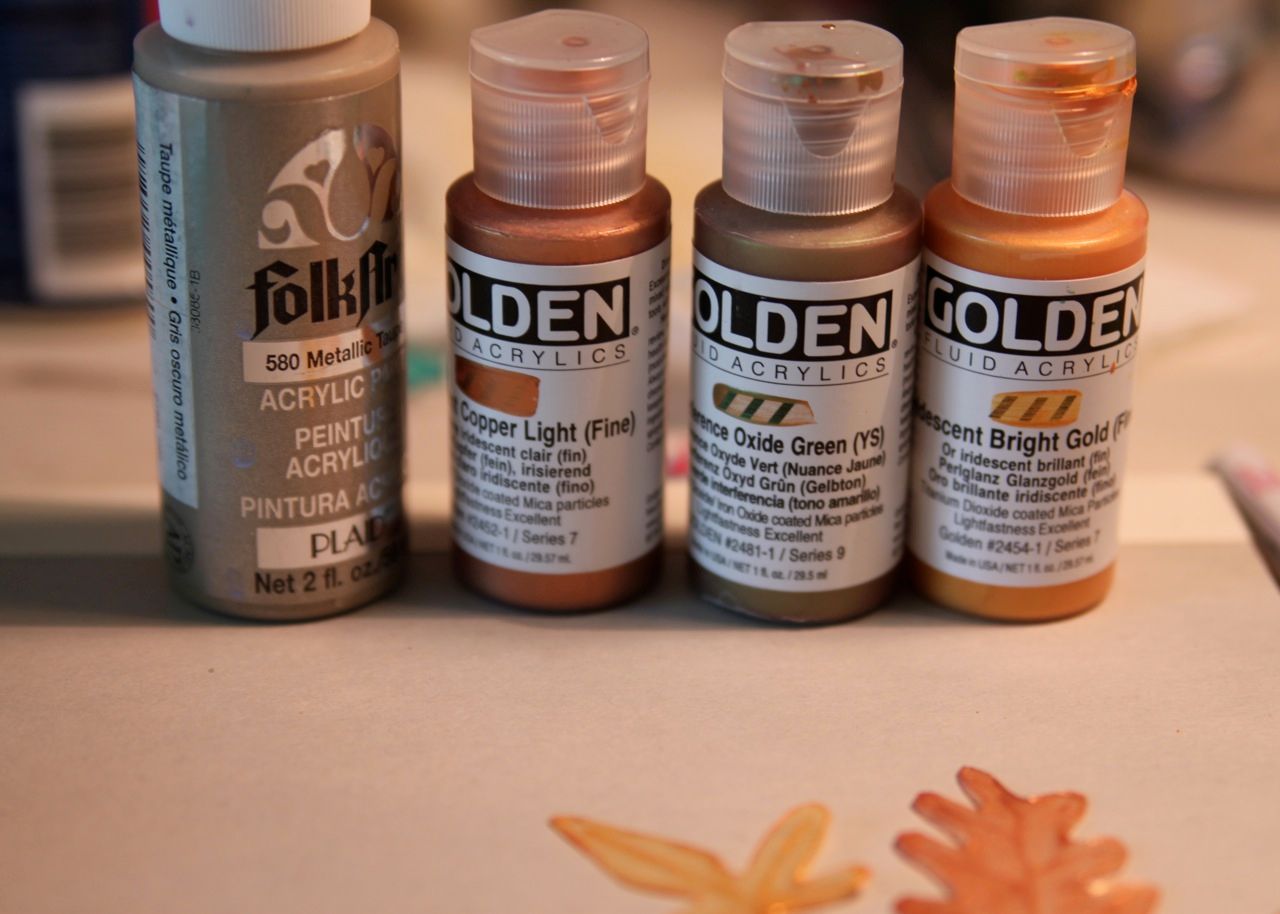
Here are the colors I used....I prefer Golden's Fluid Acrylics because they are thin, translucent and great for glazing.
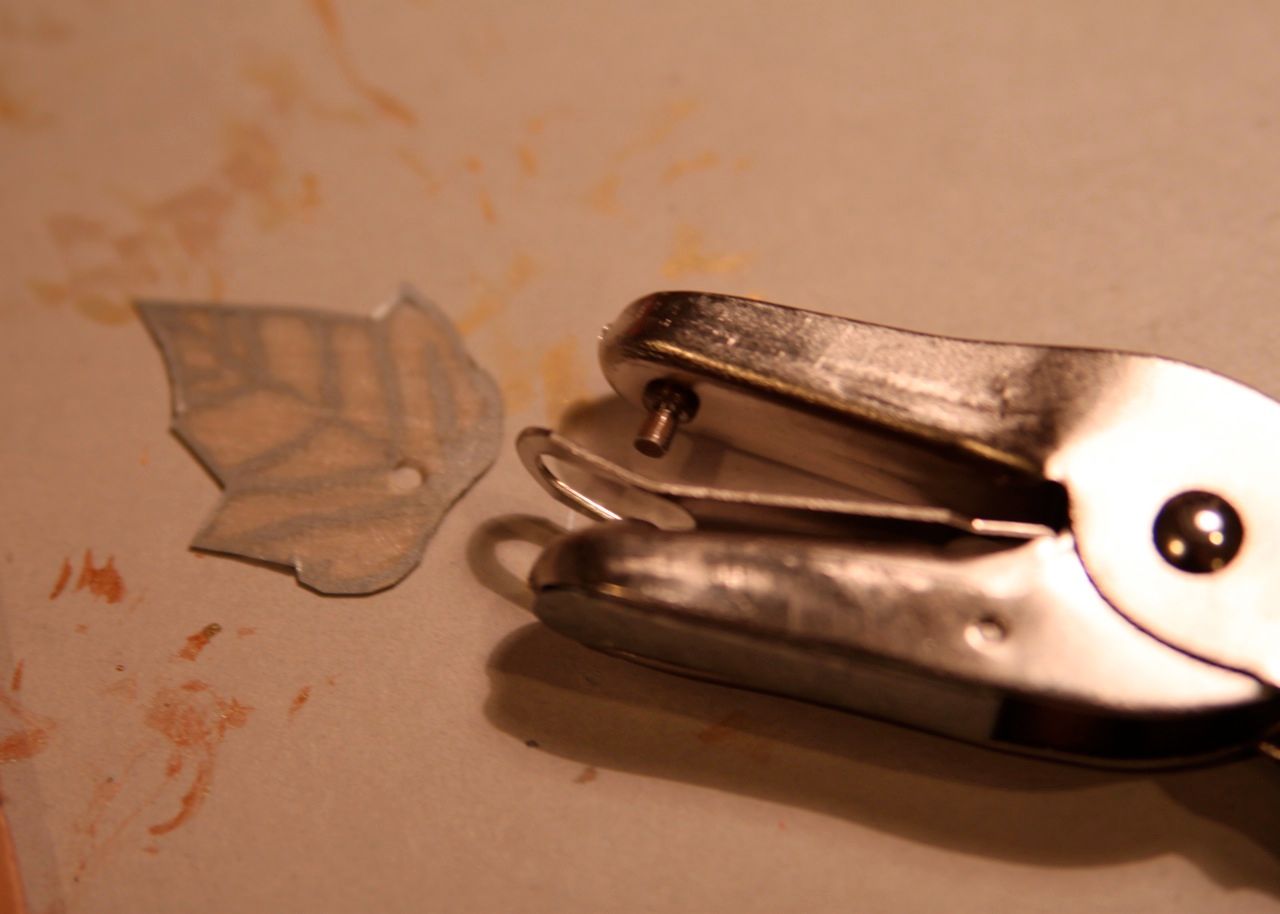
Step 4: Punch a small 1/8" hole into the top of each leaf.

Step 5 : For each leaf, glue a metal brad or nail to a thin piece of cardboard as shown below....
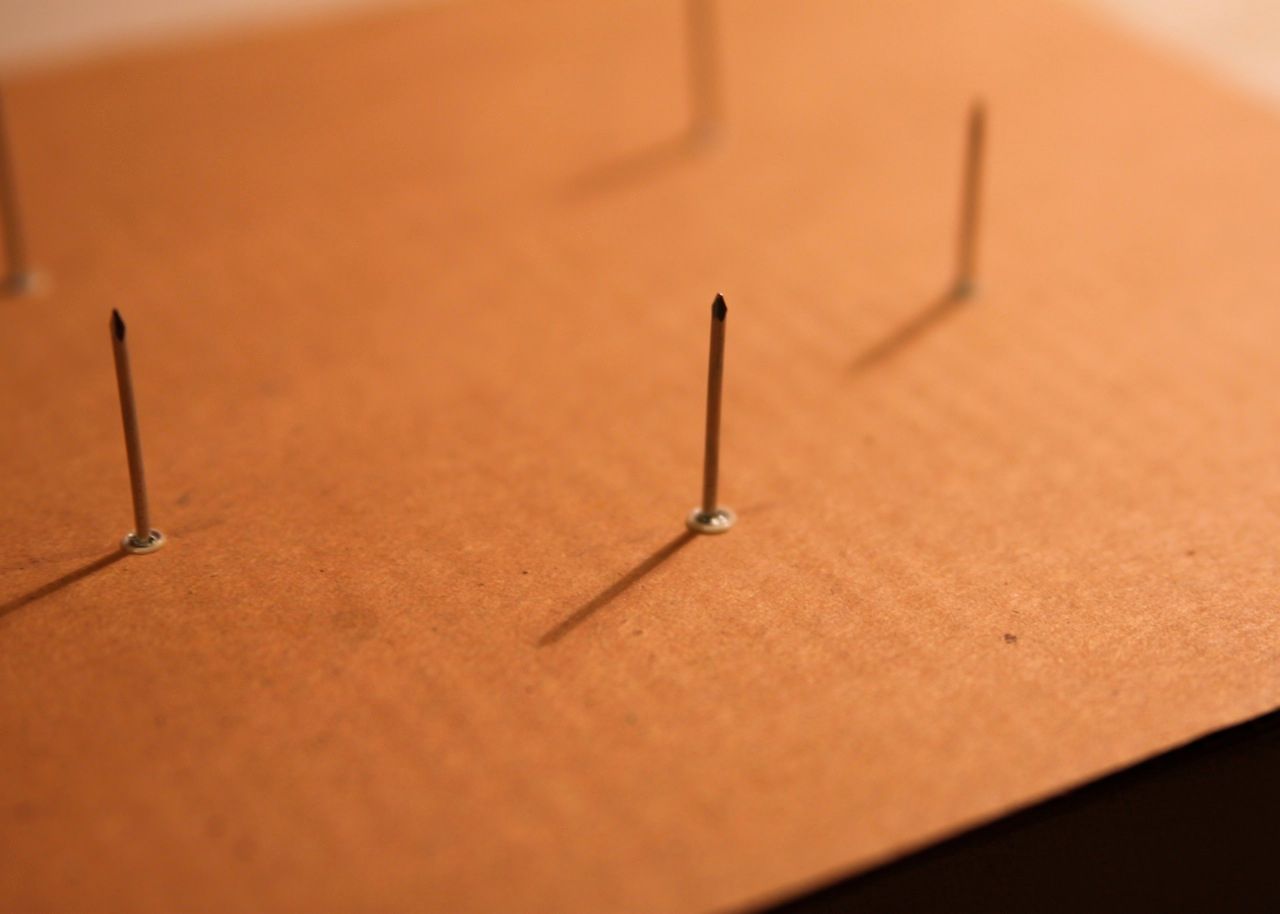
...and place one leaf on each brad/nail. The nail will keep your hole punch from closing and will allow the shrinky dink to stay flat.

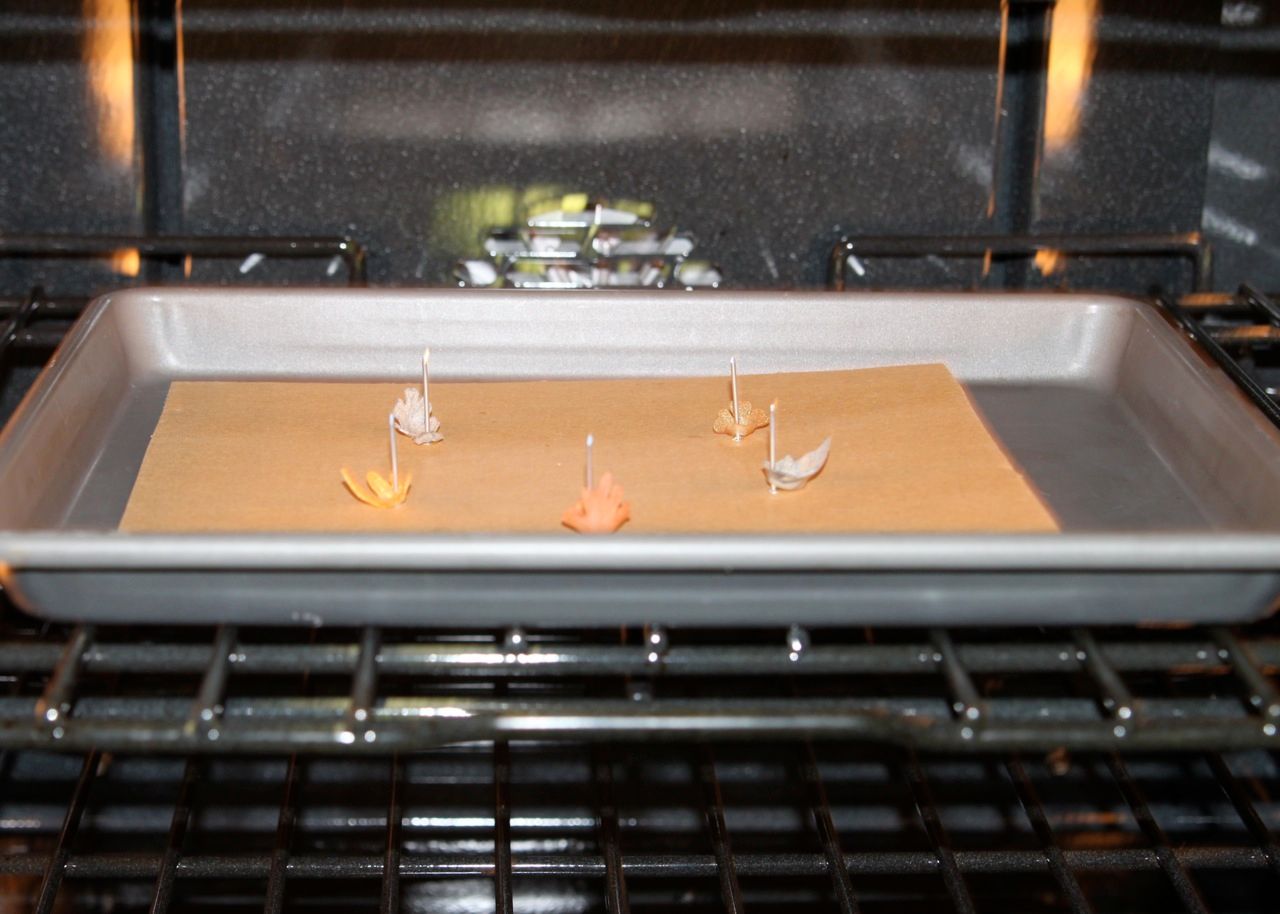
Step 6: Heat your oven to 350 degrees and place the cardboard on to a baking sheet and into the oven. The pieces will curl up and shrink around each brad/nail....and when they flatten back out you know that they are finished! Remove from the oven and allow to cool.
Step 7: Remove the nails from the leaves. The leaves will have tightened around each one so you might have to twist the nails in order to remove. The paint will thicken and you will need to lightly sand some of it off.
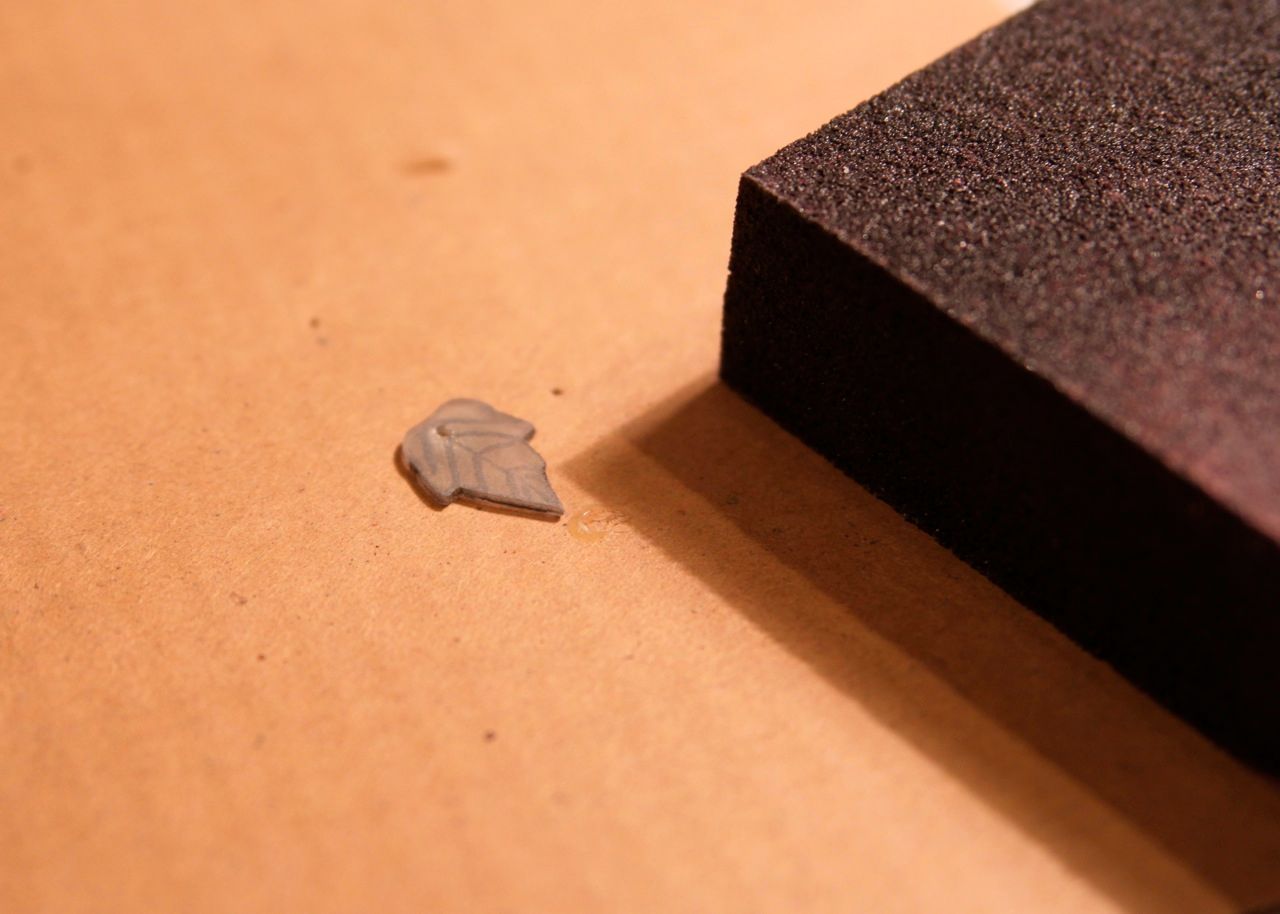
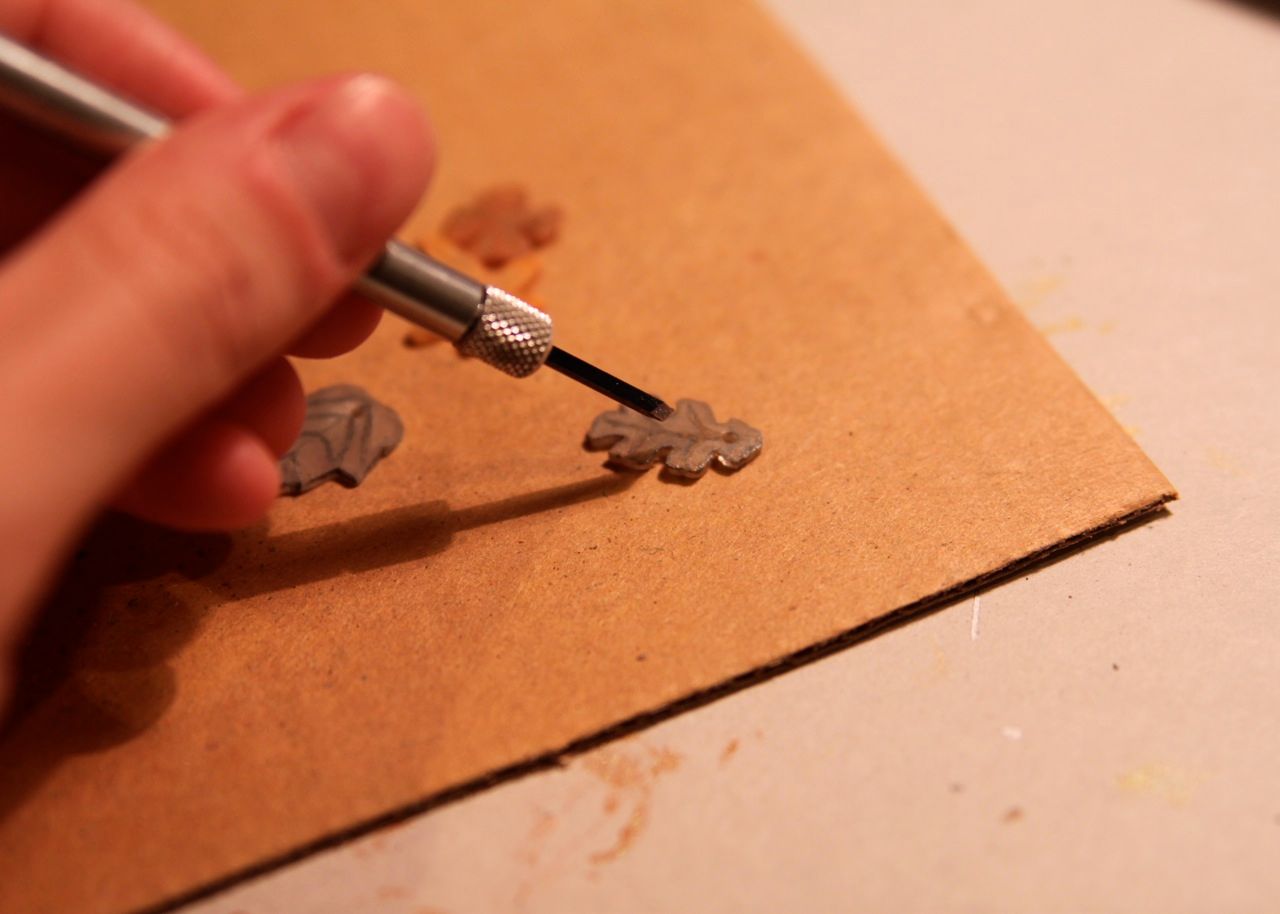
Step 8: Use a craft knife to texture the edges and leaf veins. You might want to apply another sheer layer of metallic paint so that it can seep into the carvings. Spray or paint your leaves with a clear gloss acrylic sealer.
Attach a small jump ring to each leaf and attach to a bracelet “end clasp” (the kind shaped like a ring). String onto your necklace! Now you can make earrings or a charm bracelet to match!
love this! I am going to try this sometime! you are so creative!
ReplyDeleteThose are so cute!!! thanks for the tut :)
ReplyDeleteVery pretty and oh so clever!!! Thanks for sharing :)
ReplyDeleteLove this! Thanks for the tutorial : )
ReplyDeleteThis is absolutley beautiful! I wish this was a giveaway!
ReplyDeleteWow, this is beautiful, I love your leaves!
ReplyDeleteGorgeous! I voted for this project.
ReplyDeleteI LOVED this little necklace. Thanks for the tutorial! Makes me feel like a kid again. I want to go play right now...
ReplyDeletewow! where in the world do you find this shrinky dink?
ReplyDeleteAs usual, you're brilliant. I see tons of possibilities in these.
ReplyDeleteWhat a great idea!!! The necklace turned out beautifully!
ReplyDeleteI'm glad I voted for it! :) Thank you so much for sharing! :)
ReplyDeleteI voted for this one!!! Love it :)
ReplyDeleteOMG Ashley your oven is TOO clean!!!!! ;)
ReplyDeleteI loooove this tute! Thank you. You're brilliant!
You have the cutest blog. I have learned so much and I haven't been following long. You are so creative. Thank you for teaching me something new! Again!
ReplyDeleteSizzle@keepthejuicesflowing.blogspot.com
Thanks so much for this tutorial. I have a friend who makes shrinky dink jewelry and I am fascinated with the whole process. I may have to drag out all my stuff and give THIS one a try. Have a wonderful holiday season. Blessings!
ReplyDeletevery cute and creative!
ReplyDeleteVery creative, this is beautiful.
ReplyDeleteI love this idea! I just "rediscovered" Shrinky Dinks and have been making so many things with them!!
ReplyDeleteI love this!! Very creative! I wanted to tell you I just read that the plastic containers that the cookies come in from the bakery is the same material that the Shrinky Dink stuff is made of. http://karascreativeplace.blogspot.com/2010/12/recycle-diy-shrinky-dink.html
ReplyDelete