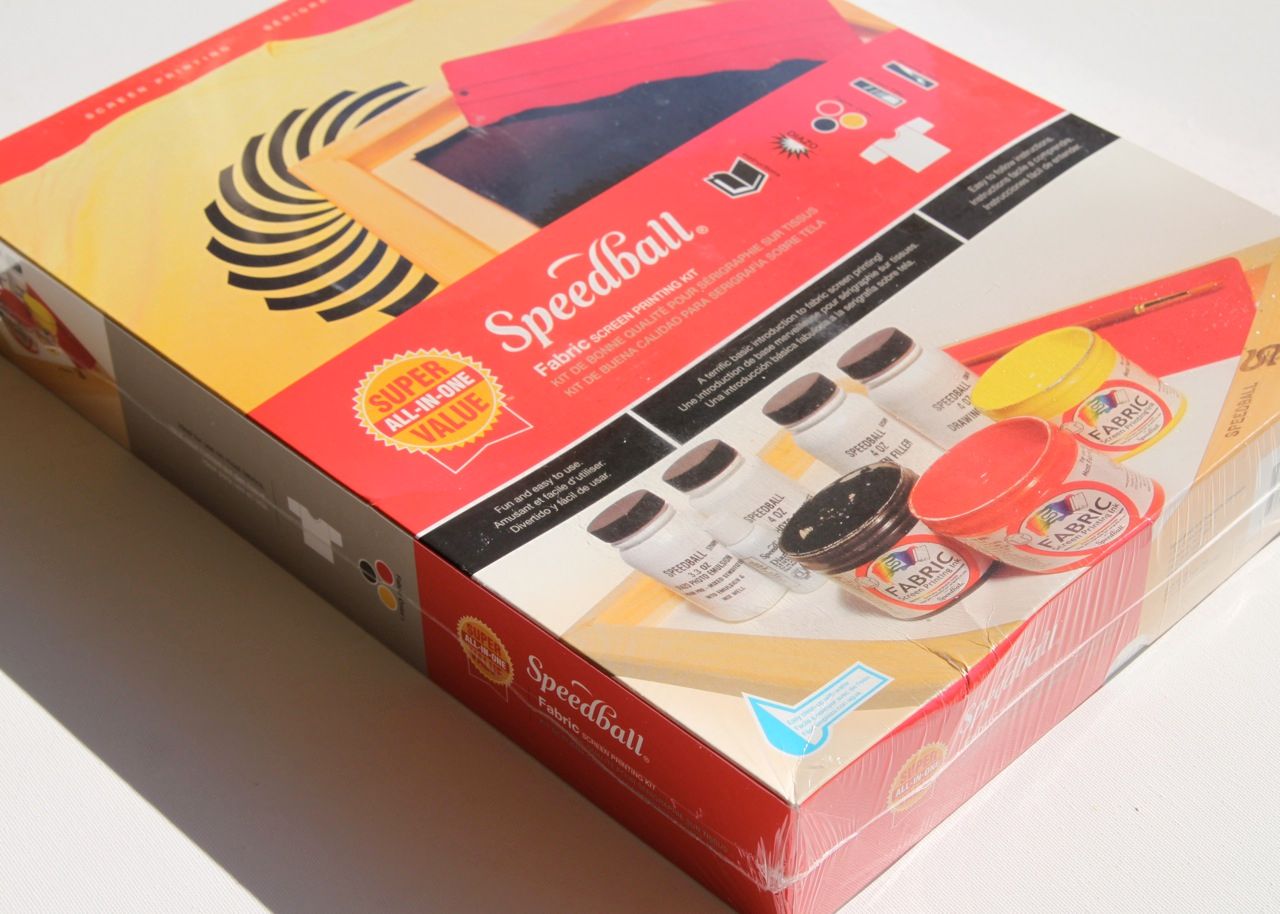
I used this Speedball Screenprinting kit from Dharma Trading which included almost everything I needed. There are several methods included in the kit: screen filler method, drawing fluid method, and photo emulsion.
The photo emulsion method usually scares people off but it produces the most amazing results because you can do such detailed images (thin lines, small text, etc.). I've tried to break it down here into the most basic of steps and without the fancy lingo:
Just a quick simple explanation of how the the photo emulsion process works: Basically I think of it as film. You use light to expose an image onto the screen to make a stencil. The photo emulsion hardens where light hits it and will wash away where light doesn't hit it (leaving an image behind). Note: I use natural sunlight for my light source. It is best to wait until the sun is high in the sky (i.e. around noon).
The only other materials you'll need (besides the kit) are:
:: A piece of glass the size of your screen (I bought an 11" x 14" frame glass from the craft store)
:: 4 pushpins
:: A piece of black fabric
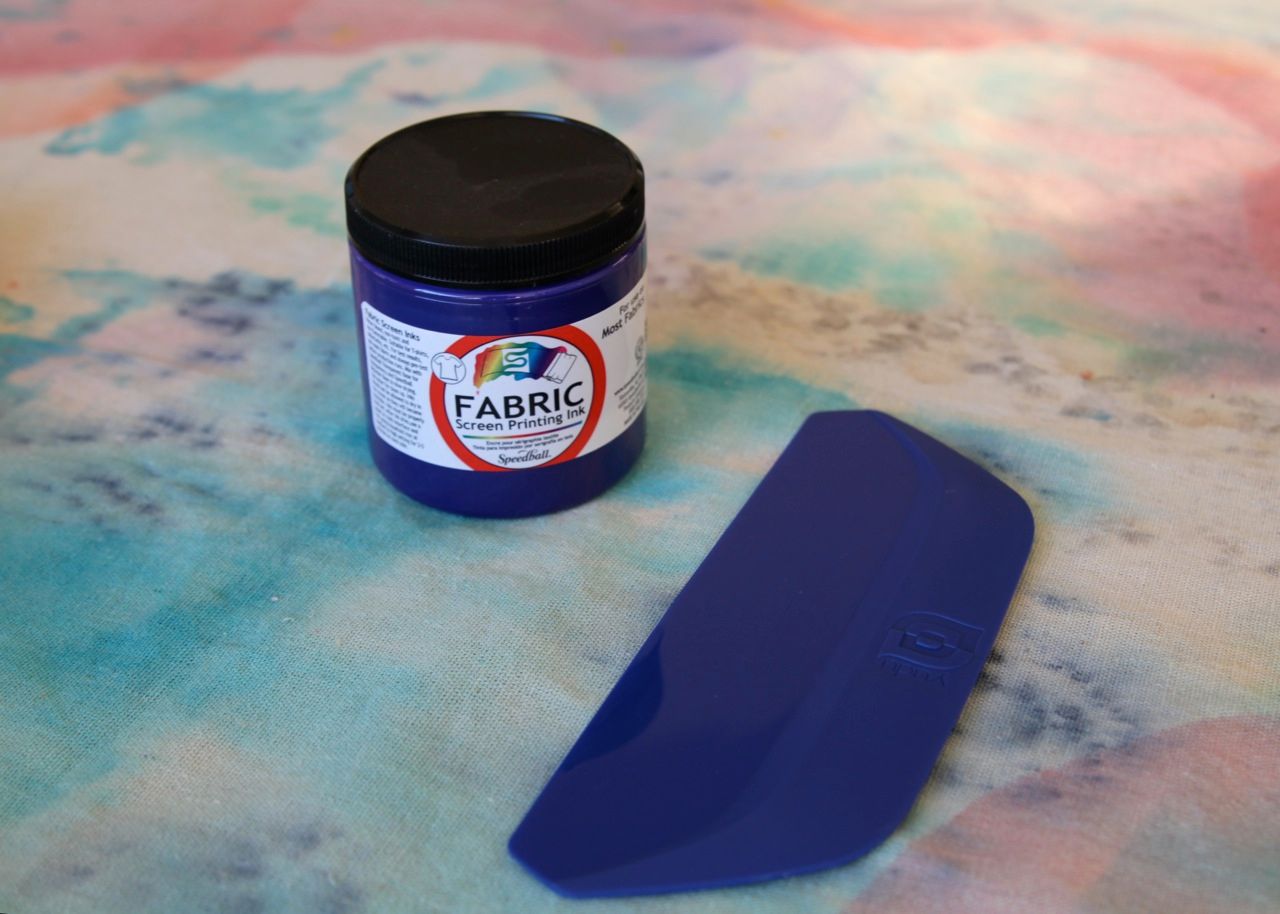
:: Screenprinting ink (if you want colors other than the ones included in the kit)
:: A sturdy board or piece of cardboard/foamboard
Step 1: Creating an Image
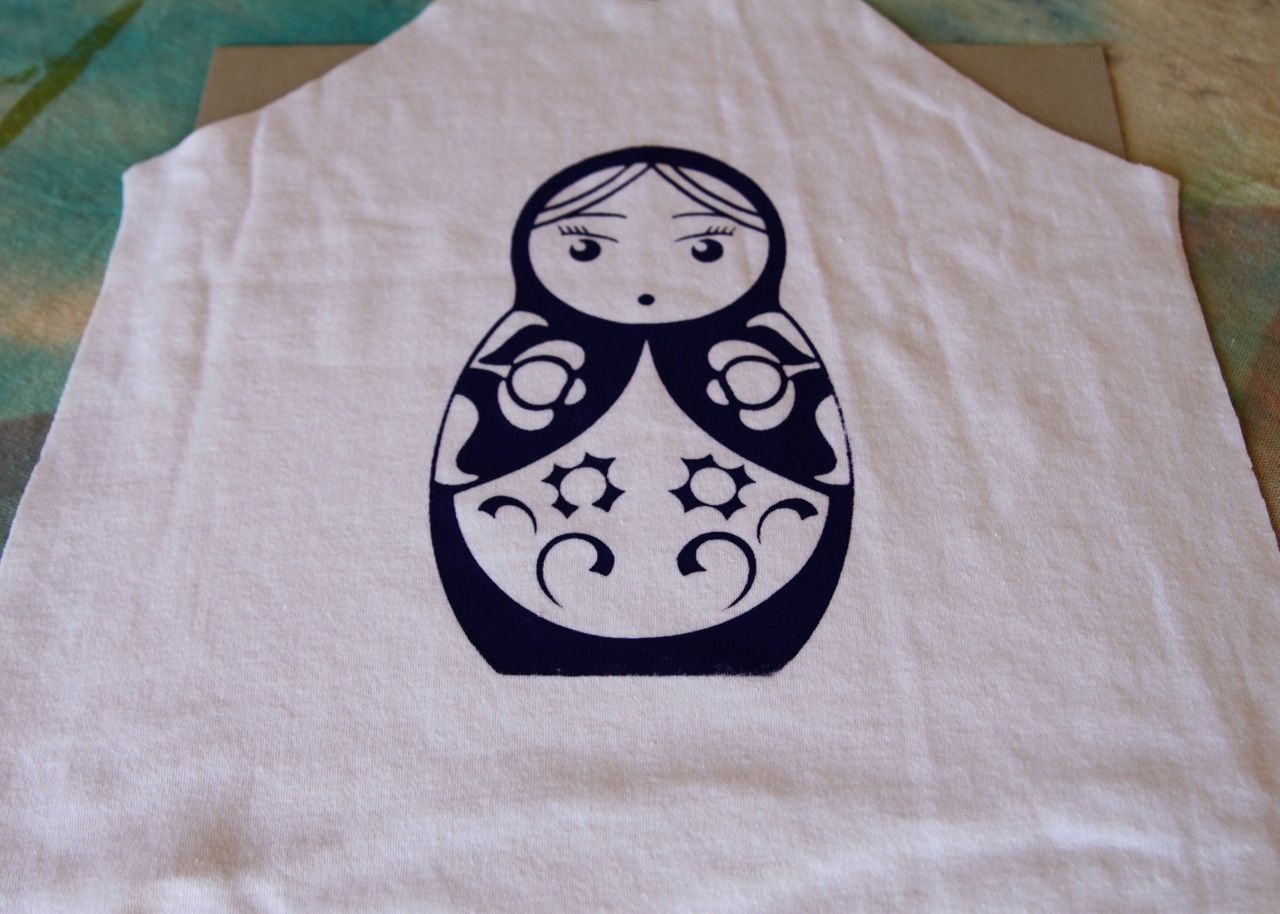
I designed my little Matryoshka doll in Powerpoint of all things (I don't have a graphics program) using basic shapes and dingbat fonts....just overlapping white and black shapes. I've included a few images at the bottom of the post and I'll be designing a few more just for you over the next few weeks.
Step 2: Printing A Transparency
Print 2-3 copies of your image to a transparency. I don't have the best printer so I save my image to a disk and take it to Kinko's and have them print the transparency for me.....the transparencies run about 75 cents a piece.....they are also much crisper printed from a commercial laser printer! Stack each of the transparencies on top of each other to create a complete "blackout" of the image....I use a little tape on the corners to keep them together.

Step 3: Mixing the Photo Emulsion
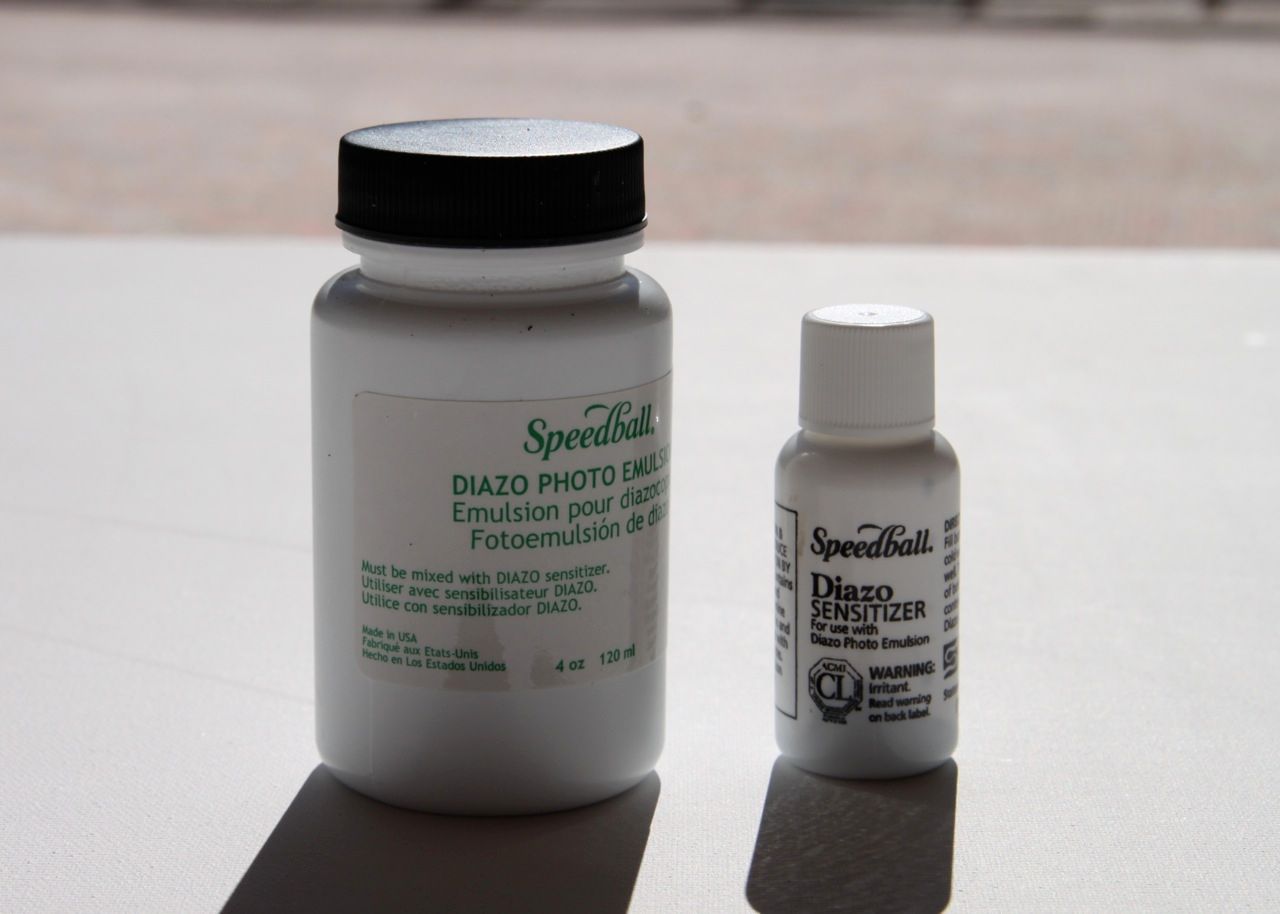
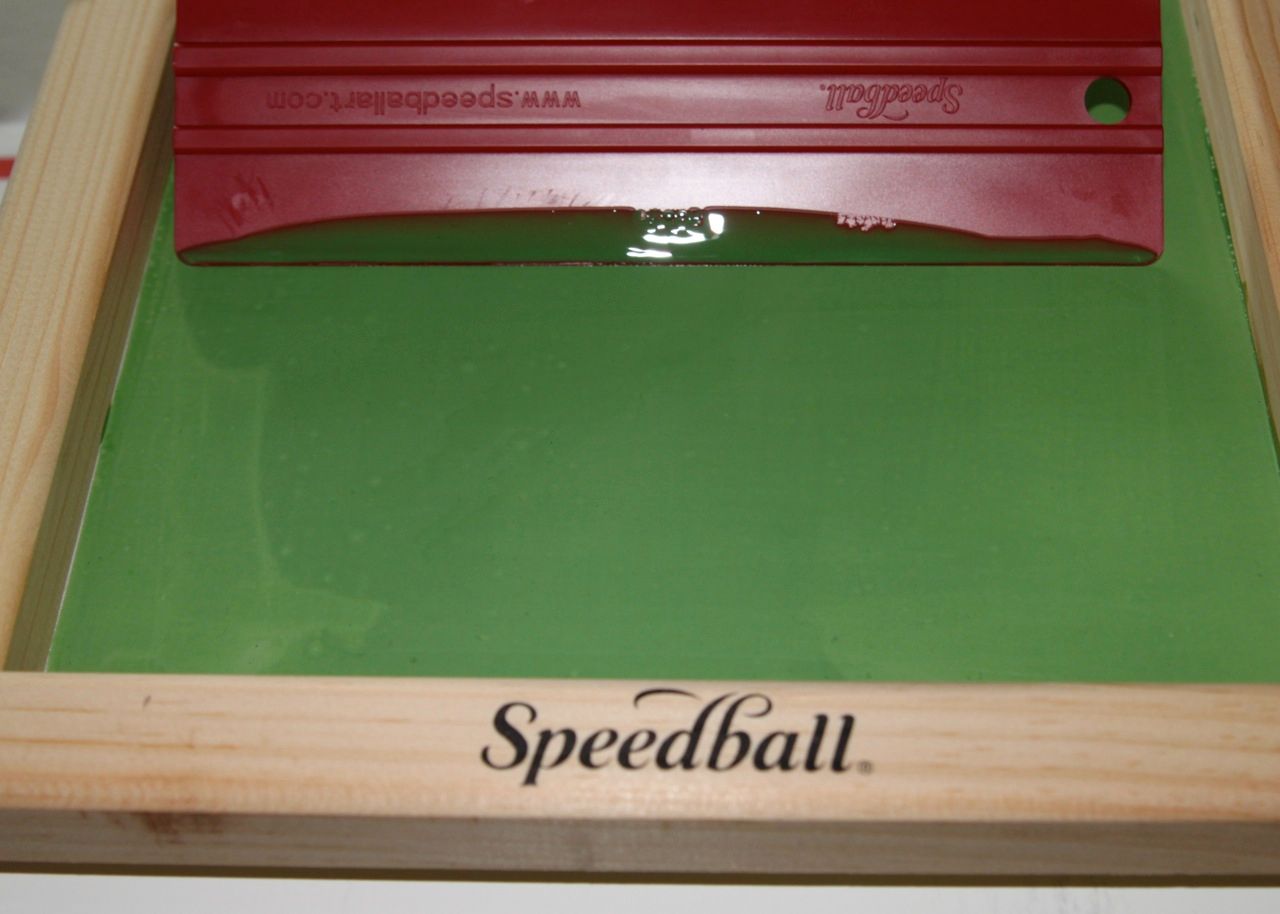
The kit has a large bottle of photo emulsion and a small bottle of sensitizer. Follow the directions but basically you add water to the sensitizer and mix it up. This process is a little tedious because the residue in the bottle is coagulated at the bottom....I used a small clean paint brush to mix it so I could "swish" the residue off the bottom.
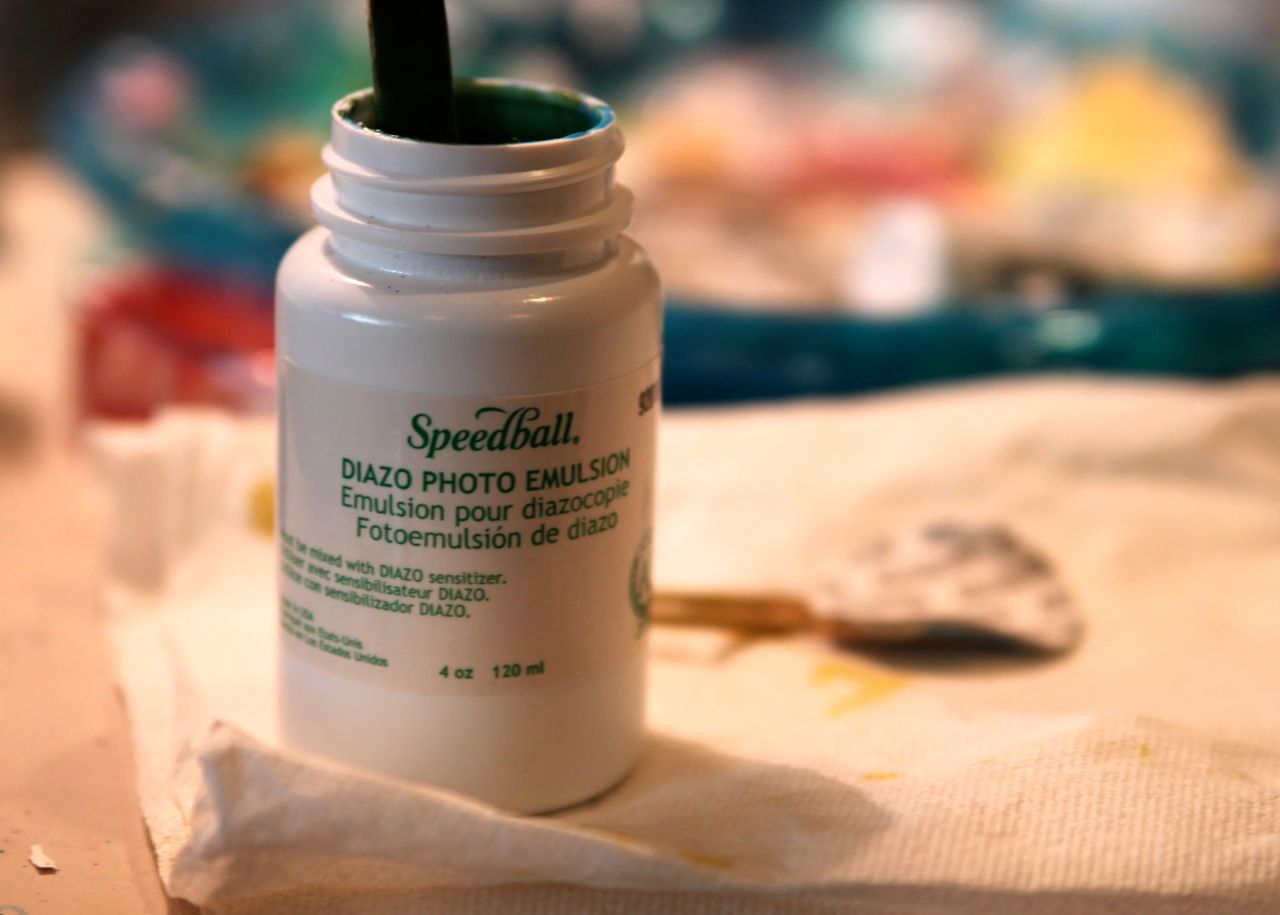
Mix the sensitizer (black liquid) into the photo emulsion bottle (bluish liquid) until the mixed liquid becomes a slime green color:
Step 4: Prepare the Screen
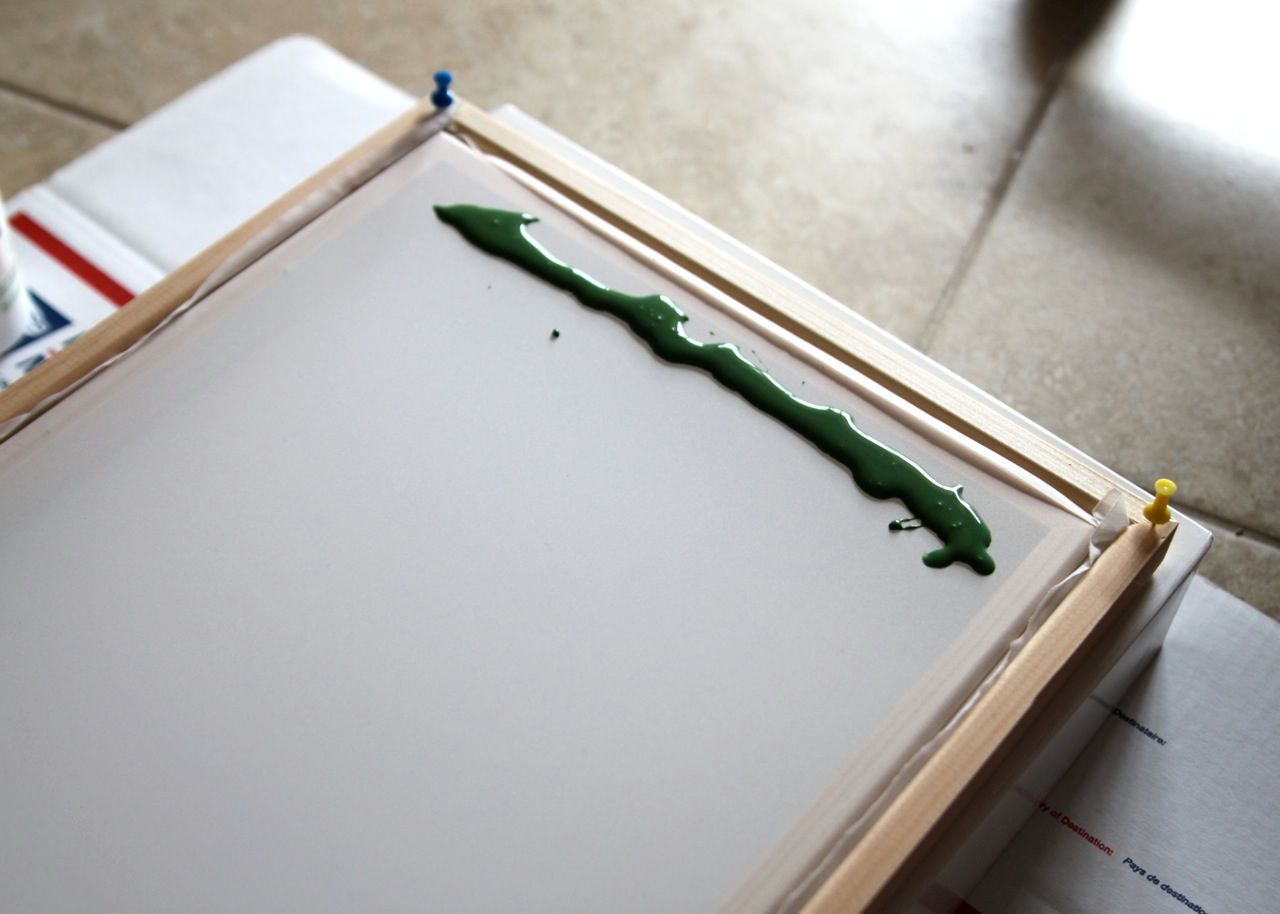
The bottom of your screen is the non-recessed part (i.e. the screen is flush with the bottom of the frame). Turn your screen so the bottom part is facing up and insert a pushpin into each corner. This will help with the next step of spreading the emulsion (and provide little "legs" for your screen to sit on while it dries).

Step 5: Applying Photo Emulsion to the Screen
You will want to do this step in a fairly dim room since the photo emulsion reacts to light. Spread a small amount of the photo emulsion on one side of the screen bottom......
.....and use the squeegee from your kit to spread a thin layer of the emulsion across the screen. Flip the screen over and repeat on the other side.....

....and keep spreading and flipping until you have a thin even layer across the entire screen.
Place your finished screen right side up (the pushpins will serve as little legs) in a cool dark place for a few hours or overnight to let it dry. I carefully placed mine back in the original box bottom to protect it.
Step 5: Preparing the Screen for Exposure
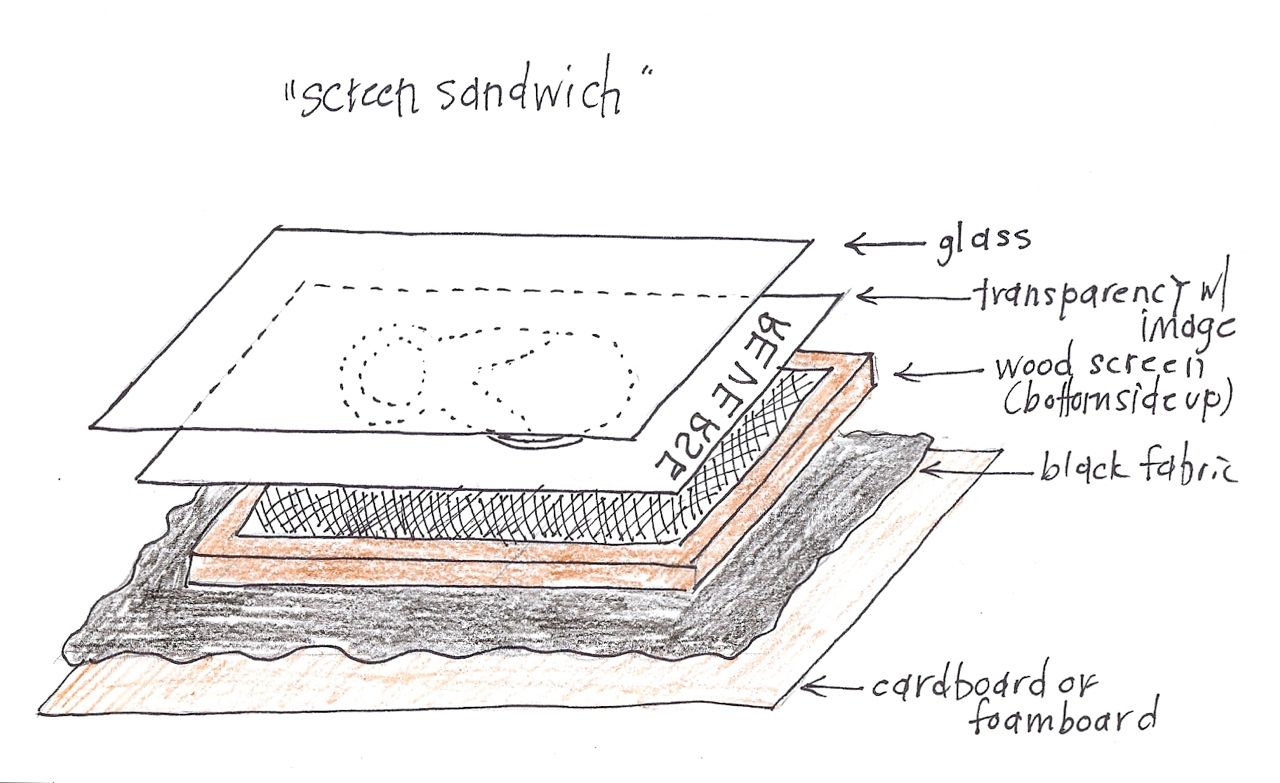
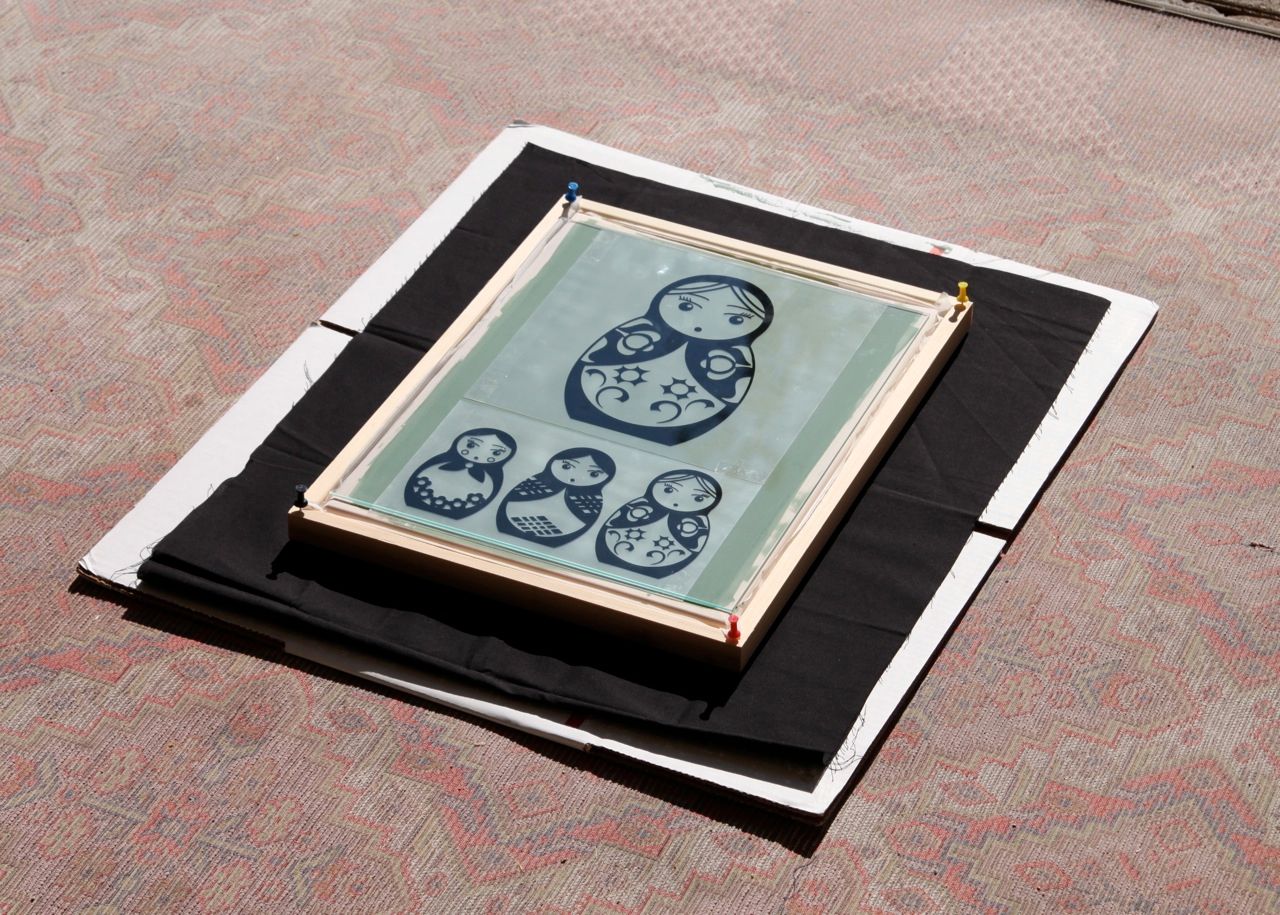
Once your screen is dry you are ready for the "exposure" part. As soon as you are ready to go (with no distractions), take your screen out of its cool dark place (but still in a dim area) and remove the pushpins. Assemble what I call the "screen sandwich" which is a sturdy piece of cardboard (so you can carry the screen into the sun easily), followed by a piece of black fabric to reduce reflection, the prepared wood screen (bottom side up), the transparencies (face down), and finally a piece of glass to hold your image in place against the screen.
Step 6: Exposing the Screen
Note: I use natural sunlight for my light source. It is best to wait until the sun is high in the sky (i.e. around noon) so the light is direct. See the bottom of the post for links using artificial light.
Cover your "screen sandwich" with a piece of cardboard or paper and carefully carry it outside into the direct sunlight. This is the tricky part because if you expose the screen for too long it will burn the image into place and it won't wash away.....and if you don't expose it long enough areas of the image might wash away. Here is how I gauge the exposure: the emulsion is a slime green color and as it exposes it begins to turn to a dark gray/green. Once you see it darken considerably it has been exposed....it should only take 2-3 minutes depending on how strong the sun it. If it is overcast it may take a few more minutes.
Carry the "screen sandwich" back inside quickly and remove the glass and transparency and take the screen directly to the sink. Your image should still be a slime green color and the rest of the screen will be the dark gray/green.
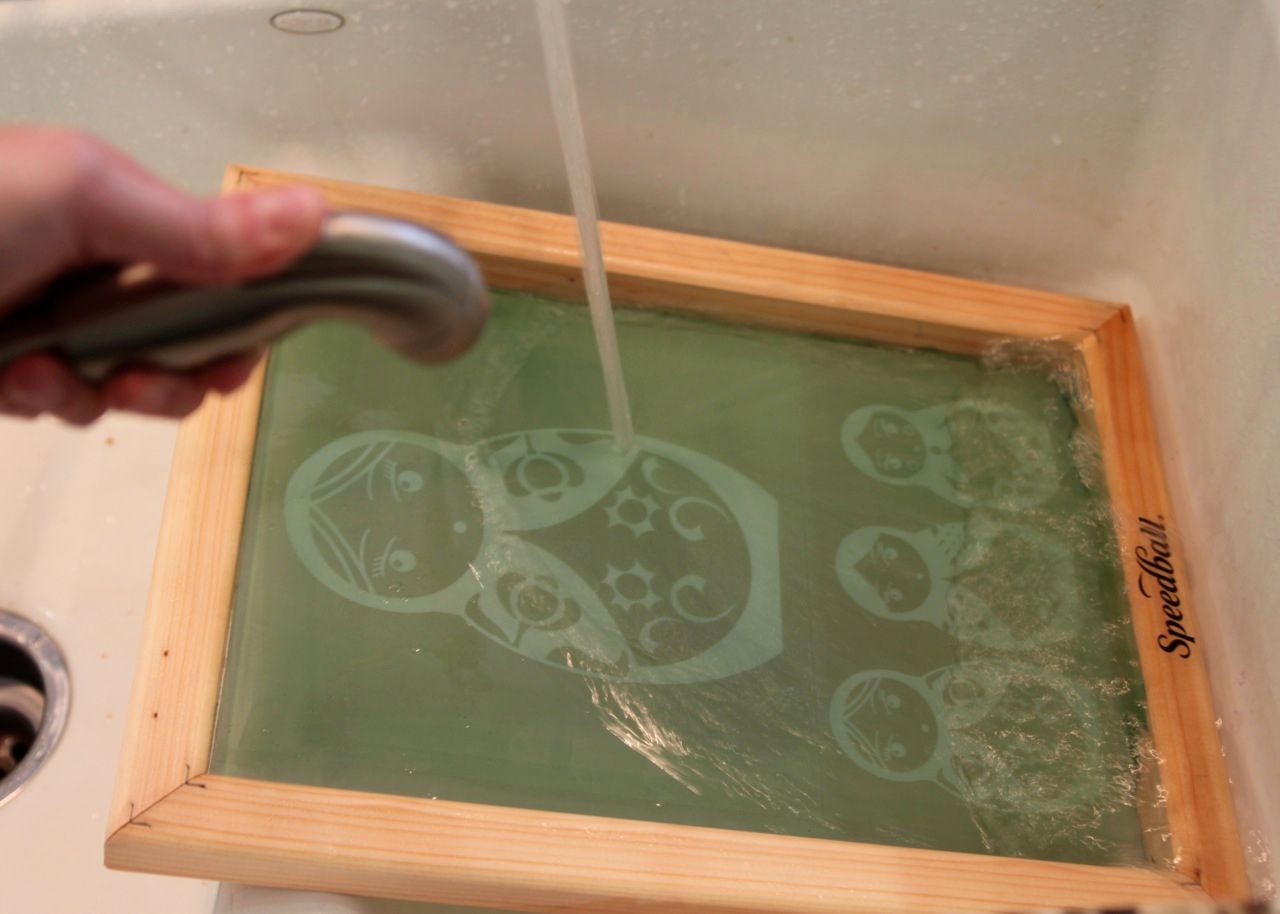
Step 7: Washing the Screen
Using a sprayer or hose apply a forceful stream of water to the screen. After a few minutes the screen will start to open up and the image areas will start washing away leaving your "stencil." If the areas do not wash away you may have overexposed the screen....and you will need to use the "emulsion remover" from the kit to clean the screen and start the process over......exposing it for much less time.
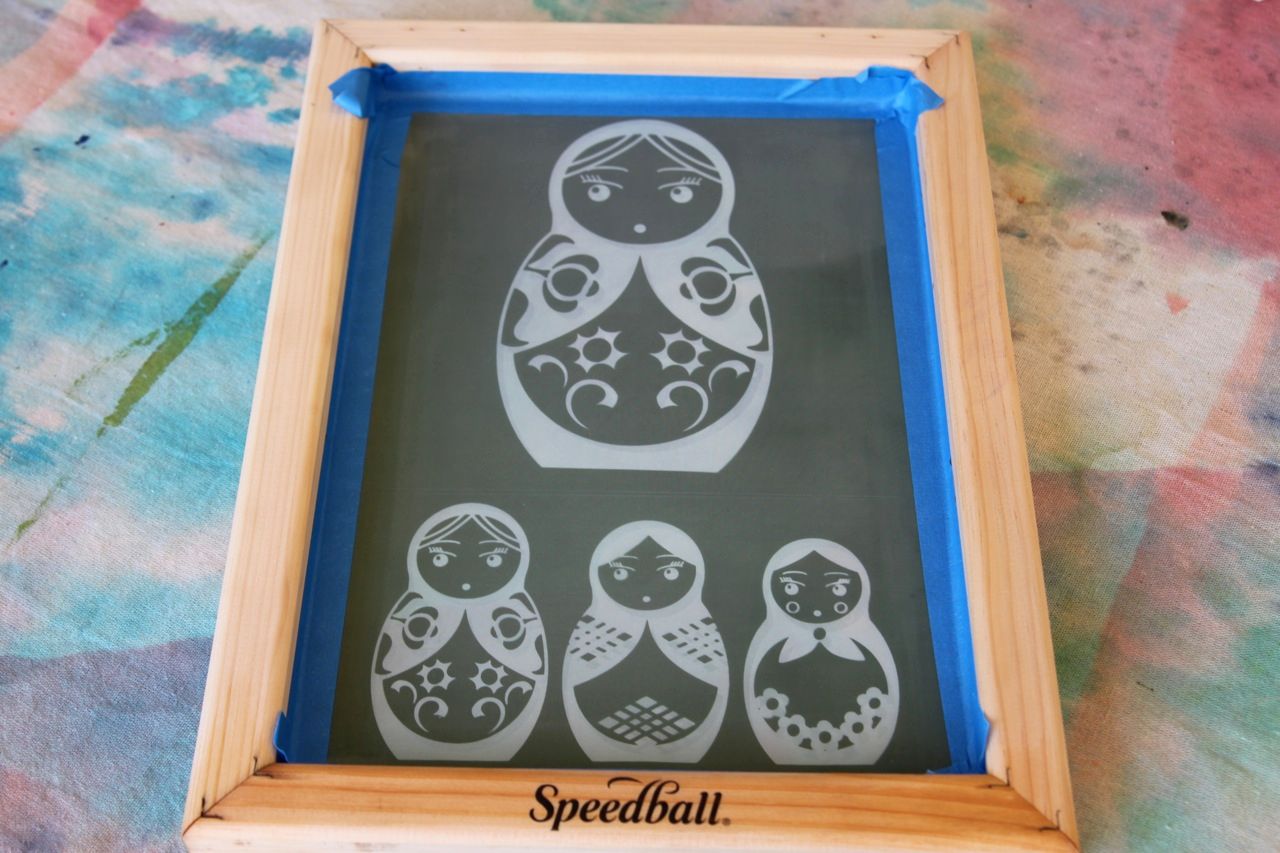
Step 8: Printing
Hold your dry screen up to the light to see if there are any holes......and use the screen filler included in your kit to touch them up. Use painting tape to cover all the inside edges of your screen to prevent any ink from leaking through.
Cover your work area and get your ink and squeegee ready.
Place your screen flat onto the fabric that you are preparing to print (if it is a t-shirt make sure to place a piece of cardboard inside to prevent ink from soaking to the other side). Apply a small glob of ink at the top of side of the image.....
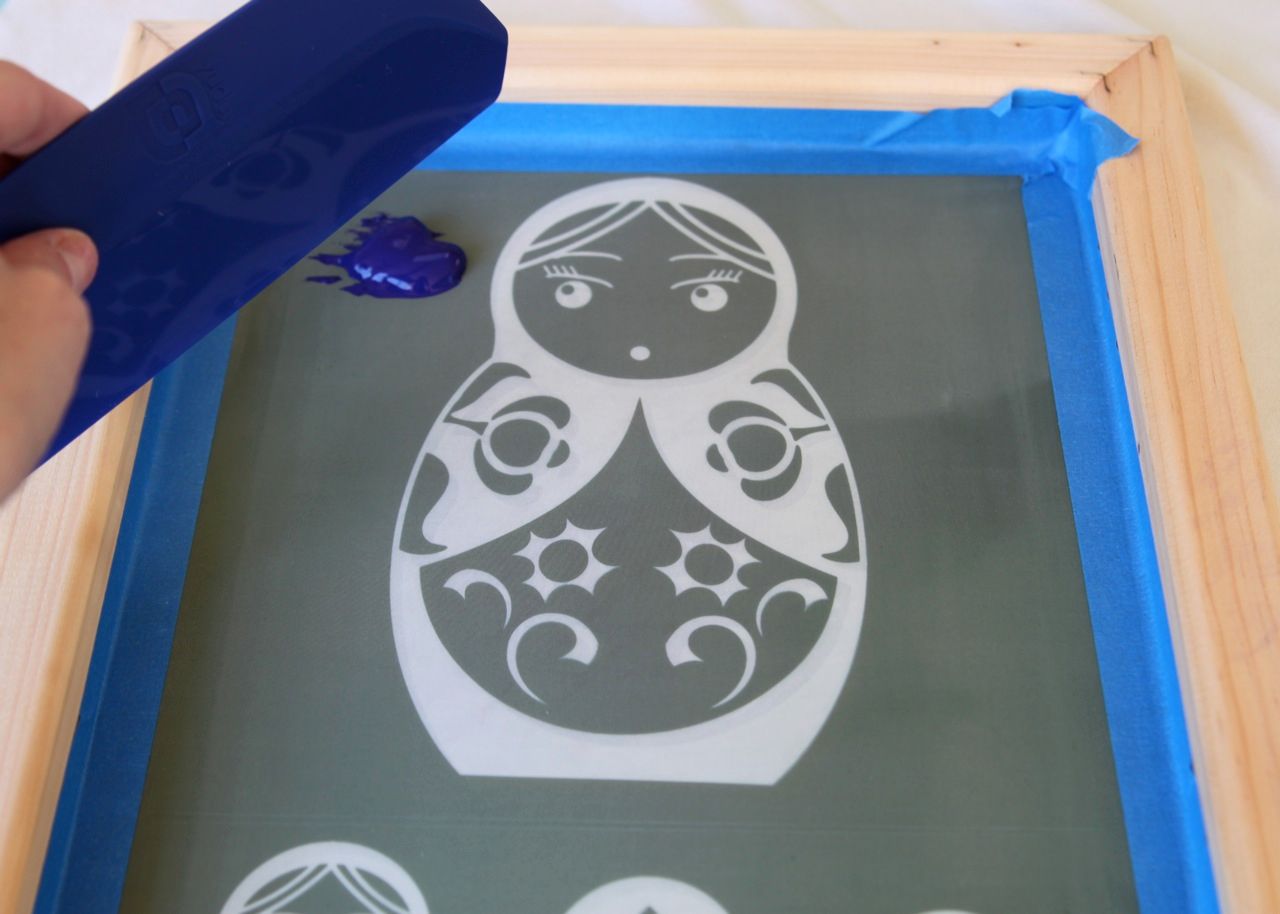
....and pull the ink down the screen with the squeegee. You might have missed some areas so I like to go over it a few times carefully. Do a test run to get the hang of it before printing on your nice t-shirt!

Carefully remove the screen and admire your image!
Step 9: Heat Setting the Ink
Allow the image to dry and then heat set according to your ink directions (usually just ironing on a high setting for several minutes).

Feel free to email me with questions!
Here are some other links you might find useful:
How to use artificial light for exposure (instead of sunlight)
Excerpts from the Kit Manual
Is this the same sort of thing as the Yudu Machine? Which would you recommend?
ReplyDeleteI just thought they would look cuter as hoodies on a twirl dress.....
ReplyDeleteMarilyn, the Yudo machine can do the same thing. I just like the old process and I think it is more economical. Depends on how much you want to spend ;)
ReplyDeleteyour ladies are soooo cute. and i love that you made them in powerpoint-so creative. i love that your crafts are economical and your tutorials are so generous (of both your time and creativity).
ReplyDeletenow if only i had enough patience to try.... : )
(and just ignore the meanies. you are very talented.)
Fabulous tute! I'm so impressed w/your blog. :)
ReplyDeleteYou never fail to amaze me! The last screen print I made was at summer camp more years ago than I care to remember, but I do recall loving it. Can't wait to try this. Thanks!
ReplyDeleteOh my gosh, if I ever get good enough to make cute dolls with POWERPOINT and DINGBATS I'm quitting my day job. Except I dont' think I can quit a mom job ;)
ReplyDeleteYeah, I can't afford a Yudu so this is a great alternative.
Looks great!
Great tute! You make it look so easy! Screenprinting was hands down my most favorite class in college. What a clever lady using powerpoint and dingbats, brilliant!
ReplyDeleteThis is PERFECT TIMING! I just bought that kit at Hobby Lobby and planned to try it this weekend. I barely started reading the instruction manual that came with it but this is MUCH easier to follow -- they should have this blog article printed and put in the kit:) Wish me luck!
ReplyDeleteLove the ideas Ashley!! I so wish I was as talented as you!
ReplyDeleteAs for Sarah...Jealous much?
Keep doing what you're doing! We love your creativity and willingness to share!
ReplyDeleteYay! A few years ago I made some screens with embroidery hoops, and I think elmers glue??? Can't remember now. IT worked pretty good but it was too much a pain. I always wanted to burn but had NO CLUE.
ReplyDeleteI'm so thankful for your tutorial.
I also love Courtney...my friend bought one for her little girl and they are just as cute in person. I think you are both fabulous artists :) Rock on.
Great tutorial! My last screen printing attempts were very cut & paste, where I took an embroidery hoop, stretched a scrap of sheer curtain material over it, and painted in the negative areas of my design with screen filler. The images aren't as crisp, but it was an easy solution to do with students and not much money.
ReplyDeleteLove those dolls too!
L-O-V-E This tutorial! THANK YOU!!
ReplyDeleteThe difference between you, "Sarah", and Courtney, is that you SHARE your great ideas and don't claim them as your own.{Like you invented the process of screen printing}
You are quick to answer ALL of my questions when I don't understand, and I really appreciate it:)
Thank you Ashley, and keep up the awesome work!
BTW Don't forget to block "Sarah"
Thanks for the tutorial. I've been wondering about trying this process but had no idea what it involved!
ReplyDeleteThank you so much for sharing this! I just took a serigraphy class at college, and my professor wasn't able to tell me how I could do this myself at home without a UV table. I'm so excited to try this now since I can't afford a Yudu machine at this time. :)
ReplyDeleteThis comment has been removed by a blog administrator.
ReplyDeleteWow, Michelle! You said it perfectly!
ReplyDeleteWell send me to blogger craft jail too because I've done the tshirt dress refashions as well!
ReplyDeleteKeep it up Ash, you certainly have inspired me & how boring would we all be anyway if we couldn't inspire eachother?
Also kudos to you for leaving the nasty comments up, you could've just deleted them but it shows you have nothing to hide by letting everyone see.
Am LOVING mr & mrs roboto btw, there just aren't enough robot designs for girls. I might have to steal that one for a shirt for me too! Uh oh, there I go again stealing, lock me up!
I have been wanting to try this forever. Thank you for sharing!!!
ReplyDeleteAshley dats a nice tutorial. I've been trying only thing is, I use a 200w bulb n the screens are not opening up after exposure. usually 45-60mins. help please.
ReplyDeletethat is a lovely design, may i know what is the tape you stuck onto the inside of the screen? im guessing it helps you get the paint out when you have done your pull? what is a good tape that does stuck on too tightly? did it work out well for you?
ReplyDeleteGreen printing has become a beneficial as well as a safer alternative when it comes to the growing environmental concerns. It is not very expensive and the recycled paper that is used in printing is also very good quality and durable as well.
ReplyDeletePrinting Company Australia
This is brilliant too...u make it look so easy :)
ReplyDeleteWow, thanks so much for the in depth tutorial! I've never considered screen printing before, but now feel I have the know how. I REALLY want to make my own damask curtains! One question before I invest in a screen print kit though...When you heat set the ink, do you put something between the image and the iron? Is there a chance the ink will transfer to your iron? Should I have an iron just for screen printing?
ReplyDeleteThanks!
KittenJen
You are SO talented. I can't believe you made that on Powerpoint ~ incredible!!
ReplyDeleteHi! I hope you don't mind, but I gave a huge shout out to your blog over at my blog http://www.kreativeknack.com/
ReplyDeleteThanks again for the great tutorials!
Nikki
I found that kit at michaels on clearance for $5 I was tempted to buy all that were there lol
ReplyDeleteNice information, I really appreciate the way you presented.
ReplyDeleteThanks so much for this tutorial (which I realize is a year old but I just discovered it) I have TWO of these kits that I've opened and looked at and never used. I must admit that reading the directions and other tutorials online scared the living day-light out of me, which is why I never attempted it. You've made it so clear and un-frightening to me that I can't wait to get home and give it a try.
ReplyDeleteMy question for you however is, after successfully making the screen and using it, is there a way to remove the hardened emulsion and reuse the screen for a new project (one time use only?) or will I have to purchase a brand new screen each time i have a new design idea?
This definitely is the best type of tutorial I've seen. Thank you so much you saved me so much time and money.
ReplyDeleteMore power to you.
I am so glad I came across this! I used the drawing fluid method and my design wasn't as sharp as I would have liked it. The photo emulsion technique sounded complicated but it's good to know I can do it without a lot of specialized equipment. I will be trying this soon. Thanks for sharing!
ReplyDeleteOk, I realize this tute is not new, but I just found it and I'm wondering if the screen is reuseable...like, can you remove THAT image to burn another image onto it? I guess a better way to ask is to say, "What do you do if you decide tomorrow you want to screen print a truck, instead of a doll?"
ReplyDelete@Beth, it should wash out with your screen cleaner :)
ReplyDeleteI'm doing this for the very first time today to make shirts for my little fella's birthday bash at Medieval Times Sat night. So far so good! Thank you for giving such a clear and easy to understand tutorial about this, I was lost when I tried to use the directions!
Thanks for the excellent tutorial.
ReplyDeleteMarsha
I have no idea what I was searching for and I found this tutorial. It's so easy to follow, congratulations!! All your tutorials are lovely!!
ReplyDelete