
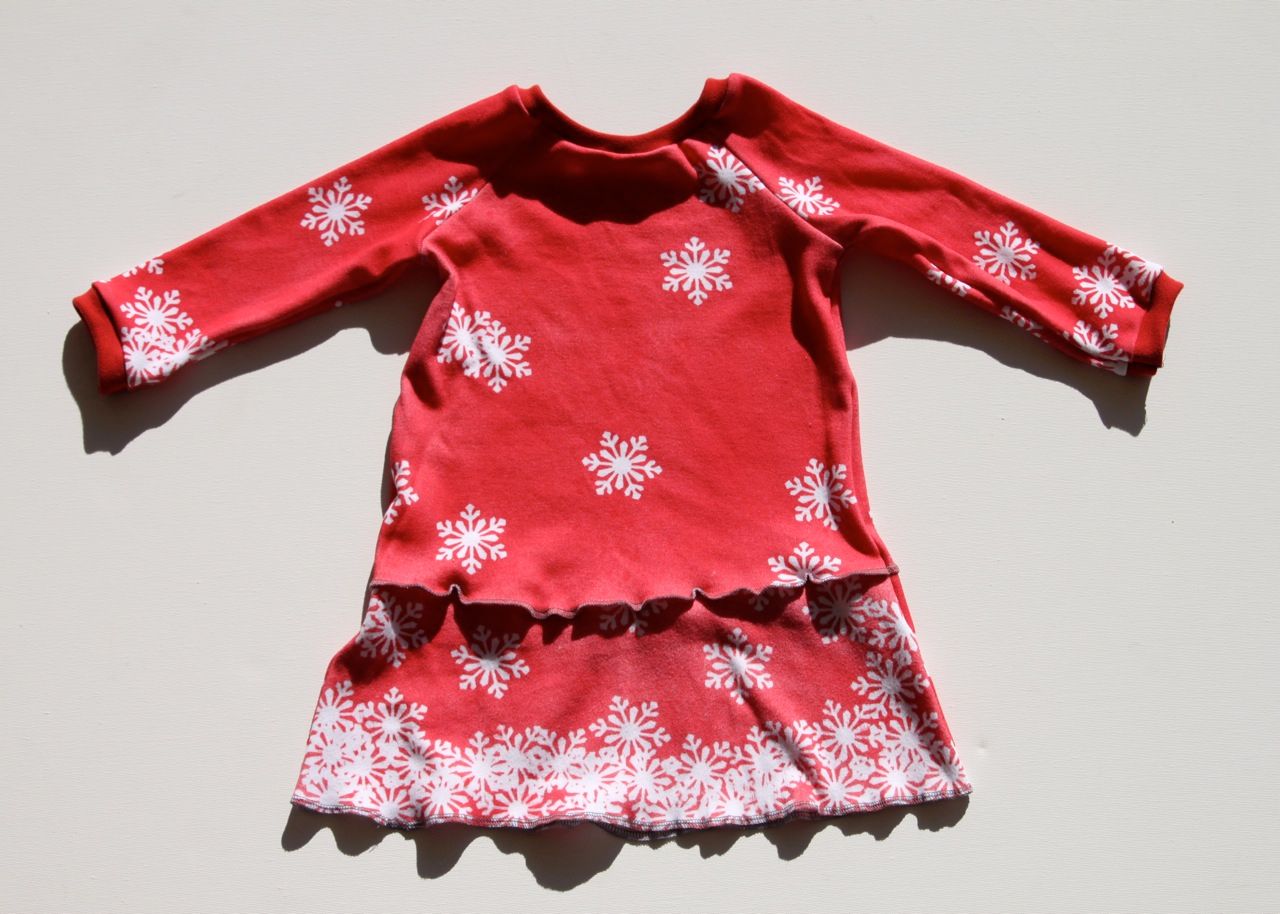
This was runner up for my submission for this coming week's snow theme over at SYTYC. I made two "crafts" but this was the one that didn't quite make the Lil Blue Boo cut so here it is! You can use this technique to make any print you like....I just chose snowflakes because of the holiday season! Use it on t-shirts or pants too! A very simple reverse freezer paper stencil technique:
Materials needed:
Solid color fabric (white or another light color works best)
Dyn-A-Flow Silk Paint* (I only needed a 2.25 oz jar)
Spray bottle
Freezer paper
Scrapbook Punch
*Not typically available at your local craft supply store....I got mine from Dharma Trading.
Step 1: Cut out the pieces of your clothing pattern.

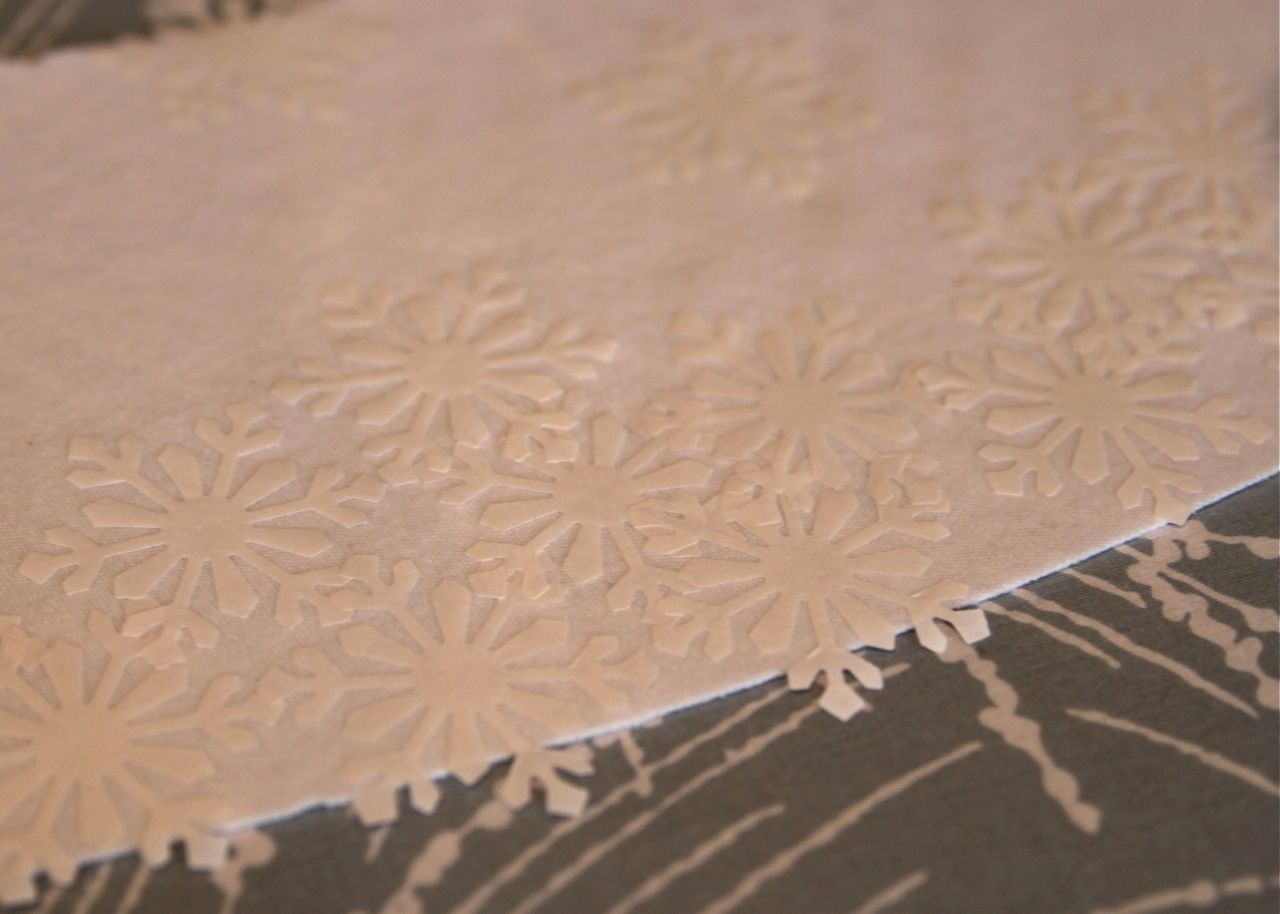
Step 2: Cut your shapes from freezer paper using a scrapbook punch.

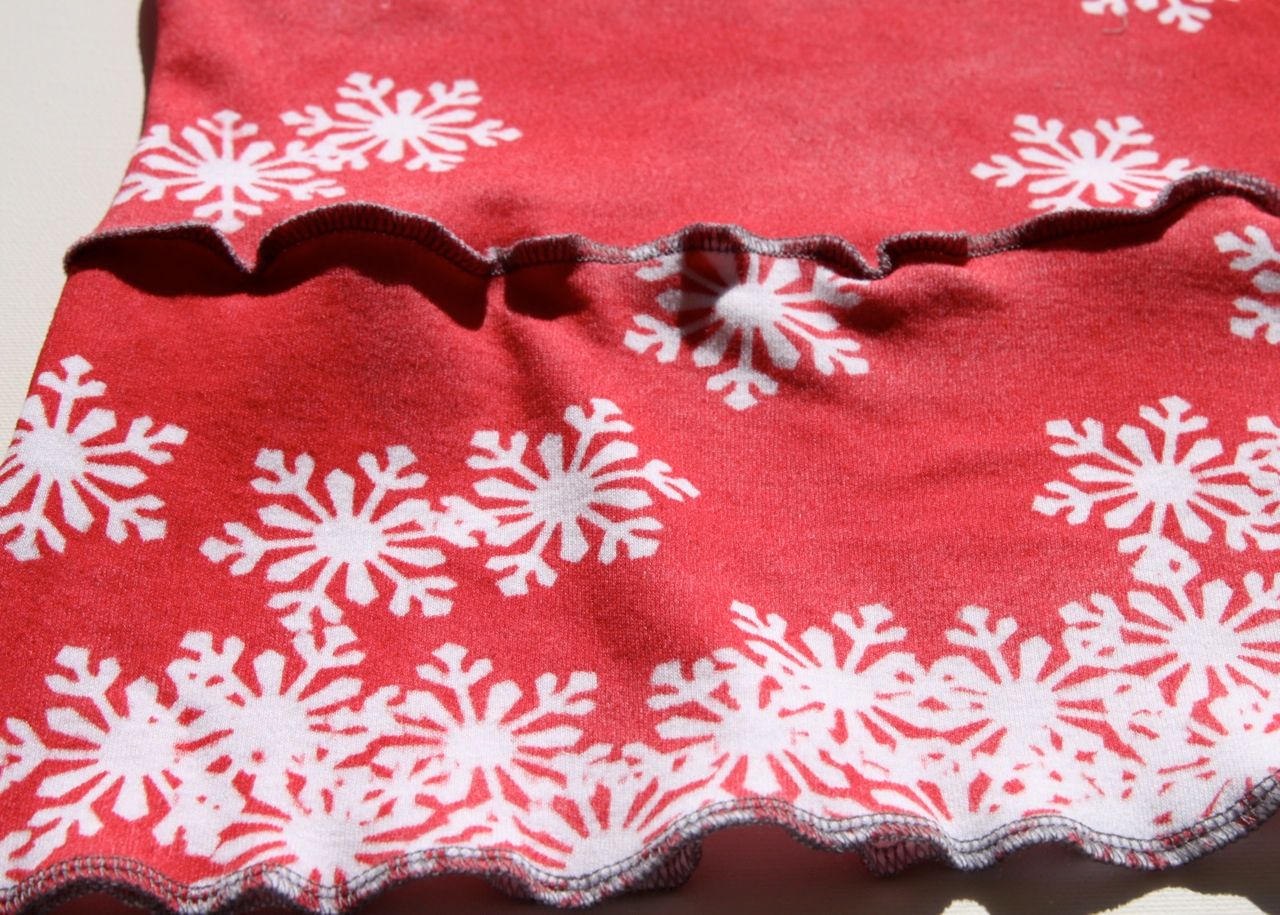
Step 3: Starting at the bottom of your pattern pieces start to iron on each shape (or snowflake in this example). I overlapped the pieces to resemble accumulating snow at the bottom.
Step 4: Mix your Dyn-A-Flow Silk Paint into a spray bottle: 1 part water to 1 part paint. I did the entire dress with one small jar of paint. This paint is really thin but strong (resembles a dye)....which leaves your fabric really soft unlike other paints.

Step 4: Lay out your fabric on a protective covering and lightly spray the entire surface. Do not spray too much or the dye will seep under the freezer paper shapes.
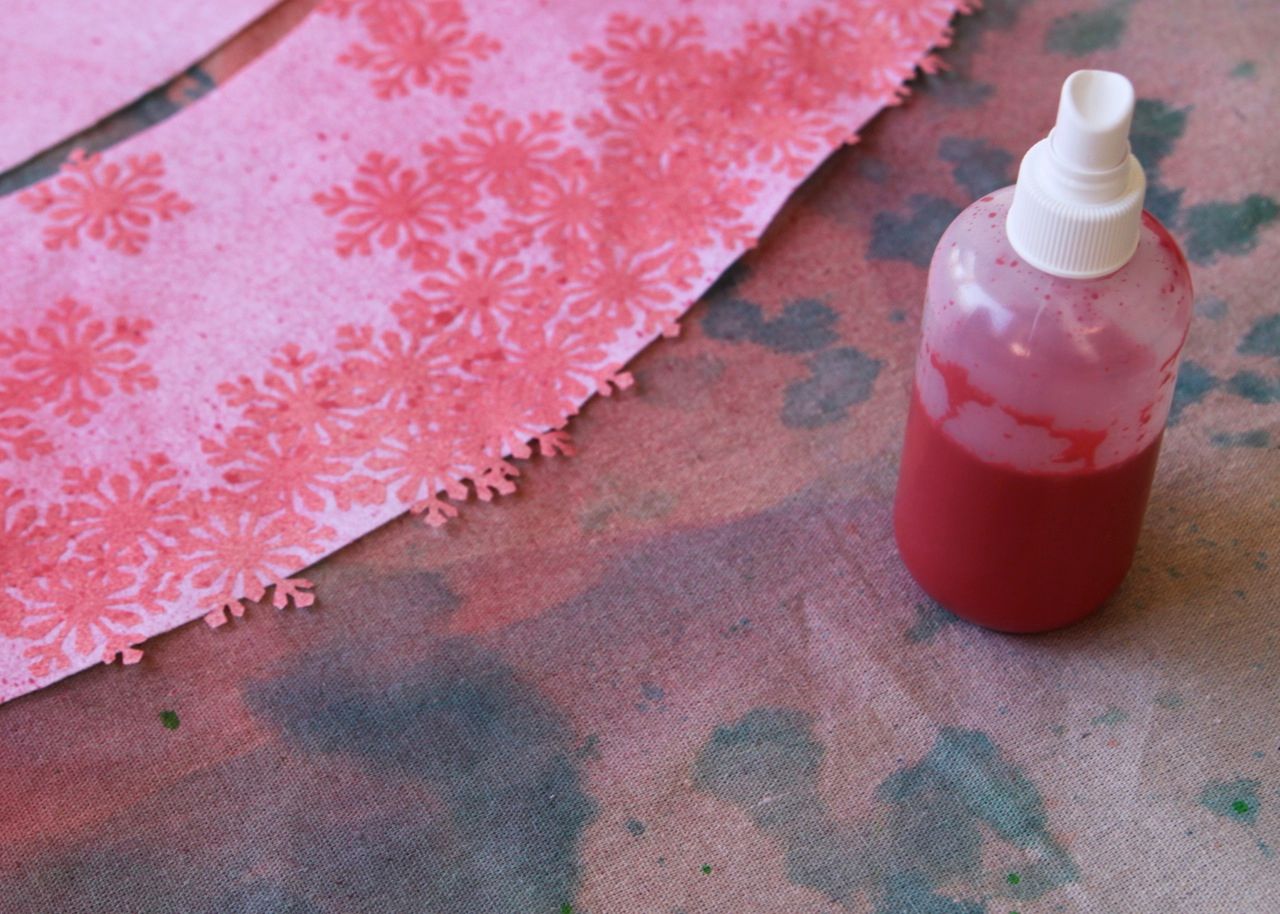
Step 5: As each layer dries, spray another layer......continue until you reach the desired color and coverage.

Step 6: Press each pattern piece with a hot iron to set the dye. You can wash your pieces before sewing if you prefer.
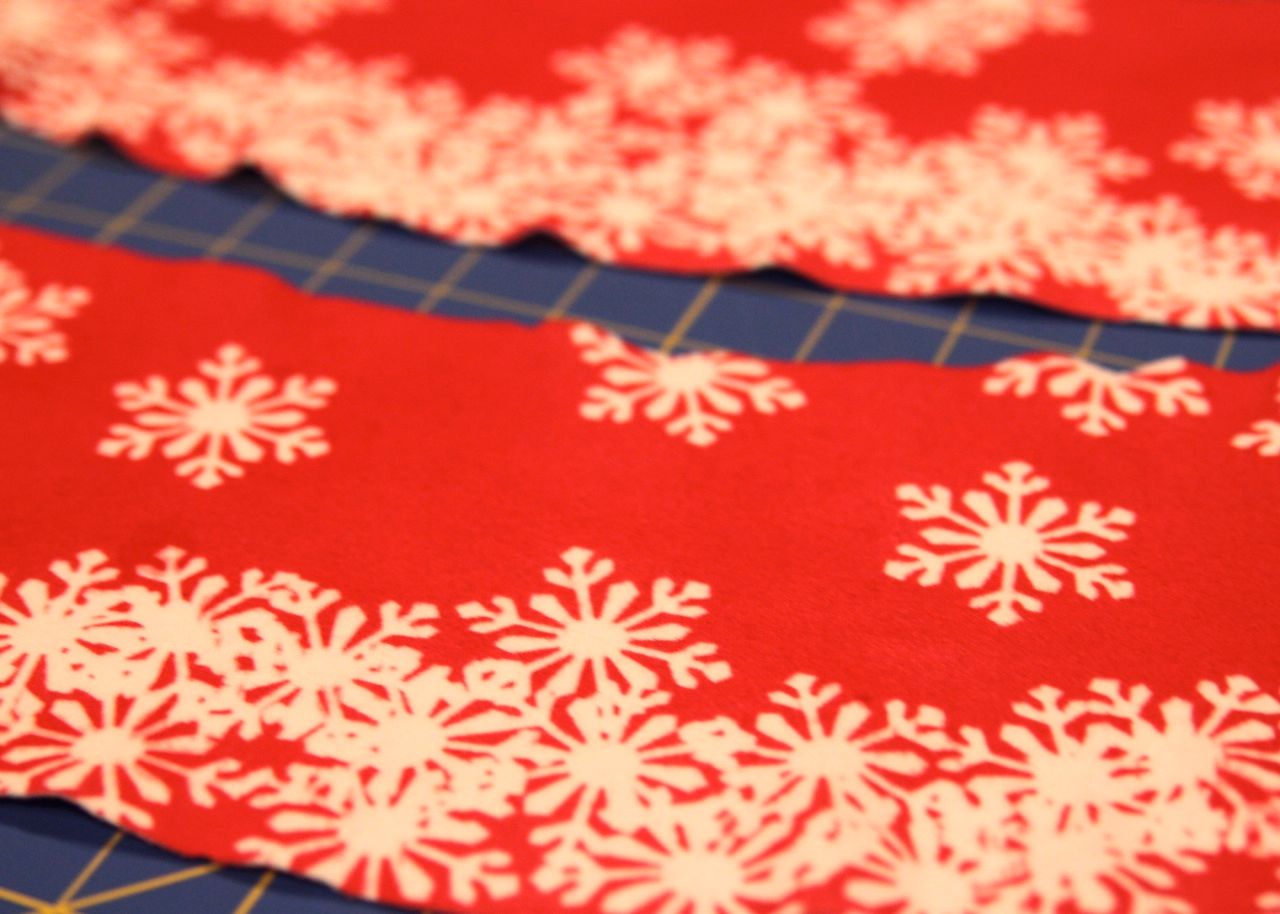
Finished! Boring old white fabric made into a vibrant custom print! Click here to see other projects and tutorials with freezer paper stenciling.
Love the simplicity! I will have to try it!Thanks for this tutorial and for many others!
ReplyDeleteI love this dress!!! Thanks for the tutorial! I love how you always introduce me to techniques I've never tried!
ReplyDeleteThis is beautiful! I read the previous post comments. Sorry your getting harassed. I went to that other person's website. While her designs are beautiful her blog is nothing like yours. Her blog is like an ad for clothes. Your blog and business is much more than that. You have many talents and you love to teach others and help others become more artistic. I respect that!
ReplyDeleteoh my gosh...........That is a gorgeous little dress for the snow lover in me. Ive gota make this one. Thanks for another great tutorial.
ReplyDeleteDarling! I will have to try out on the g kids-all twelve!
ReplyDeleteSo cute! I just bought your Sienna dress pattern yesterday and can't wait to try it out. I have officially stolen all of my hubby T-shirts (shhhh... don't tell)
ReplyDeleteThat's so cute. Love the dress.
ReplyDeleteWhat a great idea. You are so very talented. thanks for sharing!
ReplyDeleteIt looks so cool! Your entry must be amazing if this one didnt make it! Good luck to you:)
ReplyDeleteOh now I'm excited to see what you made for this week!
ReplyDeleteHey thanks for getting me lost for an hour on AngelaJohnsondesigns.com
Holy Crap. Awesomeness.
I love this idea! I might have to try this out.
ReplyDeleteLove it! Beautiful design and the reverse freezer paper stenciling is such a good idea!
ReplyDeleteAshley, You did it agian!!
ReplyDeleteThAnK yOu for sharing:)
I don't know if I can, but I will speak for EVERYONE who reads your blog that we really really APPRECIATE you sharing your talents and time with us!!!!
Thanks again,
Chacoy
Ma21cuteboy
Beautiful! I am going to have to try this. Thanks for the tute!
ReplyDeleteI love the way your print turned out on this. So striking and dainty all at the same time. It's beautiful! :)
ReplyDeleteThat turned out great! Now...I just need to find a cute snowflake punch like yours!
ReplyDeleteLove it! And if this is your #2, I can't wait to see what you #1 is. You need to win this week!
ReplyDeleteI am in LOVE!!! What a great idea, it turned out so beautiful! Thanks so much, I'll definitely be trying this out soon!
ReplyDeleteSo cute!! Reminds me of sipping hot cocoa by the fire.
ReplyDeleteI linked to your tutorial on Craft Gossip Sewing:
http://sewing.craftgossip.com/tutorial-make-a-snowdrift-dress-with-reverse-stencil-design/2009/12/05/
--Anne
I've bee the WORST blog friend and have been so buys I haven't had time to comment on all the amazing stuff you've doe! I love this idea, I loved the bustle skirt, the screen printing, everything! Anyhow, great job! love it all!
ReplyDeleteWOW! will we ever stop being amazed? How smart to do a REVERSE stencil. I LOVE it!
ReplyDeletevery cute! I really like it! I need to get myself a serger so I can work with knits more...some day.
ReplyDeleteJust beautiful, I love the idea of reverse stencilling and am a huge snowflake fan!
ReplyDeleteI had no idea you painted the entire fabric! I thought you had used red fabric and done white on top. Interesting!!
ReplyDeleteVery cute.
that's just brilliant
ReplyDeleteThis is so cute. I am including a link in my Inspire My Saturday post today.
ReplyDeleteXO*Tricia